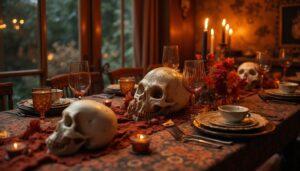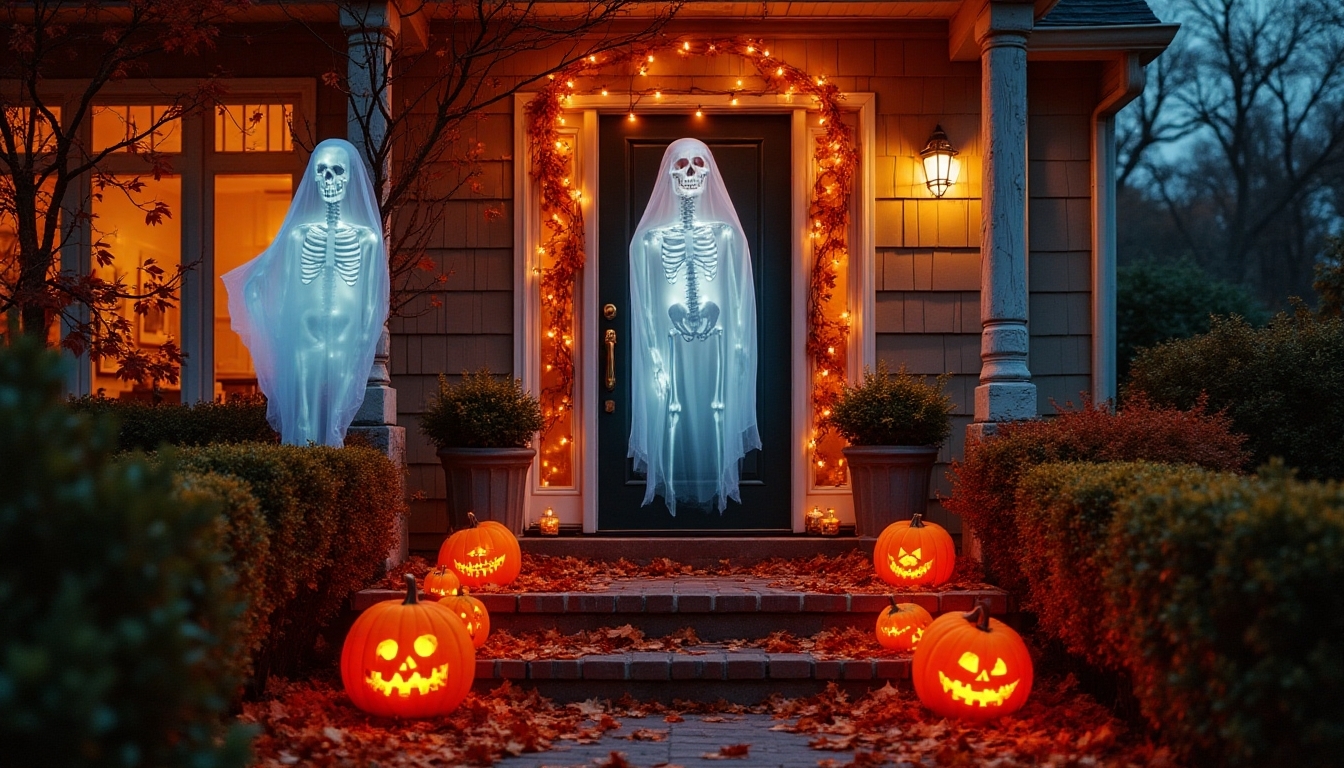
There’s something deeply satisfying about creating your own Halloween decorations. Beyond the money you’ll save, handmade decorations carry a charm and personality that store-bought items simply can’t match. Whether you’re a crafting novice looking for your first simple project or an experienced maker ready to tackle ambitious builds, this comprehensive guide offers more than 40 DIY Halloween decoration projects organized by skill level.
From quick afternoon crafts to weekend-long endeavors, you’ll find projects that fit your timeline, budget, and ability level. Each project includes difficulty ratings, estimated time requirements, and materials lists to help you choose the perfect decorations to create. Let’s transform your home into a handmade Halloween haven that reflects your personal style and creativity.
Getting Started: Essential DIY Supplies and Tools
Before diving into specific projects, let’s talk about building a basic Halloween crafting toolkit that will serve you across multiple projects.
Basic Craft Supplies You’ll Use Again and Again
Your foundation toolkit should include hot glue gun and glue sticks (the crafter’s best friend for Halloween projects), scissors in multiple sizes (fabric scissors, regular scissors, and detail scissors), craft knife and cutting mat for precision cuts, paintbrushes in various sizes, acrylic paints in black, white, orange, and purple, and measuring tape or ruler.
Additional supplies that prove invaluable include wire cutters and floral wire for structure, twine or jute for rustic projects, fishing line for hanging decorations invisibly, and painter’s tape for clean paint lines. Don’t forget basics like pencils for marking, newspapers or drop cloths for protecting surfaces, and containers for organizing small items.
Where to Source Materials on a Budget
Dollar stores offer incredible value for Halloween crafters. You’ll find foam pumpkins and skulls, black and orange craft supplies, battery-operated tea lights, plastic spiders and bats, and seasonal ribbons and fabrics all for a fraction of craft store prices.
Thrift stores and garage sales provide treasure troves of materials. Look for old picture frames to repaint, glass jars and bottles for spooky displays, fabric scraps for no-sew projects, old books for vintage Halloween crafts, and branches and natural materials often available free.
Craft stores become your friend when you shop strategically. Use coupons religiously (many stores offer 40-50% off single items), shop seasonal clearance from the previous year, buy basics in bulk when on sale, and join rewards programs for additional discounts.
Nature provides free materials if you know where to look. Collect fallen branches and twigs for rustic projects, gather pinecones for painting, find interesting stones or pebbles, collect fallen leaves for pressing, and cut ornamental grasses or dried flowers.
Safety Considerations for DIY Projects
Working with hot glue requires care. Always use a heat-resistant surface, keep a bowl of cool water nearby for minor burns, never touch freshly applied glue, unplug the glue gun when finished, and supervise children carefully around hot glue.
Spray paint safety matters both for health and results. Work in well-ventilated areas or outdoors, wear a mask rated for paint fumes, protect surrounding surfaces thoroughly, read and follow all product warnings, and store spray paint properly away from heat sources.
Sharp tools demand respect and attention. Keep craft knives sharp (dull blades are more dangerous), always cut away from your body, use a cutting mat to protect surfaces, store sharp tools safely when not in use, and supervise children closely with any sharp implements.
Beginner Projects: Perfect for First-Time Crafters
These projects require minimal skills, basic supplies, and generally take under two hours to complete. They’re perfect for crafting with kids or if you’re new to DIY decorating. Many of these handmade pieces pair beautifully with purchased decorations—for instance, your DIY garlands can complement store-bought pieces like these “10 Spooktacular Halloween-Themed Garland Decorations to Elevate Decor”.
Paper Bat Garland (15-30 minutes, Difficulty: ★☆☆☆☆)
Create a striking bat garland with just black cardstock, scissors, and string. Cut bat silhouettes using a template (easily found online or drawn freehand), punch small holes in each bat’s wings, thread fishing line or black string through the holes, and space bats evenly along your garland. Hang across doorways, along mantels, or in windows for instant Halloween atmosphere.
This project works beautifully in multiples—create several garlands in an afternoon while watching Halloween movies. Vary bat sizes for visual interest, or use different shades of black and gray cardstock for dimension.
Mason Jar Luminaries (30-45 minutes, Difficulty: ★★☆☆☆)
Transform ordinary mason jars into spooky luminaries perfect for pathways or table centerpieces. Paint jars with orange acrylic paint (or use Mod Podge with tissue paper for a translucent effect), create jack-o-lantern faces with black paint or vinyl, add twine or ribbon around the rim, and place battery-operated tea lights inside.
Alternative approaches include leaving jars clear and adding Halloween scene silhouettes to the outside, filling jars with orange and black candies with a candle on top, or frosting the glass with Epsom salts mixed with Mod Podge for an eerie glow. These luminaries can be used year after year, making them a worthwhile investment of your crafting time.
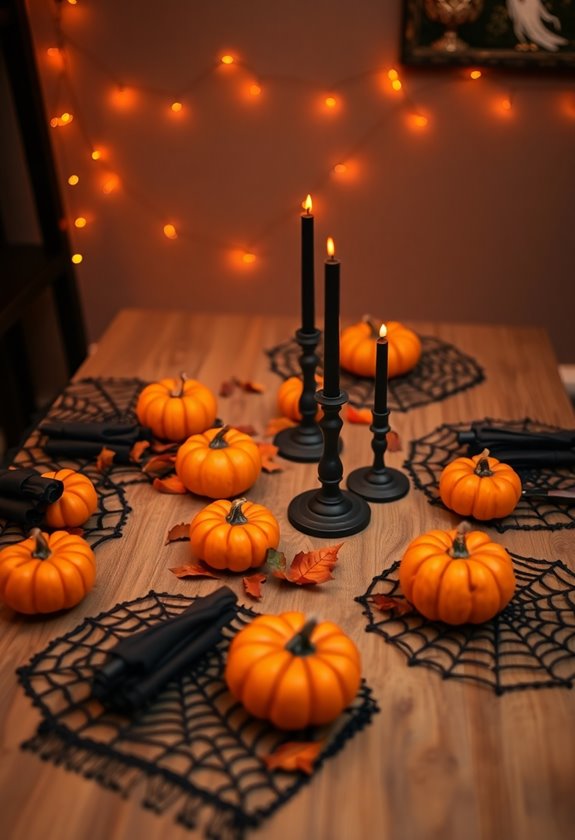
Painted Pumpkin Collection (1-2 hours, Difficulty: ★★☆☆☆)
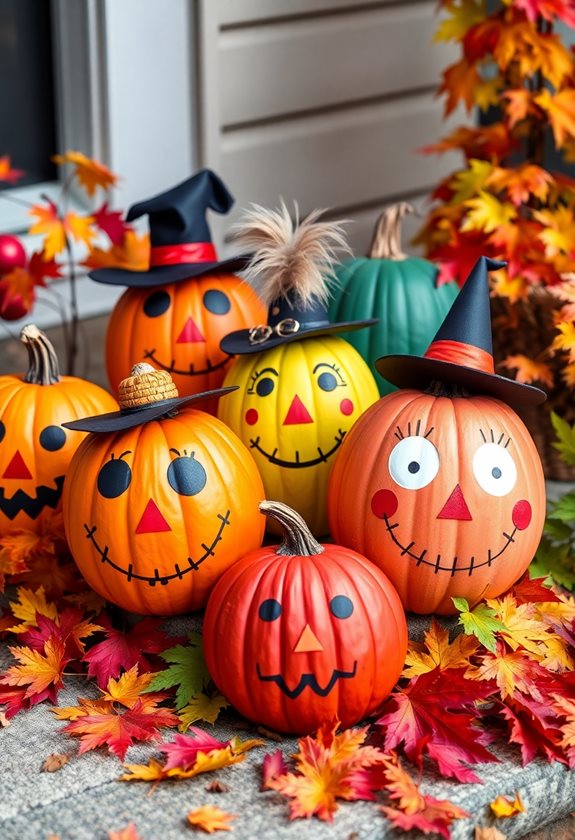
Skip the mess of carving and embrace painted pumpkins that last the entire season and beyond. For even more creative pumpkin inspiration, check out these “10 Creative Pumpkin and Gourd Decor Ideas for Fall”. Foam or real pumpkins work equally well—clean and dry your pumpkins thoroughly, apply primer if using real pumpkins for better paint adhesion, paint in solid colors or create patterns, and add details with paint pens or brushes.
Design ideas include classic black pumpkins with gold stems for elegance, white pumpkins with black stripes or polka dots, ombre effects blending orange to black, galaxy pumpkins with purple, blue, and silver, or creating a pumpkin family with different expressions painted on each. If you prefer traditional carved pumpkins, explore these “7 Creative Jack-o-Lantern Decoration Ideas for a Spooktacular Halloween” for fresh carving inspiration. For extra flair, add glitter before paint dries, use metallic paints for shine, or incorporate decoupage with Halloween-themed napkins.
Spooky Potion Bottles (45 minutes, Difficulty: ★☆☆☆☆)
Gather old bottles and jars to create an apothecary of Halloween potions. Remove labels by soaking in warm soapy water, create vintage labels with tea-stained paper and calligraphy, fill bottles with colored water (food coloring works perfectly), add props like plastic spiders or fake eyeballs, and cork or cap bottles securely.
Label ideas include “Witch’s Brew,” “Eye of Newt,” “Poison,” “Dragon’s Blood,” or “Truth Serum.” Group bottles together for a complete apothecary display, varying heights and shapes for visual interest. This project costs almost nothing if you save bottles throughout the year, yet creates impressive impact when displayed on mantels, shelves, or dining tables.
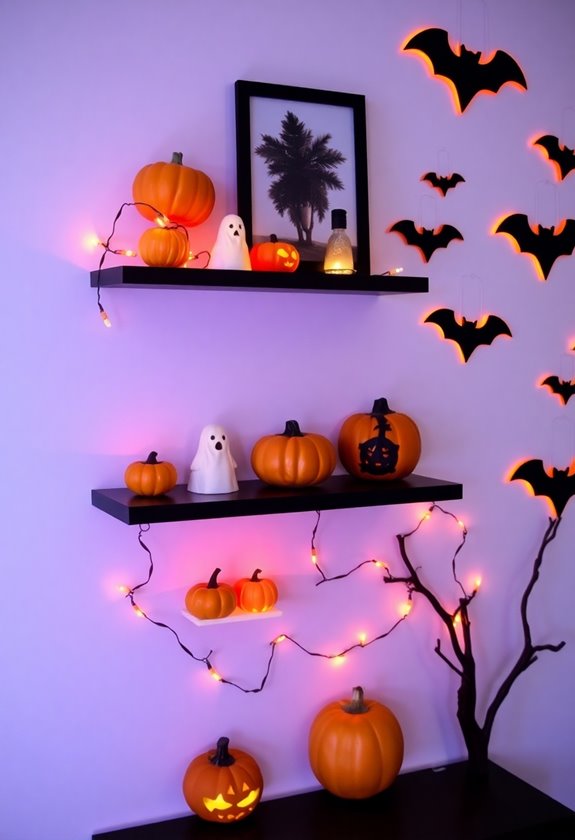
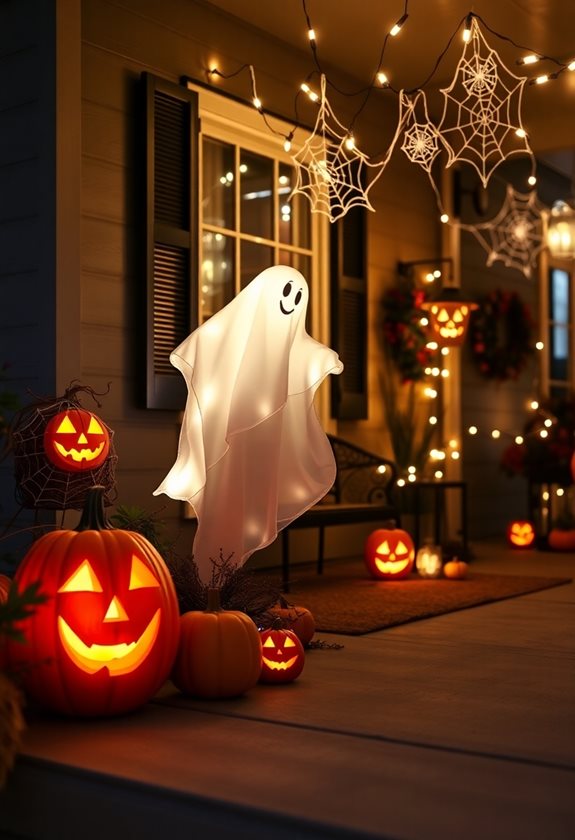
Tissue Paper Ghosts (20 minutes, Difficulty: ★☆☆☆☆)
These adorable floating ghosts require only white tissue paper, string, and a black marker. Crumple a small ball of tissue for the head, drape a larger piece of tissue over the ball, tie string around the “neck” to secure, draw simple faces with black marker, and hang from fishing line at varying heights.
Create a whole family of ghosts in different sizes, hang them in windows or from ceiling fans, use them as party decorations, or send kids home with them as party favors. The simplicity of this project makes it perfect for involving young children—they can help with every step safely.
Black Cat Silhouettes (30 minutes, Difficulty: ★☆☆☆☆)
Cut cat silhouettes from black cardstock or poster board to create striking window or wall decorations. Find templates online or draw your own arched-back cat shape, cut carefully around edges, attach to windows with removable adhesive, or frame for wall art.
Create an entire scene by adding a fence, bare tree branches, or a full moon behind your cats. These silhouettes look especially effective when backlit in windows at night, creating dramatic shadows visible from outside. If you’re feeling ambitious, create multiple cats in different poses—sitting, walking, stretching—for a more dynamic display.
Spider Web Doilies (15 minutes, Difficulty: ★☆☆☆☆)
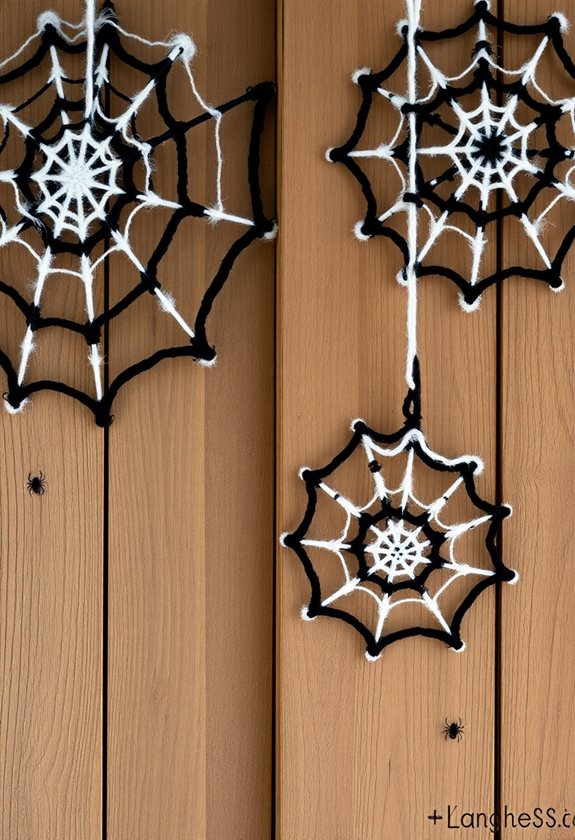
White paper doilies become instant spiderwebs with zero effort required. Simply hang doilies at varying heights and angles, add plastic spiders strategically, secure with small pieces of tape or removable adhesive, and cluster several together for impact.
This incredibly simple project creates surprisingly effective decoration, especially when used in corners or around light fixtures where real webs might form. The delicate, lacy appearance of doilies perfectly mimics authentic spider webs, and the minimal time investment means you can decorate an entire room in under an hour.
Candy Corn Vases (45 minutes, Difficulty: ★★☆☆☆)
Layer dried corn, beans, or candy corn in clear vases to create colorful fall displays. Use yellow, orange, and white items in separate layers, create clean horizontal stripes or diagonal angles, nestle fall flowers or Halloween picks in the top, and seal the top with a layer of sand or decorative moss.
This project requires no special skills—just patience in layering materials evenly. The result is a festive, colorful decoration perfect for tables, mantels, or entryways. After Halloween, you can simply dump the contents and store the vase for next year, making this an economical repeatable project.
Intermediate Projects: Building Your Skills
These projects require more time, slightly more advanced techniques, and a bit more investment in materials, but they deliver impressive results that look professionally made.
Burlap and Ribbon Wreaths (1.5-2 hours, Difficulty: ★★★☆☆)
Creating a full, lush Halloween wreath involves layering materials for dimension. Start with a foam or wire wreath form, wrap with burlap ribbon or fabric strips, layer with orange and black patterned ribbons, add embellishments like small pumpkins or signs, and finish with a hanging ribbon on back.
The key to professional-looking wreaths is generous amounts of material—don’t skimp on ribbon or burlap. Secure everything with hot glue or floral pins, building up layers until you achieve a full appearance with no foam showing through. For inspiration on different wreath styles, check out “Crafting Homemade Halloween Door Wreaths: A Step-by-Step Guide”.
Variations include creating a monochromatic black wreath for elegance, using mesh ribbon for fuller coverage with less weight, adding battery-operated string lights for illumination, or incorporating natural elements like twigs and pinecones for rustic charm.
Floating Candle Illusion (1 hour, Difficulty: ★★★☆☆)
Create the magical floating candle effect popularized by fantasy stories using paper towel tubes and LED tealights. Cut paper towel or toilet paper tubes to varying lengths (6-12 inches), paint white or leave natural for aged appearance, hot glue LED tealights to the top of each tube, drip white wax down the sides for authenticity, and hang from fishing line at different heights.
The trick to making this effect work is thin fishing line that becomes nearly invisible, especially in low light. Vary the heights significantly—some candles should hang quite low while others are much higher, creating depth and interest. Group them over a table, in a hallway, or in a large window for maximum impact.
For enhanced realism, tilt some candles at slight angles as if actually burning and melting, add flame-shaped orange and yellow tissue paper above the “wicks,” or create candle drips by letting hot glue drip down the sides before painting.
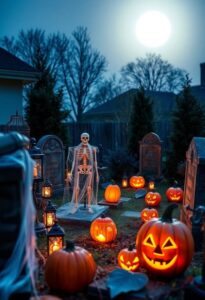
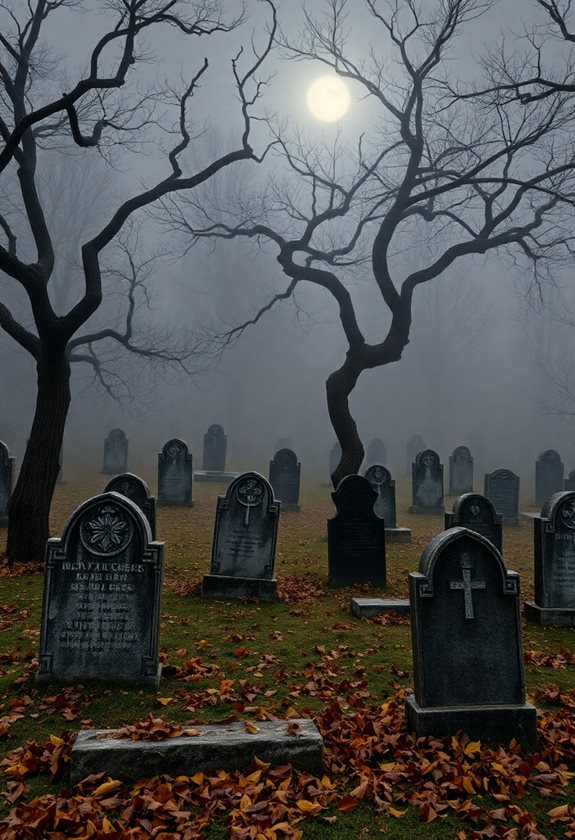
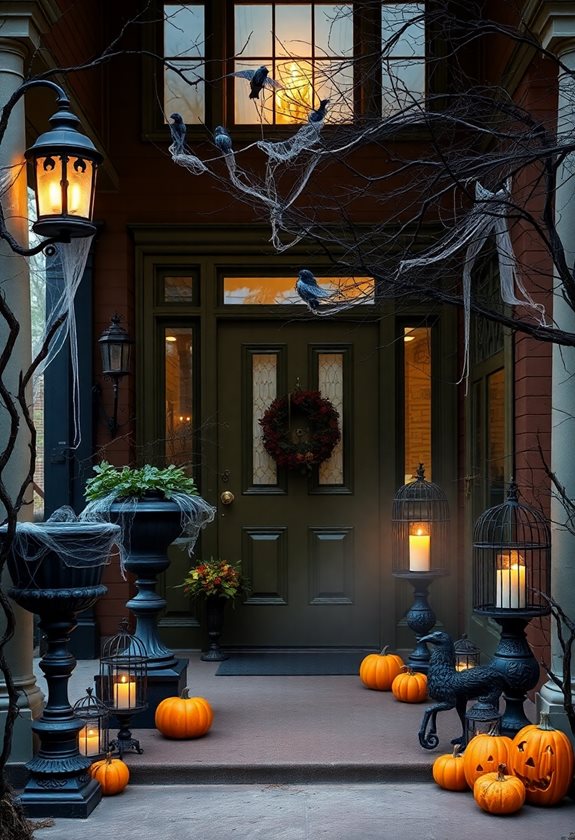
Cemetery Scene Tombstones (2-3 hours, Difficulty: ★★★☆☆)
Build a graveyard in your yard with foam board tombstones that look remarkably realistic. Cut tombstone shapes from foam insulation board (available at hardware stores), carve names and dates with a craft knife or hot knife tool, paint with gray, black, and white for aged stone appearance, add weathering with brown and green paint, and stake into ground with wooden dowels or rebar.
The painting technique makes or breaks this project. Start with a base coat of gray, dry brush with lighter gray and white for highlights, add dark gray or black in crevices for depth, stipple green and brown for moss and age, and finish with a matte sealer to protect from weather.
Epitaph ideas range from funny (“Here Lies Someone’s Diet,” “I Told You I Was Sick”) to classic spooky (“Rest in Peace,” “Here Lies…”). Create an entire cemetery with varying tombstone shapes and sizes, add plastic skeletons emerging from the ground, and illuminate with uplights for nighttime drama. Complement your graveyard with other “10 Must-Have Spooky Yard Decorations for Halloween” to create a complete haunted landscape.
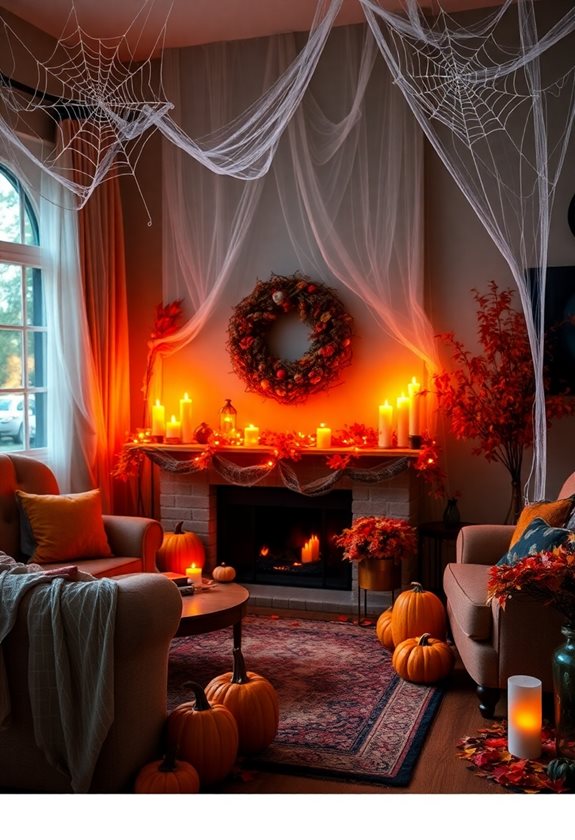
Creepy Cloth Covered Furniture (30-45 minutes per piece, Difficulty: ★★☆☆☆)
Transform ordinary furniture into haunted house pieces with cheesecloth or gauze. Purchase cheesecloth in bulk, dye with tea for aged appearance (optional), drape loosely over furniture allowing natural draping, secure with small pins or tape underneath, and add cobwebs and spiders for extra creepiness.
This technique works especially well for creating an abandoned parlor scene or witch’s cottage aesthetic. Cover lamps (never while lit or plugged in), tables, chairs, even mirrors and picture frames. The key is achieving natural-looking drapes and folds—too neat looks costume-like rather than authentically abandoned.
Enhance the effect by adding battery-operated candelabras on top of draped tables, placing vintage bottles or books on covered surfaces, or incorporating “10 Scary Home Decorations to Haunt Halloween” throughout the scene. For additional inspiration on transforming your living spaces, these “7 Spooky Haunted Living Room Decorations for a Chilling Atmosphere” offer great ideas that complement your DIY creations.
Witch Hat Chandelier (2 hours, Difficulty: ★★★☆☆)
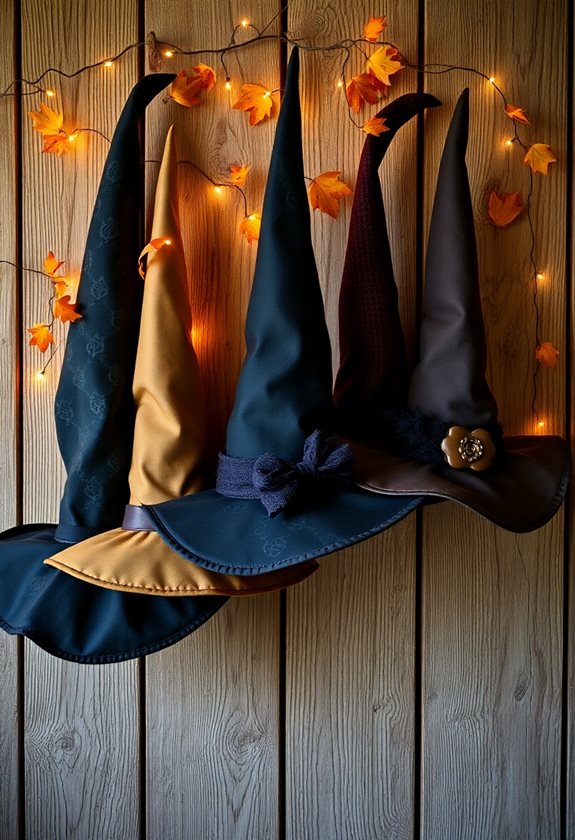
Create a striking overhead decoration with black witch hats suspended at varying heights. Purchase inexpensive witch hats from dollar stores, attach fishing line through the peak of each hat, hang from a hoop, branch, or directly from ceiling, vary heights significantly for visual interest, and add LED string lights weaving between hats for drama.
This project creates major impact with relatively little effort—it’s the varying heights and numbers that make it work. Use at least 5-7 hats for a chandelier effect, more for larger spaces. The silhouette created by the hats, especially when backlit or highlighted, becomes a stunning focal point for any Halloween party or display.
Spell Book Props (1.5 hours per book, Difficulty: ★★★☆☆)
Transform old books into ancient spell books and grimoires for your Halloween display. Find old hardcover books at thrift stores, paint covers with black or deep brown acrylic, add texture with mod podge and crumpled tissue paper, create worn edges with sandpaper, paint “titles” in gold or silver paint, and age everything with brown or black paint wash.
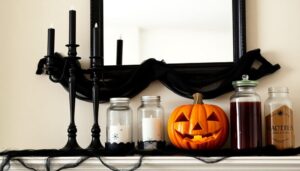
Embellish with printed spell pages glued inside, ribbon bookmarks in Halloween colors, wax seal stamps on the cover, or small decorative elements like plastic gems or metal corners. Stack these spell books with “Spooky Home Decorations to Haunt Halloween” on mantels, side tables, or as centerpiece foundations. For specific mantel styling ideas, these “3 Spooky Halloween Mantel Decor Ideas to Transform Your Space” show how to incorporate your DIY spell books into larger displays.
The aging technique is crucial—new paint looks obviously fake. After your base coat dries, lightly sand edges and corners where natural wear would occur, apply a brown paint wash and wipe away excess, add splatters or drips for character, and finish with matte sealer for a genuinely old appearance.
Bottle Brush Tree Cemetery (1.5 hours, Difficulty: ★★★☆☆)
Create a miniature Halloween forest scene using bottle brush trees painted in spooky colors. Purchase small bottle brush trees, spray paint in black, gray, or white, arrange in a wooden tray or on a platter, add model cemetery elements like small tombstones, surround with Spanish moss or fake snow for eerie ground cover, and incorporate LED fairy lights for illumination.
This project creates a captivating tabletop display that draws people in for closer inspection. The contrast between the whimsical bottle brush tree form and the dark, spooky color palette creates an intriguing juxtaposition. Add miniature elements like tiny skeletons, small black cats, or miniature pumpkins to build out your scene with personality and detail.
Advanced Projects: Impressive Statement Pieces
These projects require significant time investment, more advanced skills, and potentially specialized tools, but they create show-stopping decorations that become conversation pieces and neighborhood landmarks.
Life-Size Skeleton Diorama (3-4 hours, Difficulty: ★★★★☆)
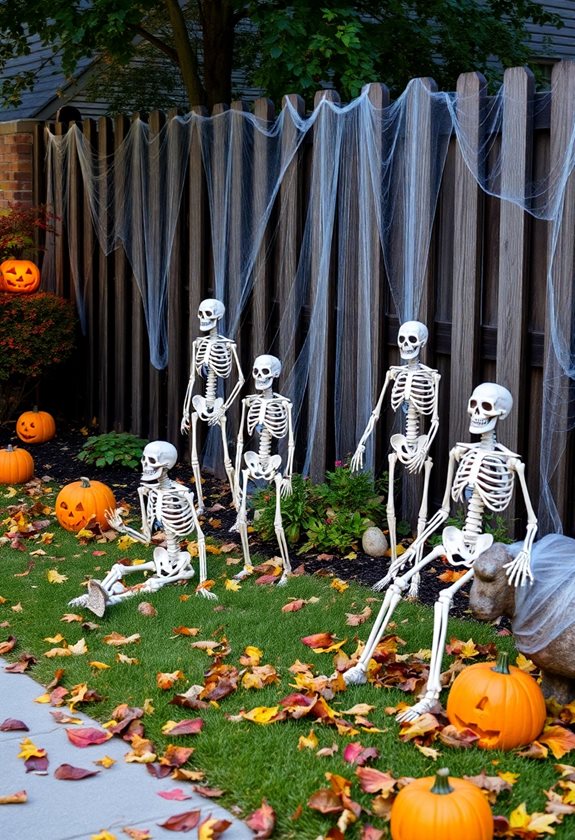
Pose inexpensive plastic skeletons in elaborate scenes that tell stories. Wire skeletons together for stability, use fishing line to suspend in mid-air poses, create themed scenes (skeleton band, skeleton dinner party, skeleton doing yard work), add props and costumes to skeletons, and use zip ties for joints that need to hold specific positions.
The key to successful skeleton displays is commitment to the scene. A skeleton just standing in your yard is boring—a skeleton mowing the lawn, skeleton reading a newspaper on your porch, or skeleton couple having a romantic dinner creates narrative that engages viewers. Don’t be afraid to add humor—Halloween doesn’t always need to be scary.
Consider creating evolving scenes throughout October, moving skeletons into new positions or scenarios each week. This gives neighbors something to look forward to and demonstrates your creative commitment to the season.
Oversized Halloween Decorations (2-3 hours each, Difficulty: ★★★★☆)
Create giant versions of traditional Halloween items for dramatic impact. Build enormous spiders from foam balls and pool noodles, construct massive jack-o-lanterns from chicken wire and papier-mâché, create supersized candy corn from painted plywood, or make giant cobwebs from rope or yarn.
The scale is what makes these projects impressive—a three-foot spider on your porch creates far more impact than a six-inch one. Paint technique matters less when objects are viewed from a distance, making these projects more forgiving than small detailed work. Focus on bold colors, clear shapes, and weather-resistant construction since these will live outdoors.
Projection Mapping Displays (4-6 hours setup and programming, Difficulty: ★★★★★)
Create sophisticated animated displays using video projectors and projection mapping software. Purchase or rent a video projector with sufficient lumens for outdoor use, download or create Halloween animations and videos, map projections to architectural features of your home, sync with music using software, and run continuously or on a timed loop.
This represents the pinnacle of home Halloween decorating—projecting dancing skeletons, flying ghosts, or morphing jack-o-lanterns onto your home’s facade. While initial setup is complex, once programmed the system runs automatically. Many free projection mapping videos are available online, or you can create custom content using software like After Effects.
The wow factor of projection mapping is unmatched, creating movement and animation that static decorations simply can’t achieve. This investment pays dividends in neighborhood impact and personal satisfaction, though it requires technical skills and equipment investment beyond basic crafting.
Animatronic Props from Scratch (6-8 hours, Difficulty: ★★★★★)
Building your own animatronic decorations from servos, microcontrollers, and custom mechanics takes Halloween DIY to the expert level. Design your concept and movements, source servo motors and Arduino or similar controllers, build the mechanical structure and linkages, add sculpting or found materials for the body, program movements using appropriate software, and integrate sensors for triggering (motion sensors, sound activation, etc.).
This project requires electronics knowledge, mechanical skills, and programming ability beyond basic crafting. However, the result is a fully custom animated prop impossible to purchase commercially. Start with simple projects like a head that turns to follow motion or a hand that beckons, then build complexity as you gain experience.
Online communities dedicated to Halloween animatronics offer invaluable resources, from code libraries to mechanical design tips. Don’t attempt this as your first DIY project—build your skills through simpler mechanical and electronic projects first, then graduate to full animatronic creation.
Haunted Portrait Gallery (3-4 hours, Difficulty: ★★★★☆)
Create a gallery of changing portraits that transform from normal to sinister. Find or print large portraits in ornate frames, create alternate spooky versions of the same portraits, use Pepper’s Ghost illusion technique with angled glass and lighting, or motorize portraits that physically change, and wire lighting to reveal transformations on timer or sensor.
This classic haunted house effect creates genuine gasps when executed well. The traditional method uses two portraits of the same subject—one normal, one zombified or skeletal—mounted back to back on a motorized rotating mechanism. When the motor engages, the portrait slowly spins to reveal its horrifying alternate version.
A simpler approach uses the Pepper’s Ghost technique: mount one portrait normally, position a second portrait at an angle with glass between them, and adjust lighting to either show the reflection (ghostly version) or allow the main portrait to show clearly. This requires precise positioning but creates an eerily effective transformation.
Custom Silhouette Window Scenes (2-3 hours per window, Difficulty: ★★★☆☆)
Transform your windows into theatrical displays with backlit silhouettes telling stories. Cut elaborate scenes from black poster board or vinyl, mount inside windows on sheer curtains or directly on glass, create depth by layering elements at different distances from the window, backlight from inside with strategic lamp placement, and coordinate multiple windows to tell a story across your home’s facade.
Unlike simple single-shape silhouettes, these scenes incorporate multiple elements creating narrative. A witch brewing potions at a cauldron, a mad scientist in his laboratory, a vampire rising from his coffin—whatever scene you create should have detail and movement to reward closer inspection.
The cutting is meditative but time-consuming—expect to spend 2-3 hours per complex window scene. Use a craft knife for precise cuts, work on a cutting mat, and consider printing templates rather than drawing freehand unless you’re confident in your artistic skills.
Tips for Success Across All DIY Projects
Regardless of which projects you choose, certain principles ensure better results and more enjoyable crafting experiences.
Work in Batches for Efficiency
When making multiples of any item—bat garlands, painted pumpkins, potion bottles—work in assembly line fashion. Complete one step for all items before moving to the next step. Paint all pumpkins at once, let them all dry together, then detail all pumpkins together. This approach is dramatically more efficient than completing one item start to finish before beginning the next.
Test Before Committing
Before painting that expensive pumpkin or cutting into your only piece of foam board, test your technique on scrap material. Try your painting method on cardboard, practice your cutting on old poster board, experiment with glue combinations on test pieces. These small tests prevent expensive mistakes and build your confidence before tackling the actual project.
Embrace Imperfection
Handmade decorations carry charm precisely because they’re not factory-perfect. A slightly crooked bat, uneven paint coverage, or asymmetrical wreath doesn’t ruin your project—it proves it’s handmade. Perfectionism is the enemy of DIY joy. Embrace the handcrafted aesthetic and remember that viewers from even a few feet away won’t notice the tiny flaws you’re obsessing over.
Store Smart for Next Year
As you create decorations, think about storage. Avoid projects that can’t be broken down or stored compactly unless they’re truly spectacular statement pieces worth the storage space. Keep all components of each project together—the matching sign with the wreath, the battery pack with the LED lights. Label storage containers clearly so you’re not rediscovering your own projects next October.
Safety Never Takes a Holiday
Hot glue burns hurt. Spray paint fumes are toxic. Sharp tools cut. Take these risks seriously by working in well-ventilated areas, using appropriate protective equipment, supervising children closely, and following product directions religiously. The goal is creating decorations, not visiting the emergency room.
Combining Store-Bought and Handmade
You don’t need to make everything from scratch to call your home “decorated with DIY projects.” The most effective Halloween displays often combine purchased items with handmade elements.
Use store-bought pieces as foundations—a purchased wreath becomes unique when you add handmade embellishments, commercial string lights gain character when you add handmade paper decorations, and plastic skulls transform when painted and aged with DIY techniques.
Create handmade accents that personalize commercial decorations. Add your own painted signs to purchased displays, craft custom bases or platforms for store-bought figures, or build scenes around commercial centerpieces using handmade supporting elements.
This hybrid approach gives you the best of both worlds—the convenience and often impressive scale of commercial decorations combined with the personal touch and cost savings of handmade elements. Don’t feel guilty about this mixing—even professional haunted houses combine commercial and custom elements.
Planning Your DIY Halloween Timeline
Successful DIY decorating requires planning, especially if you’re tackling multiple projects.
Start in late summer or early September for major projects. Give yourself time to gather materials, attempt complex builds, and recover from mistakes. Rush jobs rarely turn out well, and Halloween decorating should be fun, not stressful.
Work from largest to smallest projects. Complete your big statement pieces first when your energy and enthusiasm are highest. Smaller quick projects can fill in gaps as October progresses and serve as quick wins when you need motivation.
Set realistic expectations about how many projects you can actually complete. One spectacular handmade piece beats five half-finished attempts. Choose projects that excite you rather than trying to tackle everything in this guide. There’s always next year for the projects that don’t make the cut this October.
Final Thoughts: Make It Your Own
The best DIY Halloween decorations reflect your personal style, sense of humor, and creative vision. Don’t feel bound by the specific projects in this guide—use them as springboards for your own ideas. Combine techniques, substitute materials, scale up or down, and most importantly, have fun with the process.
DIY Halloween decorating is about more than saving money or filling your home with handmade items. It’s about the satisfaction of creating something with your own hands, the joy of watching your vision come to life, and the memories made while crafting with family and friends. Every project in this guide started with someone experimenting, making mistakes, and learning what worked.
Your first painted pumpkin might not be perfect. Your initial wreath might look a little sparse. That’s not just okay—it’s expected. The beauty of DIY is that you can try again, experiment with different approaches, and improve with each project. Plus, handmade decorations carry stories that purchased items never will. You’ll remember the afternoon you spent making potion bottles with your kids, the evening you and your partner assembled skeleton dioramas while watching horror movies, or the weekend you transformed your porch into a haunted haven.
So gather your supplies, choose a project that excites you, and start creating. Your handmade Halloween decorations will bring you joy throughout the season and for many Octobers to come. The only question left is: which project will you tackle first?
Happy crafting, and may your Halloween be filled with the special magic that only handmade decorations can bring!