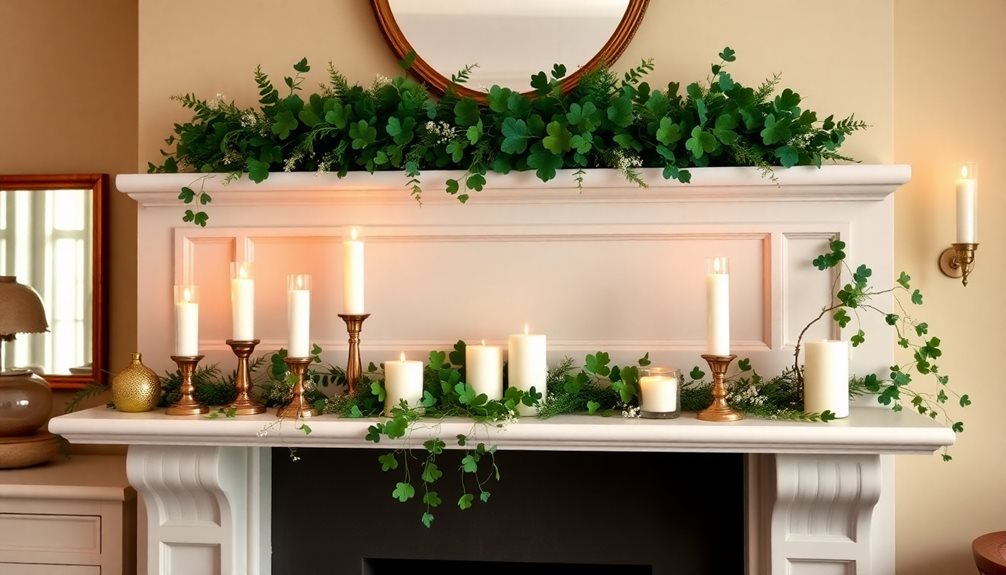
Transform your mantel into a magical St. Patrick’s Day display in five simple steps. Start by gathering green cardstock, scissors, and ribbons on a protected workspace. Create gentle swooping patterns with your garland, dividing it into three symmetrical sections. Layer complementary elements like fairy lights and white flowers for depth. Add sparkle with metallic accents and glass beads, then fine-tune by adjusting spacing and securing loose pieces. Let’s explore how to bring this enchanting Irish decoration to life.
Design Highlights
- Gather essential supplies including green cardstock, scissors, twine, and optional decorative elements like glitter or metallic markers.
- Measure your mantel and create a symmetrical draping pattern with gentle swoops dipping 6-8 inches from the edge.
- Layer multiple strands of shamrock garland slightly offset, incorporating various shades of green for depth and dimension.
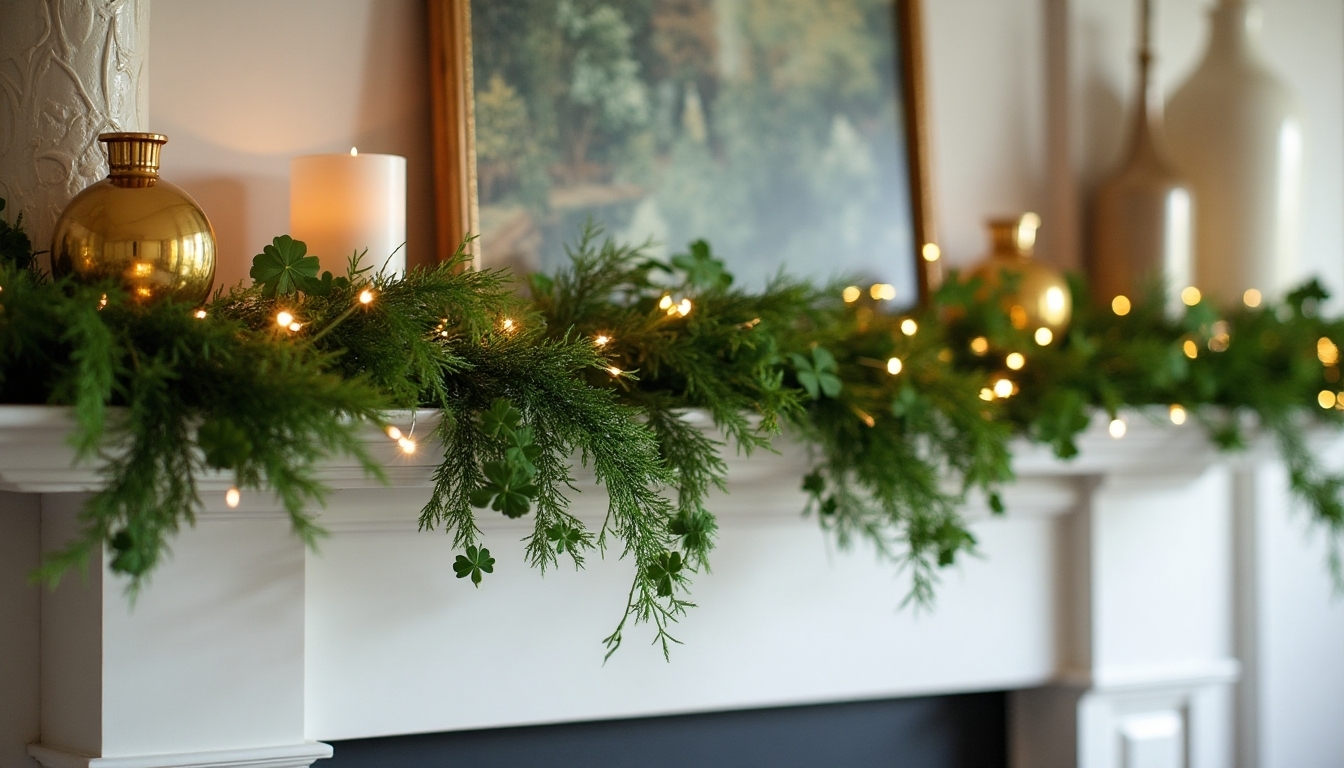
- Weave fairy lights through the garland and add decorative elements like white flowers, metallic beads, or Celtic ornaments.
- Make final adjustments by fluffing leaves, securing loose pieces, and adding small ribbons where sections meet.
Gather Your Supplies and Prep Your Space
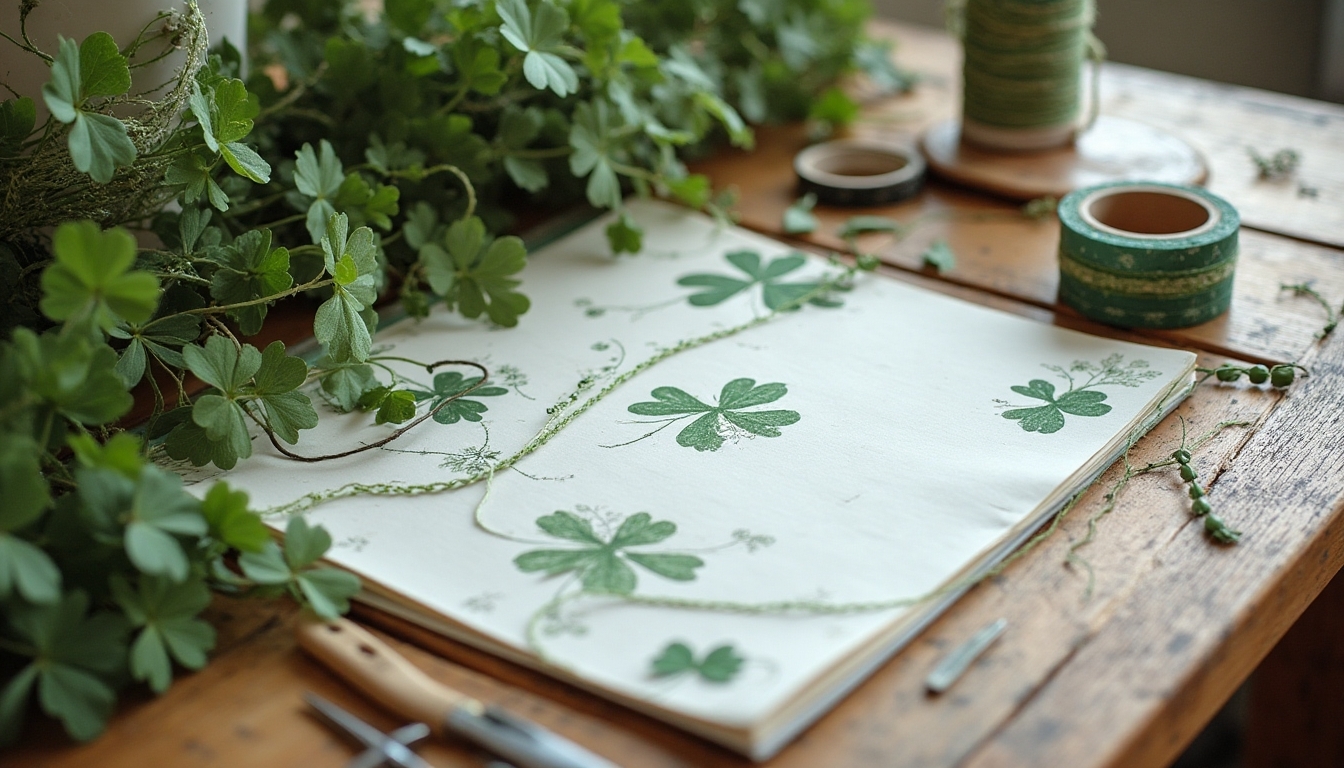
Before diving into this delightful St. Patrick’s Day project, let’s create a cozy crafting space and gather everything you’ll need. Clear off your kitchen table or craft area, and lay down some newspaper to protect your surface.
You’ll want to collect green cardstock paper, scissors, a hole punch, twine or ribbon, and a pencil for tracing. Don’t forget your ruler and glue stick! If you’re feeling extra festive, grab some glitter or metallic markers to add sparkle to your shamrocks. Additionally, consider using high-quality materials for durability and a polished look in your decorations.
Make sure you’ve got good lighting and a comfortable chair – you’ll be creating something special that’ll make your home feel wonderfully Irish!
Create the Perfect Draping Pattern
Now that you’ve got your supplies ready, let’s figure out where your beautiful shamrock garland will hang! The mantel is your perfect canvas for creating a festive St. Patrick’s Day display that’ll make everyone feel lucky.
Start by measuring your mantel’s length and marking the center point. You’ll want to create gentle swoops that dip down about 6-8 inches from the mantel’s edge. For the most pleasing look, divide your garland into three equal sections, letting each curve mirror the others. If you’re working with multiple strands, layer them slightly offset to add depth and fullness to your holiday display. Additionally, consider incorporating shades of green to enhance the festive spirit and ensure theme consistency throughout your decor.
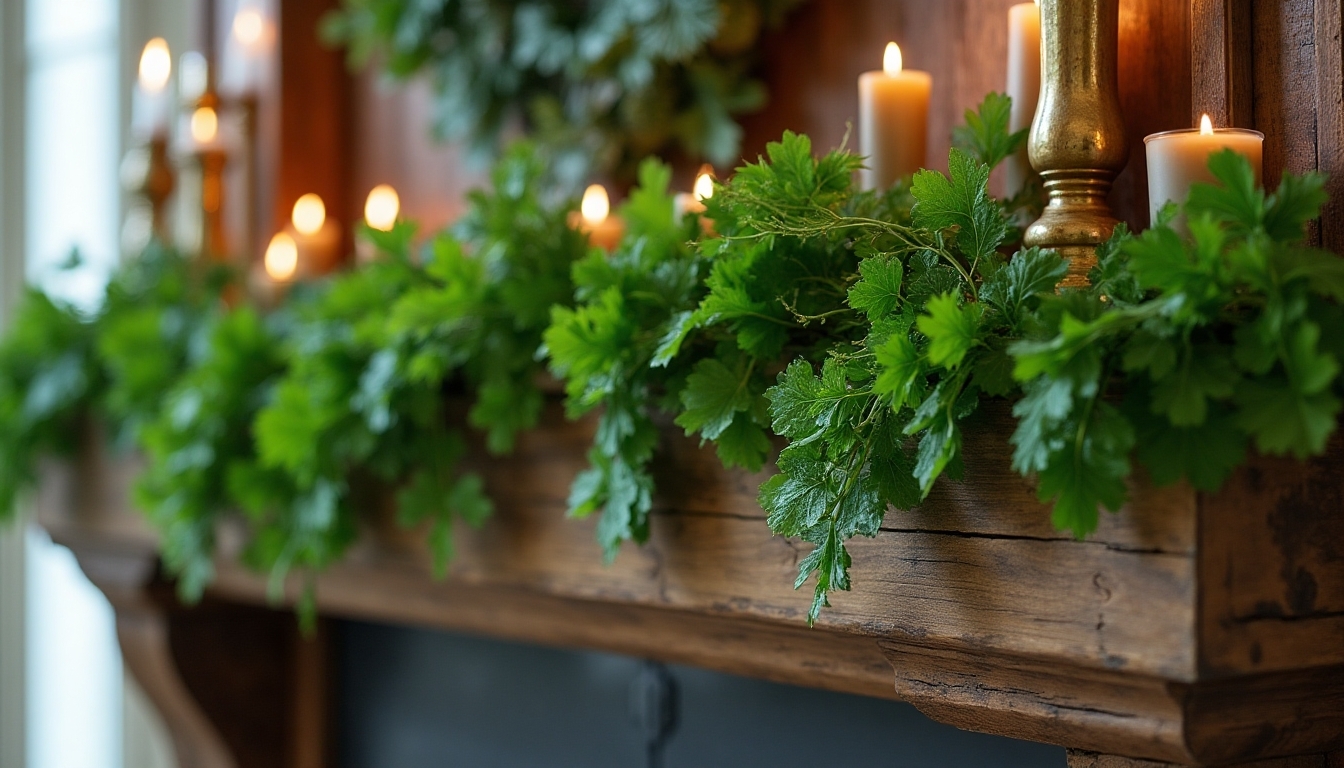
Layer With Complementary Elements

To make your shamrock garland truly magical, you’ll want to layer in some extra decorative elements that complement your festive creation. Add twinkling fairy lights between the shamrocks to create a warm, enchanting glow that’ll make your display sparkle. Nestle in some delicate white flowers or baby’s breath for a touch of natural beauty, and don’t forget to include some metallic accents like gold or silver beads.
Small green ribbons, tied in perfect bows between the shamrocks, will add movement and charm to your display. For extra Irish flair, incorporate tiny Celtic knot ornaments or miniature leprechaun hats throughout the garland. Additionally, consider incorporating Charming St. Patrick’s Day Garden Decor Ideas to further enhance your festive atmosphere.
Add Lighting and Sparkle
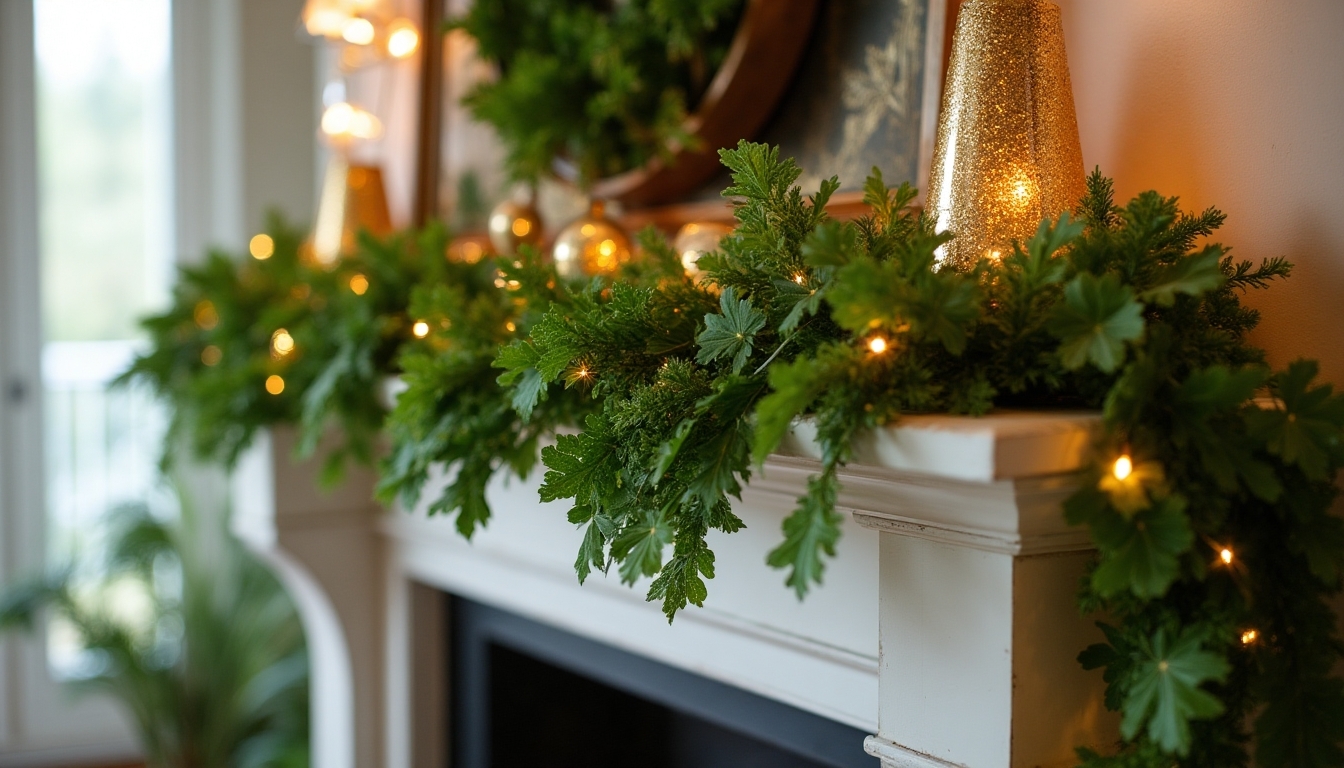
The magic of your shamrock garland comes alive with the perfect lighting and sparkle elements. Weave miniature fairy lights through your garland, letting the warm glow highlight each delicate shamrock. You’ll love how the tiny bulbs create a cozy, enchanting atmosphere that makes your display truly special.
Add shimmering touches with metallic ribbon, glass beads, or glitter-dusted shamrocks scattered throughout. For an extra magical touch, incorporate small mirrors or crystal elements that catch and reflect light. Don’t forget to position a few battery-operated votives near the base of your garland, creating depth and a welcoming warmth that’ll make everyone feel right at home. To enhance your festive display, consider using St. Patrick’s Day kitchen window decor that complements your mantel and ties the whole look together.
Fine-Tune the Final Details
Once you’ve assembled your enchanting shamrock garland, it’s time to perfect those finishing touches that’ll make your creation truly shine. Step back and adjust any uneven spots, making certain your shamrocks are evenly spaced and facing the right direction. Gently fluff any crumpled leaves, and secure any loose pieces with a dab of hot glue.
Add small ribbons or bows where sections meet, creating a polished look that’ll make your garland feel complete. Don’t forget to straighten the hanging points to guarantee your garland drapes beautifully. To enhance the festive spirit, consider incorporating St. Patrick’s Day decor that complements your garland. You’ll love how these thoughtful details transform your festive decoration into a masterpiece you’ll be proud to display.
Frequently Asked Questions
How Long Will a Shamrock Garland Typically Last Before It Starts Wilting?
You’ll love watching your shamrock garland bring Irish charm to your space, but timing is key to keeping it fresh and beautiful. With proper care, a fresh shamrock garland will typically last 5-7 days before showing signs of wilting. If you’re using artificial shamrocks, you’ll enjoy their festive appeal for years to come. To extend your fresh garland’s life, you can mist it daily and keep it away from direct heat sources.
Can I Use the Same Garland Setup for Other Holidays With Modifications?
Yes, you’ll love how versatile your garland setup can be throughout the year! You can easily swap out shamrocks for other seasonal elements like autumn leaves, hearts for Valentine’s Day, or twinkling lights for winter holidays. Keep your basic garland structure, and simply change the decorative elements to match each celebration. Your mantel can become a welcoming focal point that brings joy and festive spirit to every holiday you celebrate.
What’s the Best Way to Store a Shamrock Garland Between Seasons?
You’ll love how easy it is to keep your shamrock garland looking fresh for next year! Start by gently cleaning it with a soft brush, then wrap it loosely in acid-free tissue paper to protect its delicate details. Store your garland in a plastic container with a secure lid, and keep it in a cool, dry place away from direct sunlight. Don’t forget to label your container, so you’ll know exactly where to find your festive decoration when St. Patrick’s Day returns!
How Do I Prevent the Garland From Damaging My Mantel’s Finish?
Just like a soft cushion protects your favorite chair, you’ll want to shield your mantel from any scratches or marks. Place clear rubber bumpers or felt pads under your garland’s contact points to create a protective barrier. You can also lay a decorative runner beneath the garland – it’ll add style while safeguarding your surface. If you’re using hooks, opt for damage-free adhesive ones that’ll peel off cleanly when the season’s over.
Should I Choose Real or Artificial Shamrocks for Areas With Curious Pets?
If you’ve got curious pets at home, you’ll definitely want to go with artificial shamrocks for your decorating. Real shamrocks can be toxic to cats and dogs if they decide to take a nibble, and we want to keep your furry friends safe! Plus, artificial shamrocks are much more durable, won’t wilt, and you can reuse them year after year. They’ll look just as festive while giving you peace of mind about your pets’ wellbeing.