You’ll create the coziest holiday atmosphere by crafting personalized decorations that tell your family’s unique story. Transform cherished photos into custom ornaments, stitch names onto handmade stockings, and repurpose mason jars into memory-filled snow globes. Add warmth with wooden signs featuring inside jokes, garlands displaying important dates, and pillows adorned with handprint snowmen. These DIY touches make guests feel welcomed while celebrating your traditions—and there’s so much more magic you can create.
Design Highlights
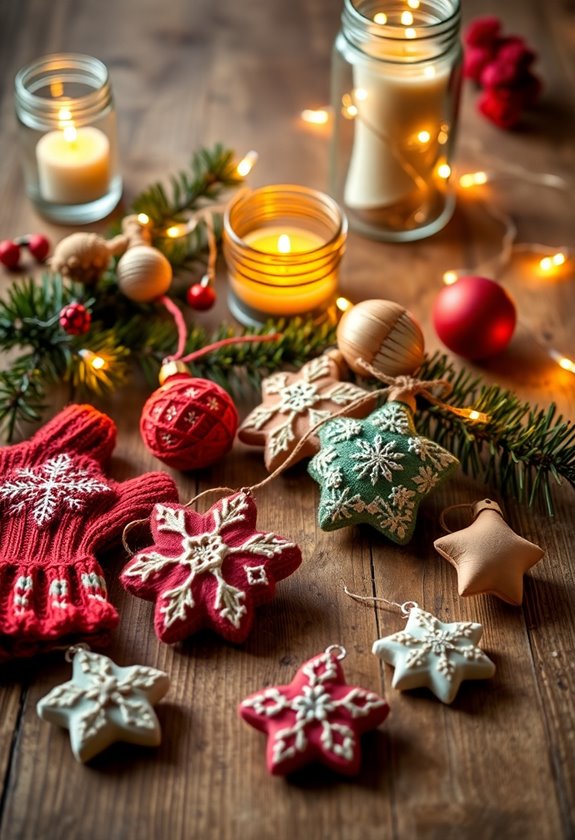
- Transform family photos into custom ornaments using cardstock and lamination to create a visual timeline that sparks holiday conversations.
- Craft memory-filled snow globes with mason jars, glycerin, and personal mementos to preserve cherished moments in magical winter scenes.
- Create hand-stitched stockings and personalized pillows using felt, embroidery, and family handprints for meaningful heirloom decorations.
- Design handmade garlands featuring family names and important dates using cardstock or felt in holiday colors for focal displays.
- Mix textures like burlap, faux fur, and velvet while embracing imperfections to create warm, inviting spaces with personal storytelling elements.
Custom Photo Ornaments That Tell Your Family’s Story

Memories have this magical way of making even the simplest ornament feel like treasure, and that’s exactly what happened when I decided to turn our family photos into Christmas decorations three years ago. You’ll discover that creating photo ornaments isn’t just about crafting—it’s about storytelling through your tree.
Start by selecting photos that capture genuine moments: your kids’ first snow day, last summer’s camping trip, or grandma’s birthday laugh. Print them on cardstock, then cut into circles or stars. I learned the hard way that regular paper wrinkles terribly, so invest in quality printing.
Laminate each photo for durability—trust me, curious toddlers will handle these constantly. Add ribbon loops, and you’ve got ornaments that spark conversations every December. My favorite shows our dog stealing Christmas cookies; it never fails to make visitors smile. These personalized treasures transform your tree into a visual family timeline. For added inspiration, you can also explore festive kitchen island decor ideas that enhance your holiday atmosphere.
Hand-Stitched Stockings With Personal Embroidery Details
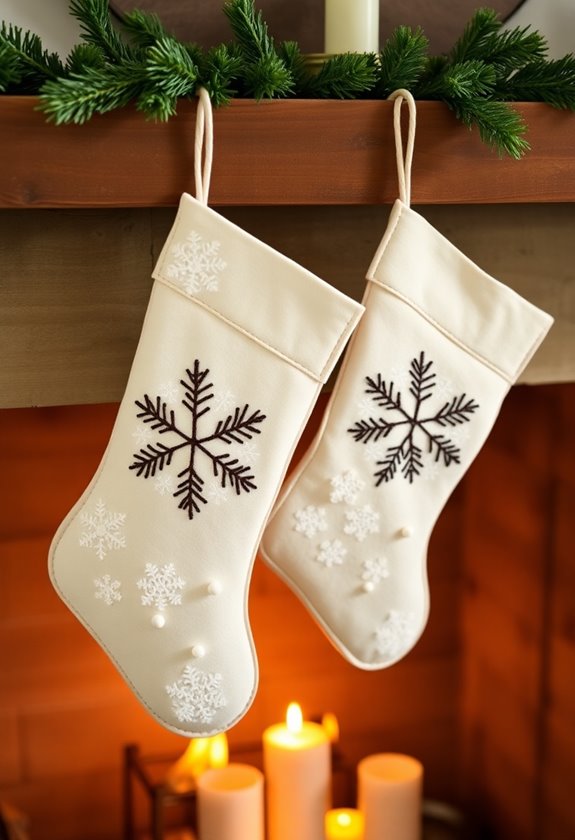
While photo ornaments capture moments in time, hand-stitched stockings become heirloom pieces that grow more precious with each Christmas morning. You’re creating something that’ll outlast plastic decorations and become tomorrow’s treasured family keepsake.
Start with sturdy felt or wool fabric – trust me, you don’t want a saggy stocking after one season of candy canes. Cut your pattern, leaving extra seam allowance because nobody’s perfect on their first try. I learned this the hard way when my nephew’s stocking barely fit a peppermint stick.
The magic happens with personal embroidery details. Stitch each family member’s name using chain stitch or backstitch – both are forgiving for beginners. Add meaningful symbols: a tiny camera for your photographer sister, musical notes for your piano-playing dad, or paw prints for beloved pets.
Choose contrasting thread colors that pop against your fabric. Your hands might cramp initially, but each careful stitch becomes meditation, connecting you to generations of crafters before you. Additionally, consider material quality when selecting fabric to ensure your creations stand the test of time.
Memory-Filled Snow Globes Using Mason Jars
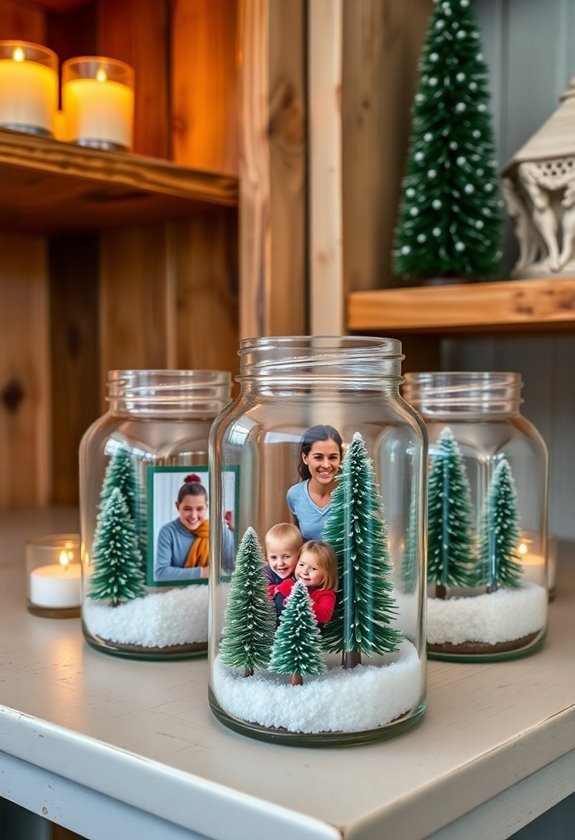
Those empty mason jars sitting in your pantry are about to become magical winter wonderlands that’ll make store-bought snow globes look boring. I discovered this craft during my first apartment Christmas when I couldn’t afford fancy decorations, and honestly, these homemade versions became more precious than anything I could’ve bought.
Start by waterproofing small mementos—family photos in plastic sleeves, miniature ornaments, or tiny figurines that spark joy. Hot glue them to the jar lid, making sure they’re secure. Here’s where it gets tricky: finding the right “snow” mixture. After several disasters involving glitter explosions, I learned that combining glycerin with water creates the perfect slow-motion snowfall effect. For a festive touch, consider adding Christmas garden decor to complement your homemade creations.
Fill your jar with the mixture, add biodegradable glitter, screw on the lid tightly, and flip it upside down. Each shake releases a gentle blizzard around your cherished memories, creating personalized magic that’ll warm hearts for years.
Personalized Wooden Signs With Holiday Messages
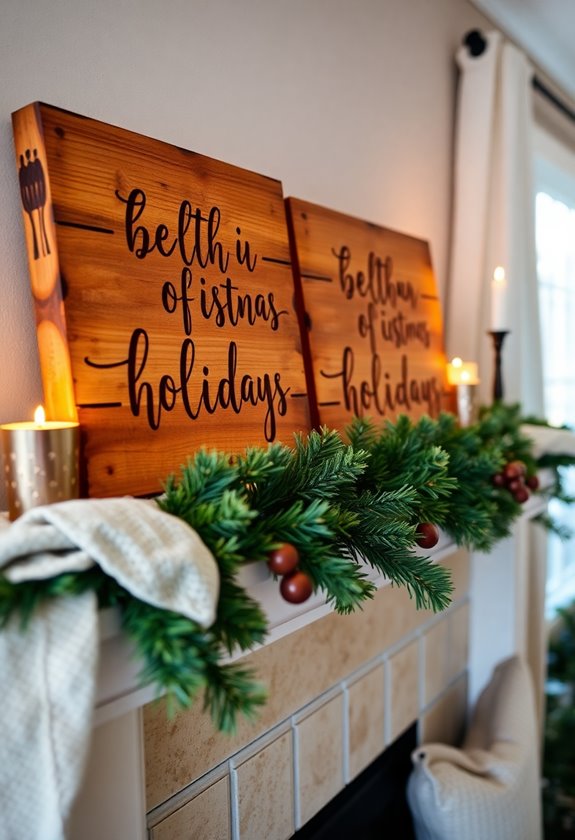
When I started making wooden signs three Christmases ago, I thought I’d need expensive equipment and years of woodworking experience—turns out, you can create stunning holiday messages with just basic supplies from your local hardware store.
You don’t need fancy tools or expert skills—just basic hardware store supplies and a little creativity can create beautiful holiday decorations.
You’ll need a piece of reclaimed wood (fence pickets work perfectly), sandpaper, paint or wood stain, and letter stencils. I learned the hard way that rushing the sanding process creates uneven paint coverage—trust me, take your time here.
Choose messages that speak to your family’s heart: “Home for the Holidays,” your last name with the year, or even inside jokes that’ll make guests smile. My favorite sign reads “Santa, Define Good” because, honestly, my kids test those boundaries daily.
Paint your base color first, let it dry completely, then add your lettering. For that weathered farmhouse look, lightly sand the edges after everything’s dry. These signs become treasured keepsakes that guests always compliment. You can also enhance your outdoor display with festive front yard decor ideas that will bring even more Christmas cheer to your home.
Handmade Garlands Featuring Family Names and Dates
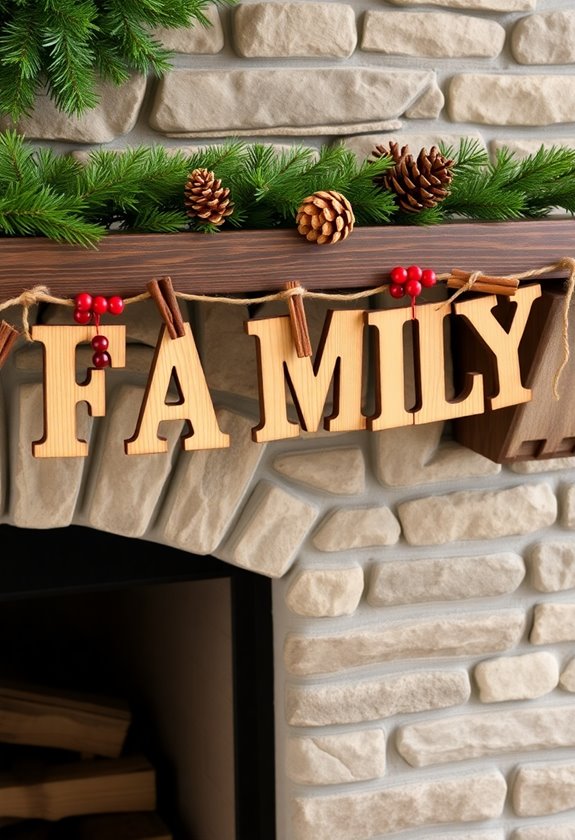
Several years ago, I discovered that handmade garlands create the most heartwarming focal points in any room—especially when they tell your family’s unique story through carefully crafted names and meaningful dates.
You’ll want to start with thick cardstock or felt in colors that match your holiday palette. Cut out letters for each family member’s name, plus significant dates like anniversaries or the year you moved into your home. I learned the hard way that consistent letter sizing matters—use stencils or print templates to keep everything uniform.
String your pieces using baker’s twine or ribbon, spacing them about three inches apart. Add small wooden hearts or stars between names for visual interest. The tricky part? Balancing longer names with shorter ones, but that’s where creativity shines. To enhance the overall theme, consider incorporating cohesive color palettes that harmonize with your existing decor.
Hang your finished garland across mantels, doorways, or windows. Trust me, guests always notice these personal touches first—they’re conversation starters that make your space uniquely yours.
Custom Advent Calendars Filled With Special Surprises
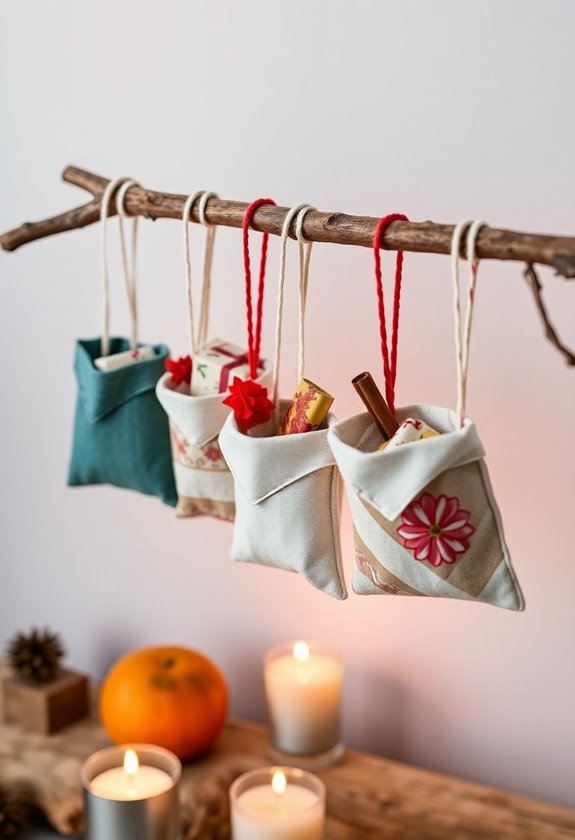
While store-bought advent calendars fill kids with excitement, creating your own custom version transforms December into something extraordinary—I’ll never forget my daughter’s face when she discovered I’d tucked tiny photo strips from our summer vacation into each pocket.
You can craft advent calendars using brown paper bags, small boxes, or even repurposed film canisters (yes, I’m showing my age here). Number each container and fill them with personalized treasures that reflect your family’s story. Think beyond candy—include handwritten notes about favorite memories, small trinkets from family trips, or promises for special activities like “hot chocolate by the fireplace tonight.”
The beauty lies in customization. For younger kids, try stickers or small toys. Teens might appreciate gift cards or makeup samples. One year, I included fragments of a larger puzzle that revealed our holiday vacation destination. Creating these calendars becomes a cherished tradition, turning countdown days into storytelling moments.
Personalized Holiday Pillows and Cozy Textile Accents
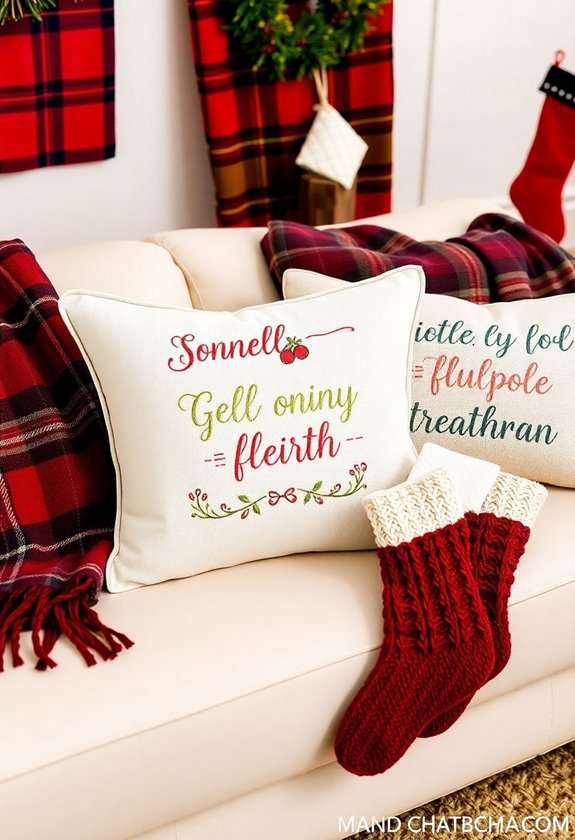
Nothing transforms a living room’s holiday atmosphere quite like handmade pillows that tell your family’s unique story—last December, I spent an entire weekend creating pillows with my kids’ handprints pressed into felt snowmen, and they’re still the first decorations everyone notices when they walk through our door.
You’ll discover that fabric paint becomes your best friend for these projects. Try stenciling family names onto burlap pillow covers, or use iron-on transfers to showcase favorite holiday photos. I’ve learned that mixing textures creates magic—combine smooth cotton with chunky knit throws, or add faux fur accents to velvet cushions.
Don’t overlook simple techniques like hand-stitching felt Christmas trees onto existing pillows. My daughter’s crooked stitches on our “Santa’s Workshop” pillow remind me that imperfection often creates the most cherished memories. These cozy accents instantly make guests feel welcomed into your family’s holiday traditions.
Frequently Asked Questions
What’s the Average Cost to Create Personalized Christmas Decorations at Home?
You’ll spend around $15-50 creating personalized Christmas decorations at home, depending on what you’re making. Basic ornaments using paper, ribbons, and glue cost about $10-15, while fancier projects with wood, paint, or specialty materials can reach $30-50. I’ve found that shopping your own craft stash first saves tons of money. Dollar stores are goldmines for supplies too. The best part? You’ll have leftover materials for next year’s creative adventures.
How Far in Advance Should I Start Making DIY Christmas Decorations?
You’re probably wondering if October’s too early—it’s not! I learned this lesson the hard way when I rushed through ornament-making in mid-December, ending up with wonky snowflakes and crooked garland. Start your DIY decorations by early November, giving yourself six to eight weeks. This timeline lets you tackle complex projects like hand-sewn stockings or painted canvas art without stress. Trust me, you’ll actually enjoy the process instead of frantically glue-gunning everything together on Christmas Eve!
Which Craft Supplies Are Essential for Most Personalized Holiday Decoration Projects?
You’ll need cardstock, scissors, glue sticks, and markers as your foundation. I always keep ribbon, twine, and double-sided tape handy—they’re lifesavers for finishing touches. Craft paint and brushes let you personalize anything, while felt sheets work magic for cozy textures. Don’t forget a cutting mat and ruler for clean lines. These basics cover most projects, though I’ve learned the hard way that buying quality scissors saves frustration later!
Can Personalized Christmas Decorations Be Safely Stored and Reused Next Year?
Your personalized treasures are like time capsules waiting to spread joy again! You’ll absolutely want to store them carefully for next year’s magic. I’ve learned the hard way that tissue paper and sturdy boxes are your best friends—trust me, finding crushed ornaments isn’t fun. Label everything clearly, keep delicate pieces separated, and store in cool, dry spots. With proper care, your handmade decorations will become cherished family traditions that grow more meaningful each holiday season.
What Are the Best Ways to Display Multiple Personalized Decorations Together?
You’ll want to create visual balance by grouping decorations in odd numbers, like three or five pieces together. Mix different heights and textures—hang some ornaments while placing others on shelves or mantels. I’ve learned that clustering similar colors creates harmony, but don’t forget to leave breathing room between displays. Trust me, overcrowding kills the magic! Try layering items at varying depths, and always step back to check if everything feels naturally connected and cozy.