You can create stunning Thanksgiving decorations using materials you probably already have at home. Transform pinecones into adorable turkey place cards with felt feathers and googly eyes, or craft magical harvest lanterns by pressing autumn leaves inside mason jars with battery tea lights. Wrap pumpkins in burlap for rustic centerpieces, build gratitude trees with branches and paper tags, or shape corn husks into elegant flower arrangements. These simple projects will elevate your holiday table beyond your expectations.
Design Highlights
- Transform pinecones into turkey place cards using felt feathers, googly eyes, and orange foam beaks for personalized table settings.
- Create mason jar harvest lanterns by securing autumn leaves inside with Mod Podge and adding battery-operated tea lights.
- Wrap pumpkins in burlap and secure with twine to make rustic centerpieces with varying sizes for visual depth.
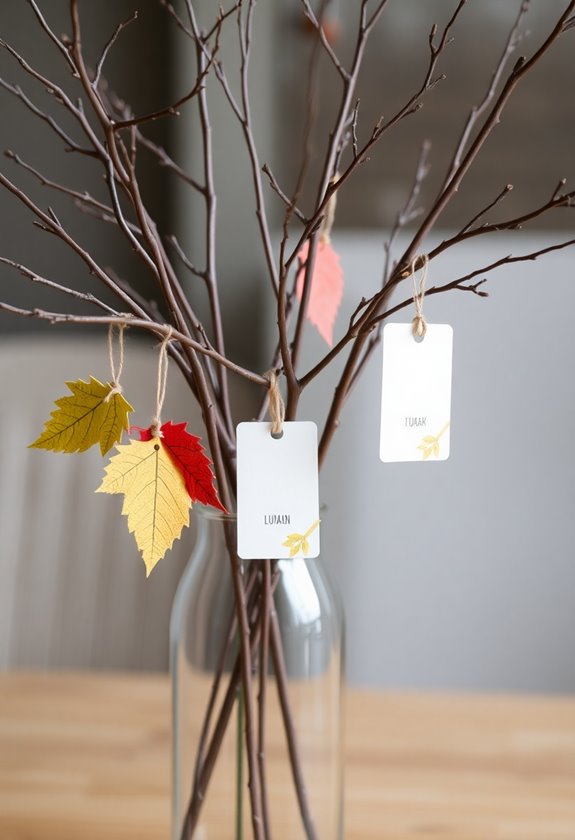
- Build a gratitude tree using branches in a vase with kraft paper leaf tags for family members to write thankful messages.
- Craft elegant flower arrangements from soaked corn husks shaped into roses and dahlias displayed in wooden bowls.
Pinecone Turkey Place Cards With Felt Feathers
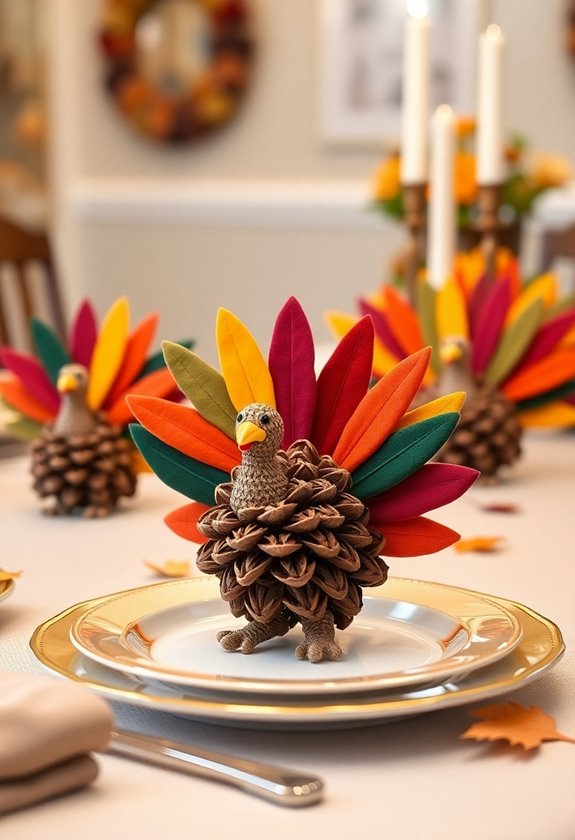
Although I’ve tried countless Thanksgiving crafts over the years, these pinecone turkey place cards remain my absolute favorite because they’re foolproof enough for kids yet charming enough to impress adults. You’ll transform ordinary pinecones into adorable table guests that’ll make everyone smile.
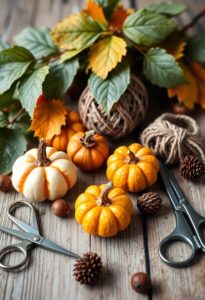
Start by gathering medium-sized pinecones, colorful felt sheets, googly eyes, and orange craft foam. Cut teardrop-shaped feathers from felt in autumn colors – reds, yellows, and browns work beautifully. Hot glue these feathers between the pinecone’s “scales” at the back, creating a magnificent tail display.
Next, cut a small triangle from orange foam for the beak and glue it on with the googly eyes. The wobblier the eyes, the more personality your turkey develops! Finally, write each guest’s name on a small card and tuck it beneath the pinecone.
I discovered these gems during a particularly stressful Thanksgiving prep, and they instantly lightened the mood while solving my place card dilemma. Adding these festive creations to your table will enhance your overall Thanksgiving closet decor and bring warmth to your gathering.
Mason Jar Harvest Lanterns With Autumn Leaves

While pinecone turkeys add whimsy to your table setting, nothing creates atmosphere quite like the warm glow of handmade harvest lanterns scattered throughout your dining space.
You’ll need mason jars, battery-operated tea lights, and freshly collected autumn leaves. I learned the hard way that wet leaves create a soggy mess, so make certain they’re completely dry first. Press colorful leaves against the jar’s interior, then carefully apply Mod Podge to secure them permanently.
Here’s my favorite trick: layer different leaf colors for depth. Start with darker reds and oranges, then add golden yellows on top. The overlapping creates beautiful shadows when lit.
Once your leaves are secured and dried, drop in your battery tea light. These lanterns work magic during dinner, casting dancing leaf patterns on your walls. I’ve made dozens over the years, and guests always ask for the secret. The answer? Patience and really good leaves make all the difference. Additionally, consider incorporating festive kitchen decor ideas to enhance your overall Thanksgiving atmosphere.
Burlap and Twine Pumpkin Centerpiece
Rustic charm takes center stage when you transform ordinary pumpkins into stunning burlap-wrapped centerpieces that’ll have your guests thinking you hired a professional decorator. I’ll never forget my first attempt at this craft – I was knee-deep in burlap scraps, looking like I’d wrestled with a scarecrow! But here’s the thing: these centerpieces are surprisingly forgiving, and the imperfections actually add character.
Start by gathering your supplies and visualizing these gorgeous elements:
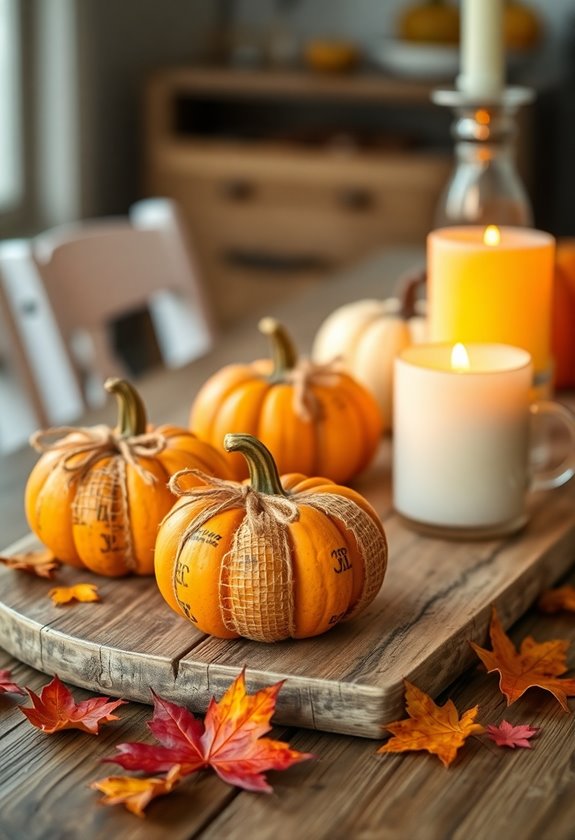
- Cream-colored burlap fabric draped elegantly around orange pumpkins, creating beautiful texture contrasts
- Natural jute twine wrapped snugly around the stems, securing everything with rustic bow details
- Scattered autumn leaves nestled between multiple pumpkins of varying sizes for depth
You’ll simply wrap each pumpkin like you’re gift-wrapping a present, securing with twine at the top. The key is embracing that slightly messy, farmhouse aesthetic – it’s supposed to look effortlessly charming, not perfectly polished. Additionally, incorporating Thanksgiving garden decor can elevate the overall ambiance of your setting, making it even more inviting for your guests.
Grateful Tree Branch Display With Paper Tags
When my daughter suggested we create a gratitude tree last year, I honestly thought it sounded a bit cheesy – until I watched our entire family gather around it every evening, sharing what made them thankful that day.
You’ll need sturdy branches from your yard, a tall vase, kraft paper tags, and twine. Start by selecting branches with interesting shapes – think character over perfection. Arrange them in your vase, creating natural height variations that catch the eye.
Cut paper tags in leaf shapes, punch small holes, and thread twine through each one. Place blank tags beside the display with pencils, encouraging everyone to write what they’re grateful for. As tags accumulate, your bare branches transform into a meaningful centerpiece.
The magic happens gradually. Each day brings new additions, creating conversations that wouldn’t have occurred otherwise. You’ll discover surprising insights about your loved ones through their handwritten gratitudes. Additionally, incorporating elements of cozy Thanksgiving bedroom decor can enhance the overall ambiance of your home during the holiday season.
Corn Husk Flower Arrangements in Wooden Bowls
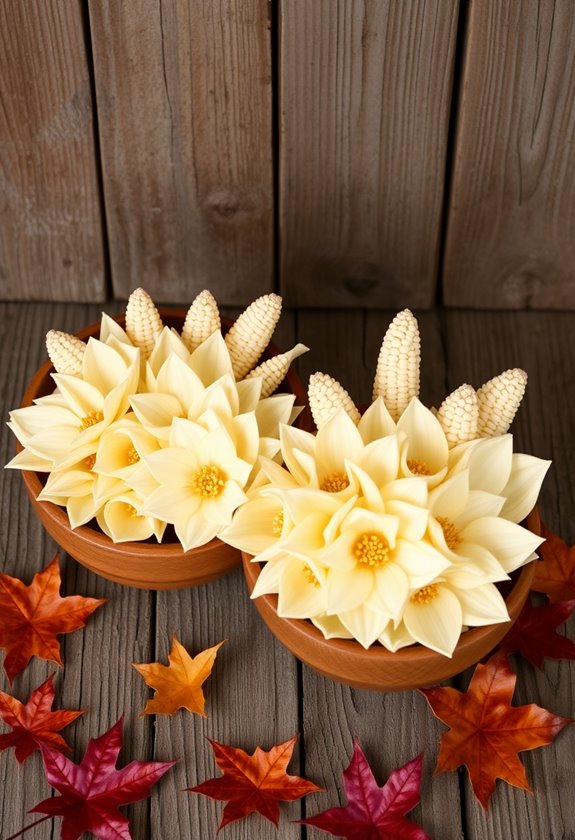
After discovering corn husks scattered around our local farmer’s market last October, I couldn’t resist gathering armfuls to experiment with – much to my husband’s bewilderment as he watched me stuff our car with what he called “farm scraps.” These papery golden husks, often discarded after corn harvest, transform into surprisingly elegant flowers that capture autumn’s warm palette perfectly.
You’ll want to soak dried husks in warm water for about twenty minutes until they’re pliable. Then, you can shape them into roses, dahlias, or simple layered blooms. The best part? They look absolutely stunning nestled in rustic wooden bowls.
Picture these gorgeous arrangements gracing your table:
- Golden corn husk roses spilling over weathered oak bowls
- Cream-colored dahlia replicas clustered in reclaimed barn wood vessels
- Mixed autumn blooms cascading from hand-carved maple centerpiece bowls
Your guests will never guess these sophisticated centerpieces started as humble corn husks! Additionally, incorporating Thanksgiving office decor can enhance the festive atmosphere in your workspace.
Frequently Asked Questions
How Far in Advance Can I Make These Thanksgiving Decorations?
You can make most decorations 1-2 weeks ahead, which I’ve learned saves you tons of stress! Paper crafts, painted pumpkins, and fabric elements store beautifully when kept dry. I always tackle mine early because, honestly, Thanksgiving week gets crazy with cooking prep. Fresh elements like real leaves or flowers should wait until 2-3 days before. Trust me, your future self will thank you for planning ahead and avoiding that last-minute scramble!
What’s the Total Cost to Make All Five DIY Projects?
You’re looking at roughly $25-35 total for all five projects, depending on what you’ve already got at home. I’ve found that acorns, pinecones, and branches are free if you’re willing to take a nature walk with the kids. The priciest items you’ll need are craft paints, ribbon, and small candles, but these stretch across multiple projects. Shop dollar stores first—you’ll save about half compared to craft stores, and honestly, the quality’s nearly identical.
Can These Ornaments Be Stored and Reused for Next Year?
You’ll definitely want to save these beauties for next year! I learned this the hard way after tossing my first batch – what a mistake. Store paper ornaments in airtight containers with tissue paper between layers, and keep pinecone crafts in breathable boxes. Your leaf garlands might get brittle, but everything else should survive just fine. Trust me, you’ll thank yourself next November when you’re not scrambling to remake everything!
How Long Does Each Craft Project Take to Complete?
Time flies like autumn leaves when you’re crafting! You’ll breeze through simple paper turkeys in just 15 minutes, while pinecone centerpieces take about 30 minutes once you’ve gathered supplies. I’ve learned that rushing kills creativity—my first attempt at corn husk dolls was a disaster because I didn’t allow the full hour they needed. Give yourself plenty of time, and you’ll create treasures that’ll make your guests smile for years to come.
Are There Child-Friendly Versions of These Decorations Kids Can Help Make?
You’ll love watching kids create their own masterpieces. Try simple paper turkey handprints, where they trace their hands and add colorful feathers—it’s messy but magical. Pine cone turkeys work wonderfully too; kids can glue on felt pieces and googly eyes. I’ve found that leaf garlands are perfect for little hands, and they’ll beam with pride seeing their creations displayed. Just prep materials beforehand, and you’re golden!