You’ll love these simple Thanksgiving crafts that turn everyday items into festive decorations! Create handprint turkey plates using brown paper plates and colorful paint, build gratitude trees with fallen leaves where kids write what they’re thankful for, or craft pine cone pilgrim families with wooden beads and construction paper hats. Don’t forget thankful pumpkin garlands, construction paper cornucopias, toilet roll Native American dolls, and coffee filter fall wreaths—each project brings unique seasonal magic to your home celebrations.
Design Highlights
- Paper plate turkeys using handprints for tail feathers create colorful decorations with paint, googly eyes, and orange beaks.
- Gratitude trees made from fallen leaves let kids write thankful messages to display in vases throughout November.
- Pine cone Pilgrim families use wooden beads for heads, construction paper hats, and fabric scraps for festive table centerpieces.
- Construction paper cornucopias filled with tiny paper fruits and vegetables capture the abundant spirit of Thanksgiving beautifully.
- Watercolor flower ornaments combine painted filters shaped into flowers with paper leaves for vibrant door decorations.
Paper Plate Turkey With Handprint Feathers
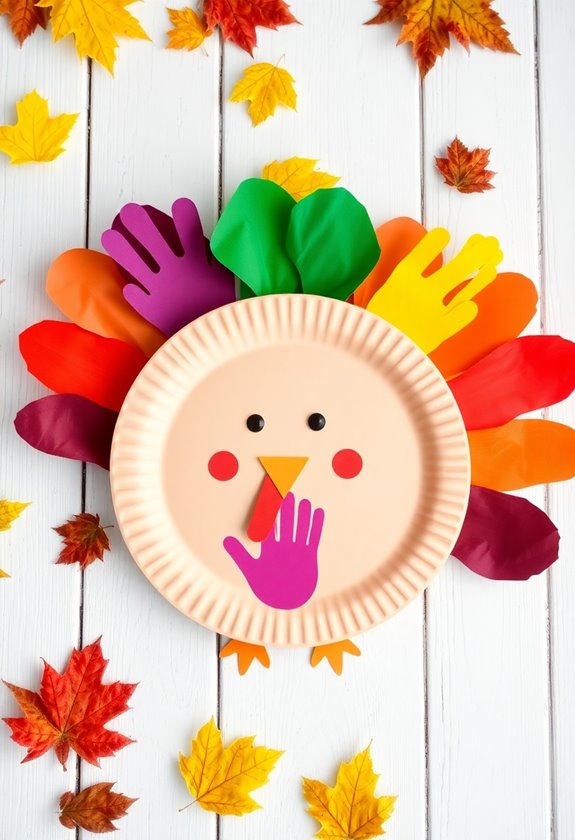
When I first discovered this paper plate turkey craft with my own kids, I honestly wasn’t expecting much – just another messy afternoon project that’d end up in the recycling bin by December. Boy, was I wrong! This simple craft became our go-to Thanksgiving tradition.
You’ll need brown paper plates, washable paint in fall colors, and baby wipes for cleanup. Start by having your child dip their hand in orange, red, or yellow paint, then press it firmly around the plate’s edge – these become the turkey’s gorgeous tail feathers. The plate’s center becomes the body.
Once dry, glue on a small orange triangle for the beak and add googly eyes. Here’s my secret: let each kid make multiple handprints in different colors. The layered effect looks absolutely stunning, and you’ll treasure seeing how their little hands change each year. Plus, you can enhance your Thanksgiving celebration with festive office decor ideas to create a warm atmosphere for the holiday.
Gratitude Tree With Fall Leaves
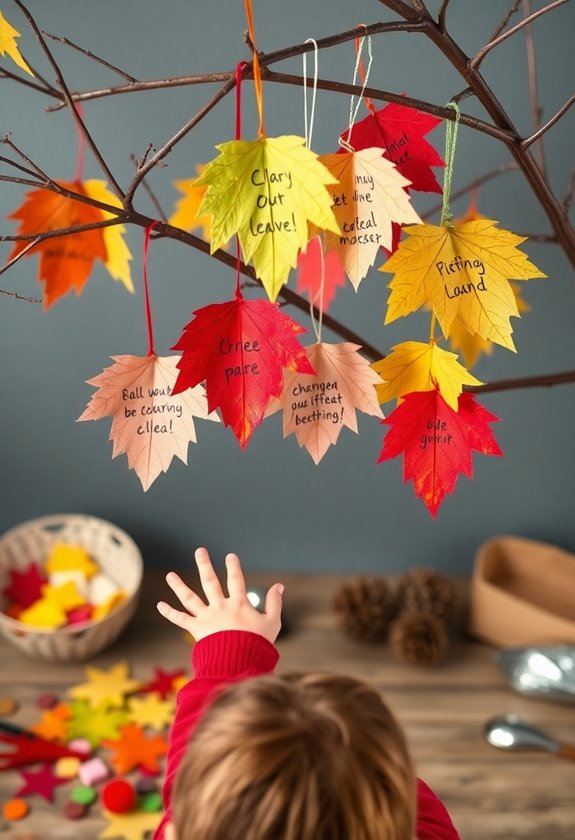
The gratitude tree has become my family’s most meaningful Thanksgiving tradition, transforming our dining room into a warm celebration of everything we’re thankful for. You’ll love watching your kids light up as they discover their own thankful hearts through this simple craft.
A simple craft that transforms your dining room into a warm celebration while helping children discover their own thankful hearts.
Start by collecting fallen leaves from your yard – the crunchier, the better! Your children will write what they’re grateful for on each leaf, then attach them to branches you’ve arranged in a tall vase. I’ve discovered that even my most reluctant writers get excited about this activity.
Here’s what makes this project special for families:
- Each family member contributes daily throughout November, watching the tree grow fuller
- Reading the gratitude leaves aloud becomes a cherished dinner tradition
- Younger kids can draw pictures instead of writing words
The magic happens when your quiet teenager suddenly shares something heartfelt, or your preschooler thanks God for dinosaurs. Plus, this activity pairs perfectly with stunning table decor to create a beautifully festive atmosphere!
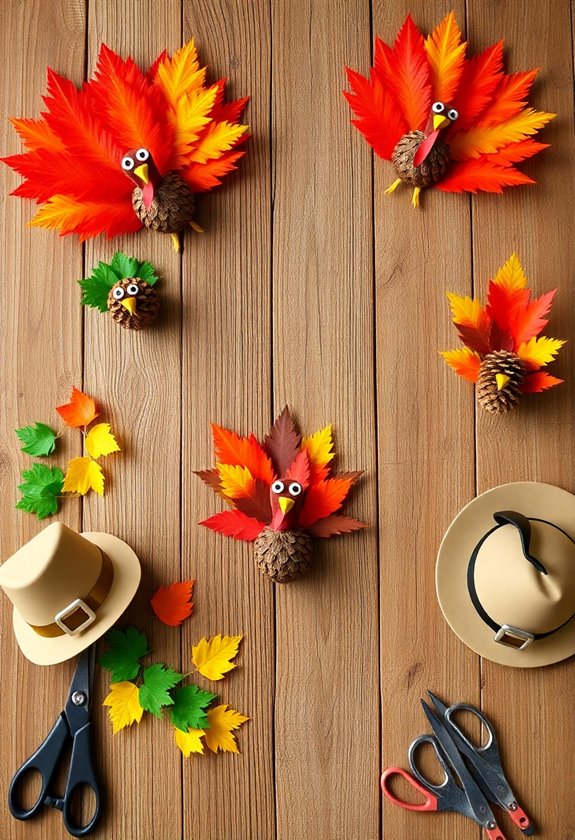
Pine Cone Pilgrim Family
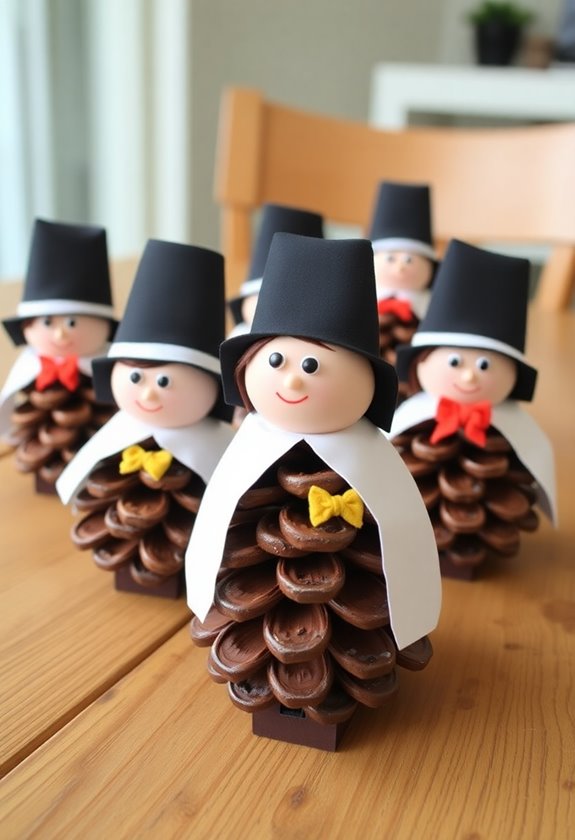
Pine cones scattered across your front yard hold incredible potential for creating the most adorable Pilgrim family you’ve ever seen. I discovered this craft during my first year teaching, when I desperately needed something that wouldn’t end in complete classroom chaos. These little characters became my saving grace!
Start by collecting medium-sized pine cones – they’ll serve as your Pilgrims’ bodies. For the heads, you’ll need wooden beads or small foam balls. Hot glue works best, but younger kids can use craft glue with adult supervision. Create Pilgrim hats using black construction paper, cutting small rectangles and rolling them into cylinders. The buckles? Tiny yellow paper squares do the trick perfectly.
Paint simple faces with fine-tip markers, and add fabric scraps for clothing details. My students always giggle when creating the stern Pilgrim expressions – apparently, they think historical figures never smiled! These pine cone families make wonderful table centerpieces or mantel decorations. You can enhance your Thanksgiving decor by incorporating cozy Thanksgiving living room decor ideas, which will complement your delightful crafts beautifully.
Construction Paper Cornucopia
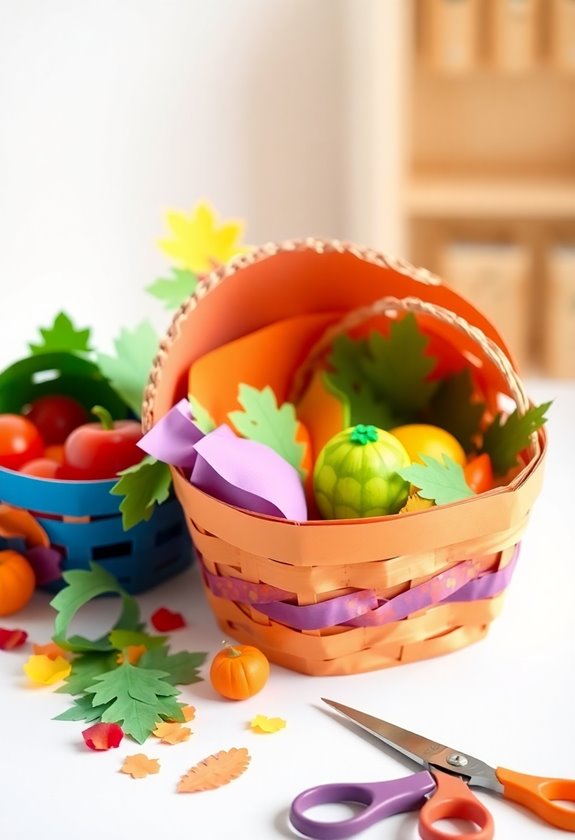
Here’s what makes this craft particularly brilliant:
- One cone template works for everyone – trace, cut, tape, and you’re halfway done
- Endless filling possibilities – from paper fruit to cotton ball “popcorn”
- Mistakes become character – wonky shapes just add homemade charm
You’ll start by rolling brown or tan construction paper into a cone shape, securing it with tape or glue. Then comes the fun part: creating tiny paper fruits and vegetables to spill out. I love watching kids get creative here – purple carrots, rainbow apples, and mysteriously geometric “tomatoes” all count as artistic expression. The final result always captures that abundant Thanksgiving spirit perfectly. Additionally, incorporating Thanksgiving closet decor ideas can enhance your home’s festive atmosphere while enjoying this craft.
Thankful Pumpkin Garland
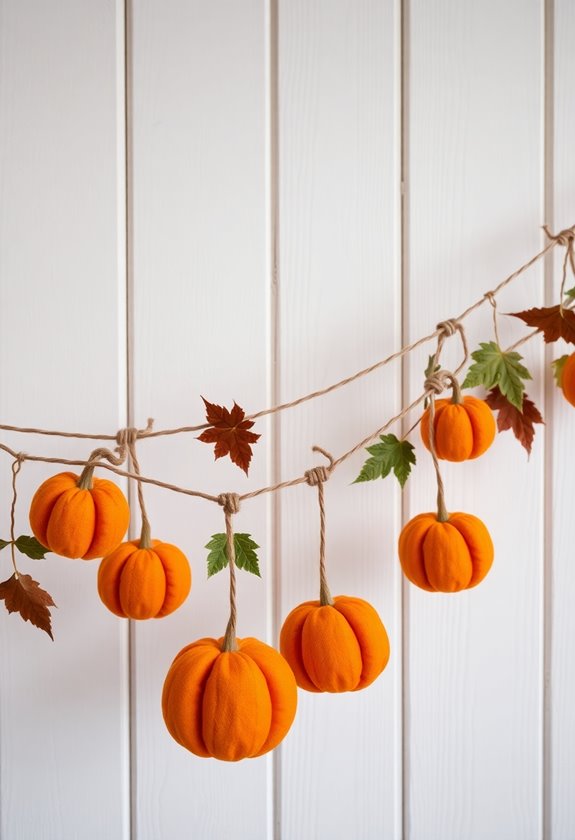
Five orange pumpkin cutouts strung together might seem simple, but this thankful garland becomes something magical when kids start writing what they’re grateful for on each one. I’ve watched my own children transform basic orange construction paper into heartfelt displays that remind us daily of life’s blessings.
Cut five pumpkin shapes from orange cardstock—make them chunky and imperfect, just like real pumpkins. Let your kids use markers or crayons to write one thing they’re thankful for on each pumpkin. Don’t be surprised when they struggle at first; gratitude isn’t always easy to express, especially for younger children.
Use a hole punch to create spaces at the top of each pumpkin, then thread colorful yarn through to connect them. The beauty isn’t in perfect spacing or neat handwriting—it’s in those honest words like “pizza,” “hugs,” and “my annoying little sister.” Hang this garland where everyone can see it. Consider adding festive Thanksgiving decor items to complement your DIY project and enhance the holiday spirit in your yard.
Toilet Roll Native American Dolls
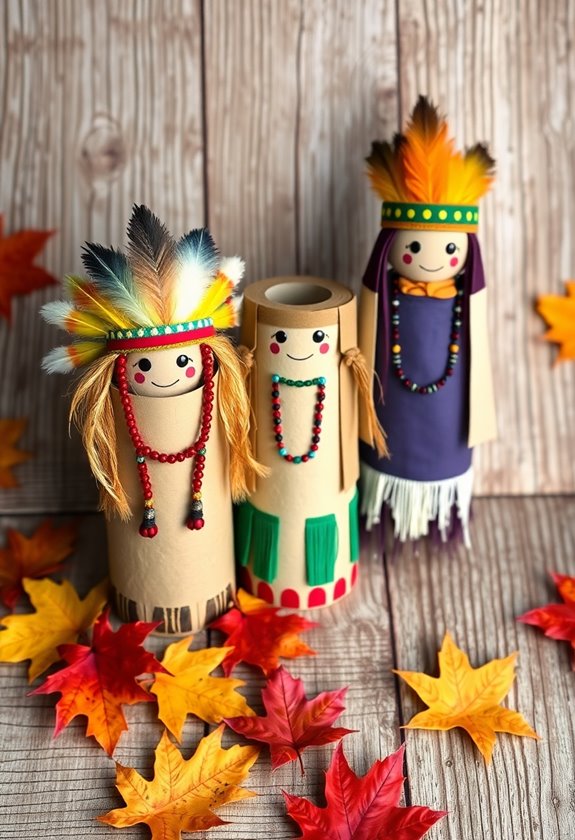
Cardboard tubes transform into meaningful cultural crafts when you approach this project with respect and genuine curiosity about Native American traditions. I’ve learned through years of teaching kids that this craft opens beautiful conversations about different cultures while creating something special together.
You’ll gather simple supplies: toilet paper rolls, construction paper, markers, feathers, and yarn. Start by wrapping your tube in tan or brown paper, securing it with glue. Here’s where the magic happens—you’re not just making a decoration, you’re exploring history.
- Create traditional clothing patterns using geometric designs inspired by authentic Native American art
- Add natural materials like feathers and beads to honor traditional crafting methods
- Research specific tribal traditions together to make your dolls culturally meaningful
I’ve watched children’s faces light up when they discover the stories behind the patterns they’re drawing. This isn’t just about following directions—it’s about connecting with rich cultural heritage while developing respect for traditions different from our own.
Coffee Filter Fall Wreath
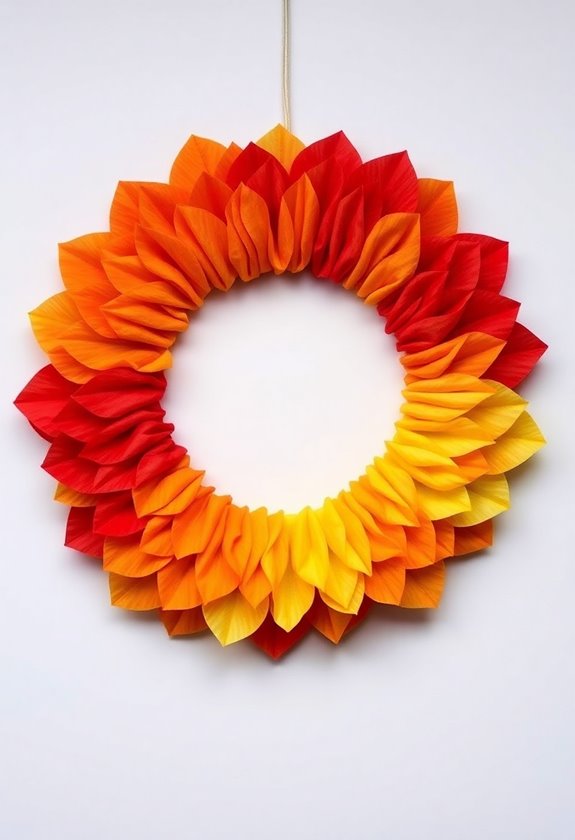
Three simple coffee filters can create the most stunning fall wreath you’ve ever made, and I’m not exaggerating—this project surprised me the first time I tried it with my students. You’ll need coffee filters, washable markers, a spray bottle, and construction paper for leaves.
First, you’ll color the coffee filters with autumn shades—oranges, reds, and yellows work beautifully. Here’s where the magic happens: lightly spray them with water and watch the colors bleed together like watercolors. It’s honestly mesmerizing, and your kids will be glued to this transformation.
Once they’re dry, scrunch each filter into a flower shape and secure with tape. Cut leaf shapes from construction paper, then arrange everything in a circle on a paper plate. The contrast between the delicate, translucent filters and bold paper leaves creates depth that’ll make you proud to hang this on your door.
Frequently Asked Questions
What Age Group Are These Thanksgiving Ornament Crafts Most Suitable For?
You’ll find these Thanksgiving ornament crafts perfect for kids aged 6-12, though I’ve watched my 4-year-old surprise me with her creativity when given simpler tasks. Elementary schoolers shine with these projects because they’ve developed fine motor skills but still love getting messy. I remember my 8-year-old son creating the most elaborate turkey ornament, complete with glitter everywhere—including his hair! Younger kids need more help, but they’re equally enthusiastic participants.
How Long Do These DIY Ornaments Typically Take to Complete?
You’ll find most ornaments take about 15-30 minutes to complete, which I’ve learned is perfect for keeping kids engaged without losing their attention. Simple crafts like paper turkeys or handprint leaves finish quickly, while more detailed projects like pinecone pilgrims might stretch longer. I always set realistic expectations—rushed crafts often end in frustration, but giving enough time lets creativity flow naturally and builds confidence.
Can These Ornaments Be Stored and Reused for Next Year’s Thanksgiving?
These handmade treasures are like time capsules, preserving your family’s creative memories year after year. You’ll absolutely love pulling them out next Thanksgiving! I’ve discovered that paper-based ornaments need gentle handling—store them in tissue paper inside sturdy boxes. My kids get so excited rediscovering their old creations, and honestly, it’s become our sweetest tradition. The key’s protecting them from moisture and crushing, then you’re golden for decades of grateful celebrations ahead.
What’s the Estimated Cost for Supplies Needed for All These Craft Projects?
You’ll spend roughly $15-25 for all the craft supplies, depending on what you’ve already got at home. I’ve learned that buying basics like construction paper, glue sticks, and markers in bulk saves money long-term. You probably have some items already—like old magazines for turkey feathers or empty toilet paper rolls. The best part? These supplies stretch across multiple projects, so you’re getting serious bang for your buck here.
Are There Any Safety Precautions Parents Should Consider During These Activities?
You’ll definitely want to supervise younger kids with scissors and hot glue guns—trust me, I’ve learned this the hard way! Keep sharp tools away from little hands, and consider child-safe alternatives like glue sticks. Watch for small parts that could be choking hazards, especially with toddlers around. Set up your workspace away from carpets since craft supplies can get messy. Most importantly, you’ll want to test any materials for allergies beforehand.