You’ll love how small spaces can pack maximum Halloween punch with these clever decorating tricks! Use miniature pumpkin clusters as low-profile centerpieces, create vertical displays with tiered stands, and add battery-operated string lights under tablecloths for spooky uplighting. Mason jar vignettes become portable mini-worlds, while wall-mounted floating shelves save precious table space. Don’t forget stretch cotton batting for realistic spider webs in corners—these strategic touches transform cramped dining rooms into haunting masterpieces that’ll have your guests discovering new details all evening long.
Design Highlights
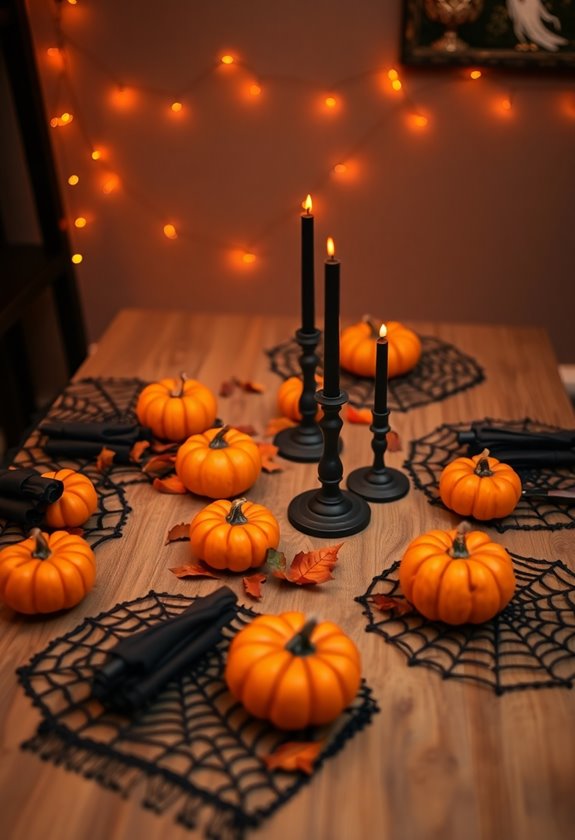
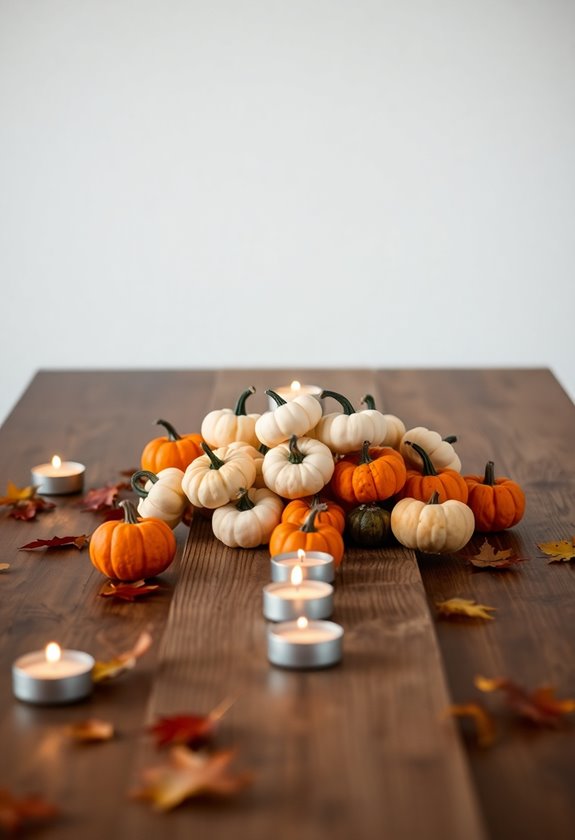
- Use miniature pumpkin centerpieces with battery-operated string lights to create cozy ambiance without overwhelming small table spaces.
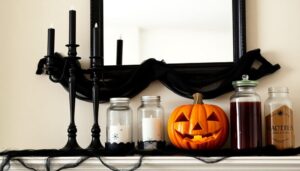
- Create compact mason jar vignettes containing themed mini-scenes like graveyards or witch potions for portable conversation starters.
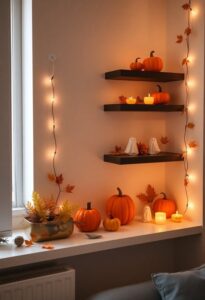
- Install wall-mounted floating shelves at varying heights to display decorations vertically and save valuable table surface area.
- Drape stretch cotton batting around table edges with tiny spiders for subtle spooky accents that don’t block guest visibility.
- Repurpose stackable storage boxes as decorative pedestals wrapped in Halloween paper for dual-purpose centerpiece bases and post-party organization.
Miniature Pumpkin Centerpieces That Save Space
When you’re working with limited table space, miniature pumpkins become your best friend for creating stunning Halloween centerpieces that won’t overwhelm your dining area. I’ve learned this lesson the hard way after cramming too many decorations onto my tiny apartment table, leaving barely enough room for actual food!
These palm-sized beauties work magic in small spaces. You can cluster three to five mini pumpkins down your table’s center, alternating orange and white varieties for visual interest. I love adding battery-operated string lights weaving between them – it creates that cozy, intimate atmosphere you’re craving without taking up precious real estate. Plus, incorporating spooktacular Halloween dining table decor ideas can elevate your setup even further.
Try hollowing out a few miniatures to hold tea lights or small succulents. Last year, I discovered that painting some with metallic gold transformed my centerpiece from ordinary to absolutely enchanting. The key is keeping everything low-profile so guests can still see each other across the table while enjoying your spook-tacular creation.
Vertical Halloween Displays Using Tiered Stands
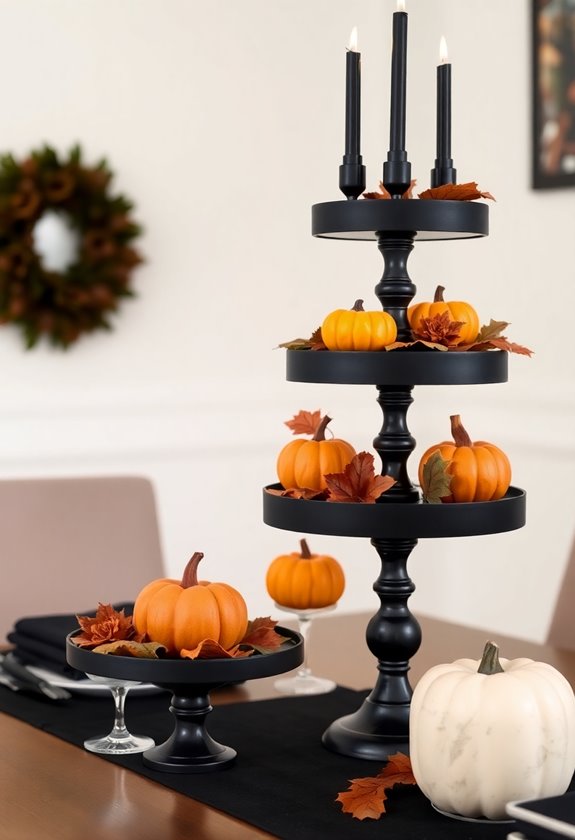
Tiered stands revolutionize your Halloween table game by building upward instead of outward, and I can’t believe it took me three years of cluttered holiday disasters to figure this out! You’ll create stunning vertical displays that maximize every inch while keeping your space organized.
I discovered these game-changers during my fourth Halloween hosting attempt, when my dining table looked like a spooky yard sale explosion. Now I stack decorations strategically, creating layers that draw eyes upward and make small spaces feel magical.
Here’s what works best on tiered stands:
- Bottom tier: Battery-operated candles and mini skulls for dramatic lighting
- Middle tier: Small pumpkins, plastic spiders, and candy corn bowls
- Top tier: Lightweight decorations like paper bats or foam tombstones
You’ll love how these stands transform chaos into organized beauty. Mix different heights and materials—wooden cake stands, metal plant risers, even sturdy books wrapped in Halloween fabric create perfect pedestals for your spooky masterpiece. Consider adding Halloween kitchen island decor for an extra festive touch!
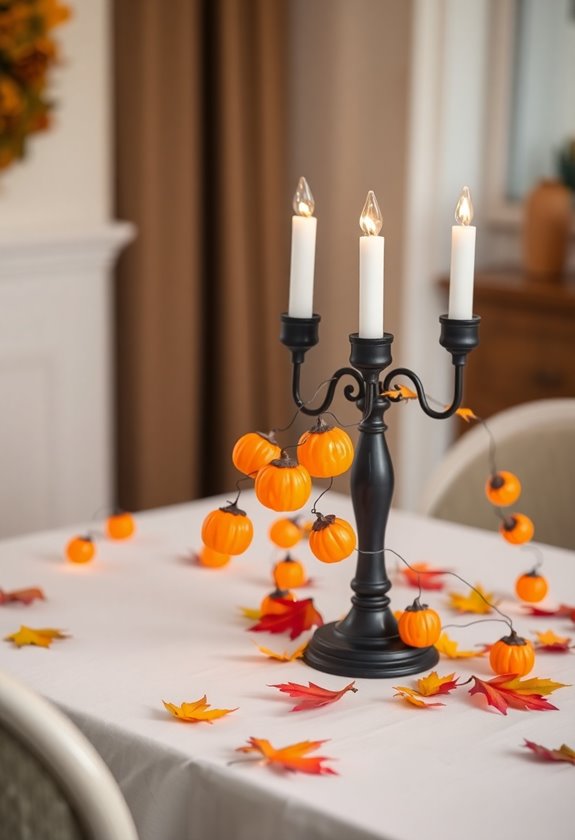
Multi-Purpose Candle Arrangements With Spooky Flair
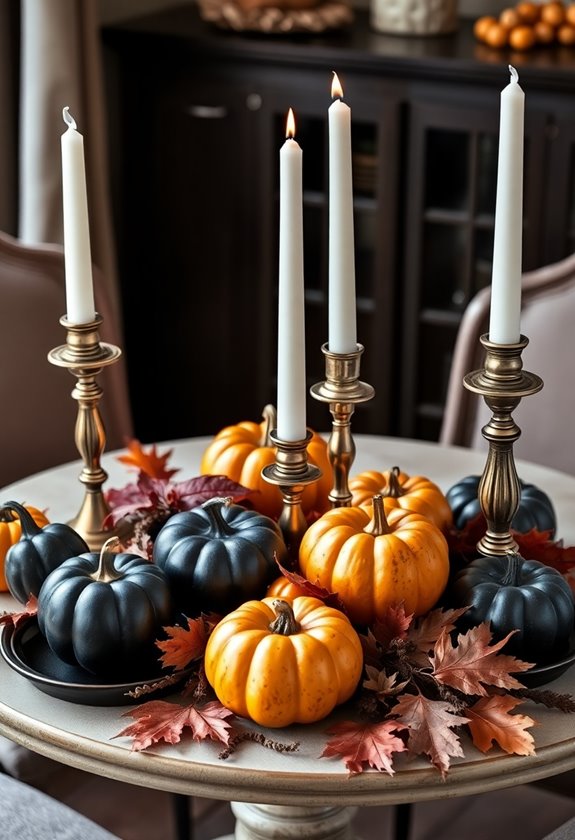
Flickering flames transform ordinary dinner parties into spine-tingling experiences, and I learned this lesson during my most memorable Halloween disaster when half my decorations caught fire because I didn’t plan my candle placement properly! Now I’m obsessed with creating safe, spooky candle arrangements that’ll make your guests gasp with delight.
You’ll love how battery-operated candles nestled inside carved mini pumpkins create haunting ambiance without the fire risk. Group three different heights together for visual drama, then surround them with plastic spiders or skeleton hands. For real candles, place them in hurricane glass holders decorated with black lace or fake cobwebs.
Try floating orange and black candles in glass bowls filled with water and plastic eyeballs – it’s creepy yet elegant! Mason jars wrapped in cheesecloth with battery tea lights inside make perfect ghostly luminaries. Remember, you can reuse these arrangements for regular dinner parties by simply swapping out the spooky elements. Incorporating durable materials like metal candelabra holders ensures that your elegant displays remain stable and safe throughout the night.
Compact Mason Jar Halloween Vignettes

Three small mason jars completely transformed my cramped apartment‘s dining table last Halloween, proving you don’t need massive centerpieces to create show-stopping spooky scenes! These compact vignettes pack serious punch while leaving room for actual food—a win-win in my tiny space.
I discovered mason jars work brilliantly because they’re versatile containers that instantly create contained mini-worlds. You can fill them with different spooky elements to tell three distinct Halloween stories across your table.
Here are my go-to combinations that never fail:
- Graveyard scene: Black sand, miniature tombstones, and skeleton hands
- Witch’s potion: Colored water, floating eyeballs, and dry ice effect
- Haunted forest: Bare twigs, plastic spiders, and orange fairy lights
The beauty lies in their portability—you’ll easily rearrange them throughout dinner. Plus, guests love examining each jar’s tiny details up close, creating natural conversation starters that make your gathering memorable. Halloween kitchen decor ideas can further enhance your festive atmosphere and inspire creativity in your decor.
Wall-Mounted Floating Shelves for Extra Decor Space
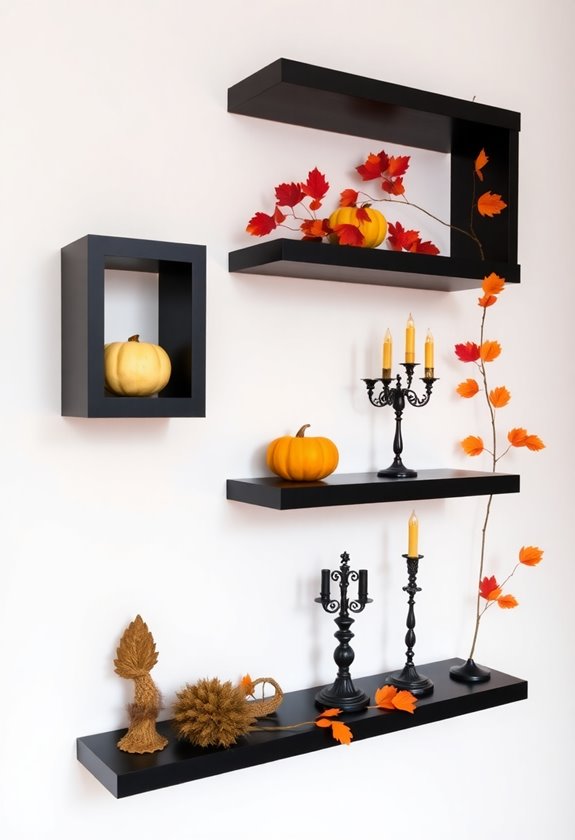
When you’re running out of table space but still want to showcase your Halloween collection, floating shelves become your secret weapon for creating vertical spooky displays! I learned this trick while filming a horror short in my cramped apartment – suddenly, my tiny dining area transformed into a haunted mansion set.
You’ll want to install shelves at varying heights, creating visual interest that draws the eye upward. Place lightweight decorations like miniature pumpkins, battery-operated candles, and small skeleton figurines on each level. I’ve found that clustering odd numbers of items works best – three mini cauldrons here, five plastic spiders there.
The beauty of wall-mounted shelves is they don’t steal precious table real estate. You can still serve dinner while your Halloween magic happens above eye level. Plus, when guests look up from their plates, they’re greeted by your carefully curated spooky scenes floating mysteriously on the walls. To enhance your decor even further, consider adding Halloween attic decor ideas that can complement your floating displays and create an even more immersive atmosphere.
Layered Table Runner Techniques for Visual Depth
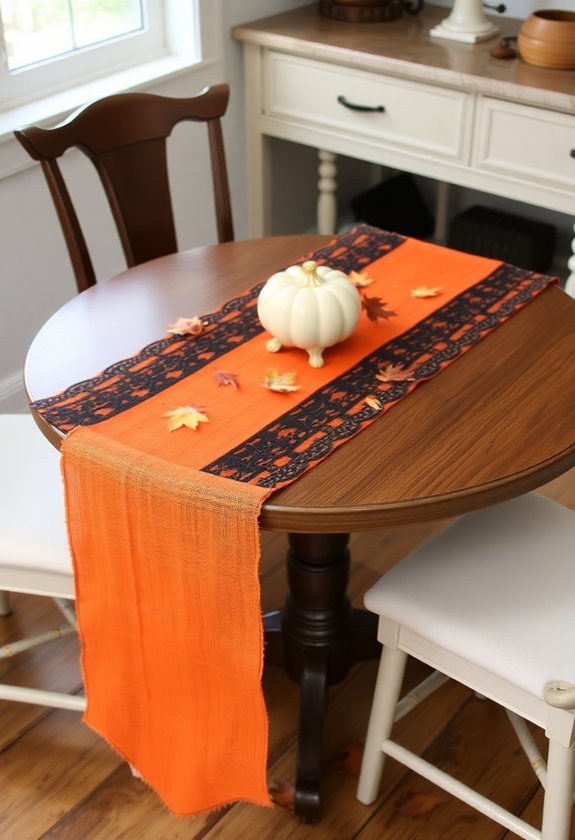
While floating shelves handle your vertical displays beautifully, your table surface deserves just as much creative attention through layered runner techniques that’ll make your Halloween spread look professionally designed.
I’ve learned that creating depth isn’t about buying expensive pieces—it’s about strategic layering. Start with your longest runner as the base, then add shorter ones on top. Last Halloween, I used my grandmother’s lace tablecloth underneath an orange burlap runner, and guests couldn’t stop complimenting the sophisticated look.
Here’s my foolproof layering system:
- Base layer: Use your widest, longest runner in a neutral Halloween color
- Middle layer: Add a contrasting texture runner that’s 6 inches shorter on each end
- Top accent: Place a narrow decorative strip or ribbon down the center
This technique works brilliantly in small spaces because it draws the eye lengthwise, making your table appear larger while maximizing visual impact.
Small-Scale Spider Web Corner Accents
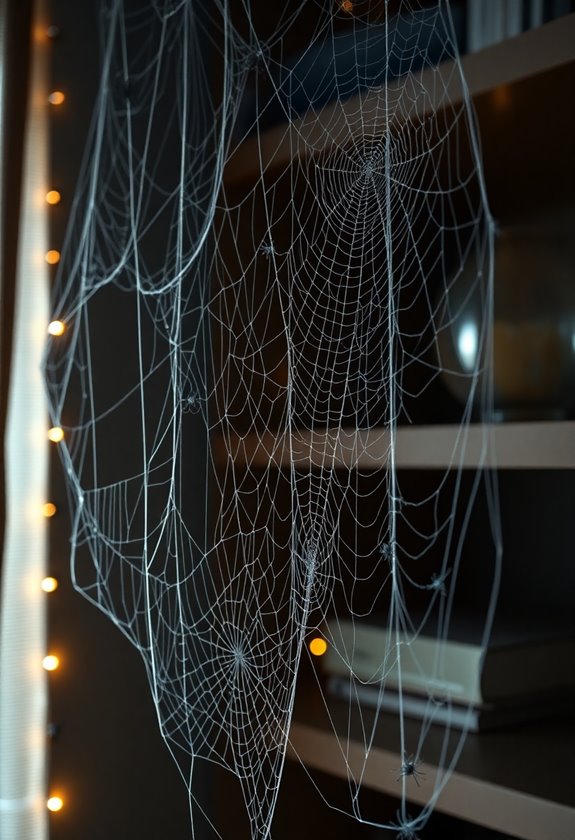
Four simple spider webs tucked into your table’s corners create an instant Halloween atmosphere without overwhelming your carefully planned decor. You’ll love how these delicate accents frame your tablescape like a spooky picture border.
I’ve discovered that stretching cotton batting works brilliantly for realistic web textures. Simply pull the fibers apart until they’re translucent, then drape them naturally around your table’s edges. Don’t make them perfect—real webs aren’t symmetrical! Add tiny plastic spiders for extra creepiness, but keep it subtle.
Corner placement is genius because it won’t interfere with your guests’ dining experience. I learned this the hard way when my first Halloween dinner featured webs draped across plates—definitely not appetizing! Now I position them where they’ll catch candlelight beautifully without blocking conversation.
These miniature masterpieces take just minutes to create but deliver maximum spooky impact for your intimate Halloween gathering.
Battery-Operated String Light Magic for Tight Spaces
Since cramped dining spaces often struggle with traditional lighting setups, battery-operated string lights become your secret weapon for creating enchanting Halloween ambiance without the hassle of extension cords or outlet hunting.
Battery-operated string lights eliminate the cord chaos while delivering maximum Halloween magic in even the tiniest dining spaces.
I’ve discovered these portable powerhouses work wonders in tight quarters. You can weave orange and purple lights through centerpieces, drape them along table edges, or create floating ghost effects by wrapping them around white fabric. The freedom from outlets means you’ll position lights exactly where they’re needed most.
Here are three game-changing placement strategies:
- Under-table uplighting – Hide warm white strings beneath translucent tablecloths for eerie glowing effects
- Vertical accent walls – Attach lights to nearby walls using removable hooks for backdrop drama
- Layered centerpiece integration – Thread mini lights through pumpkins, gourds, and decorative branches
I always keep extra batteries handy because nothing kills the Halloween spirit faster than dimming lights mid-party. These versatile illuminators transform even the smallest dining nooks into enchanting haunted hideaways.
Stackable Halloween Storage Boxes as Decor Elements

After you’ve mastered the lighting magic, smart decorators know that storage doesn’t have to disappear during Halloween season. I discovered this trick while frantically preparing for my daughter’s Halloween party—those orange and black storage boxes became instant decor heroes.
Stack them at varying heights to create dramatic pedestals for your spooky centerpieces. You’ll love how a medium box topped with a smaller one instantly becomes the perfect platform for your carved pumpkin or skeleton figurine. I’ve found that wrapping them in Halloween-themed paper transforms ordinary storage into themed display pieces.
Here’s my favorite part: after the party, everything goes right back into those same boxes for next year’s storage. It’s like getting double duty from your decorating budget! The boxes work especially well in tight spaces because they’re doing two jobs—storing your regular stuff during the party and creating vertical interest on your table.
Magnetic and Adhesive Decorations for Vertical Surfaces
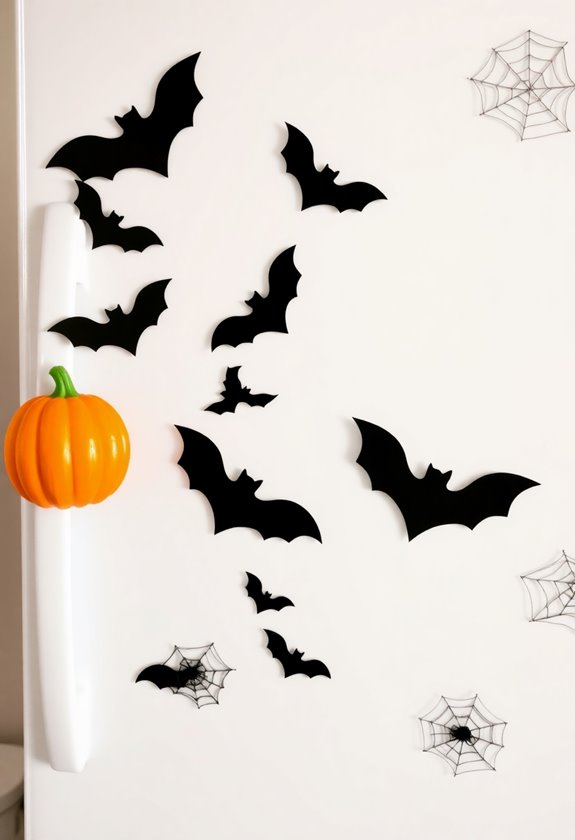
Three years ago, while decorating for my son’s monster movie marathon, I realized I’d been ignoring my biggest canvas—the walls themselves. You don’t need permanent changes to transform your vertical spaces into spooky masterpieces.
Magnetic decorations work brilliantly on refrigerators, metal cabinets, and even hidden steel strips behind artwork. I’ve collected dozens of miniature pumpkins, bats, and ghost magnets that create instant atmosphere. For non-magnetic surfaces, removable adhesive decorations become your best friend—they won’t damage paint or leave residue.
Here’s what works best for vertical Halloween magic:
- Layered wall clings creating depth with overlapping shadows and silhouettes
- Magnetic spice jars filled with colored rice resembling potions on your fridge
- Adhesive window gels that catch light beautifully during both day and night
These solutions maximize your decorating space without cluttering precious table real estate, giving you more room for food and festivities.
Frequently Asked Questions
How Much Should I Budget for Halloween Table Decorations in Small Spaces?
Want to create spooky magic without breaking the bank? You’ll need about $15-30 for stunning small-space Halloween table decor. I’ve discovered that dollar store finds work beautifully—grab mini pumpkins, battery candles, and plastic spiders for under $10. Add a $5 black tablecloth and some $8 orange string lights, and you’re set! Last year, I spent just $22 and guests couldn’t stop raving about my tiny apartment’s transformed dining nook.
What Colors Work Best for Halloween Decor in Minimalist Small Apartments?
You’ll want to stick with a classic black and white palette—it’s incredibly chic and won’t overwhelm your space. I learned this the hard way after my orange-heavy disaster last year! Add one accent color like deep burgundy or forest green for warmth. Metallics, especially matte gold or copper, create stunning contrast without screaming “Halloween store explosion.” Trust me, less is definitely more in minimalist spaces.
How Do I Safely Secure Decorations on Rented Apartment Surfaces?
Like a ghost leaving no trace, you’ll want damage-free solutions for your rental. I’ve learned this lesson the hard way after losing deposits! Use removable adhesive strips for lightweight items, suction cups on smooth surfaces, and tension rods between walls. Command strips became my best friend when decorating tight spaces. For heavier pieces, try weighted bases or clamp-on holders. Your landlord won’t even know you’ve transformed your cozy space into a spooky haven.
Can Halloween Table Decor Work With My Existing Year-Round Home Style?
You’ll absolutely love how Halloween table decor blends with your existing style! I’ve discovered that choosing decorations in your home’s color palette works magic—if you’ve got modern minimalist vibes, try sleek black pumpkins and geometric candles. For farmhouse lovers, burlap table runners with mini gourds create perfect harmony. The trick I’ve learned is selecting pieces that complement, not clash with, your year-round aesthetic while adding seasonal charm.
How Early Should I Start Setting up Halloween Decorations in Small Spaces?
You can start setting up in early October, giving yourself plenty of time to experiment without rushing. I’ve learned that small spaces benefit from gradual layering—adding one spooky element at a time lets you see what works. Start with your base pieces like tablecloths or runners, then build up. This approach prevents overwhelming your space and helps you adjust if something doesn’t feel right before guests arrive.