You can create stunning Thanksgiving decorations using items you’d normally toss! Transform cardboard boxes into turkey centerpieces with real leaf feathers, punch autumn patterns into tin cans for magical luminaries, and craft pumpkin garlands from brown paper bags. Wine corks become charming acorn place card holders, while newspapers roll into elegant cornucopias. Don’t overlook egg cartons for mini pumpkin displays or cereal boxes for pilgrim hat treats—these simple transformations will reveal countless creative possibilities.
Design Highlights
- Transform cardboard boxes into turkey centerpieces using fallen leaves as feathers and warm paint colors for authentic seasonal decorations.
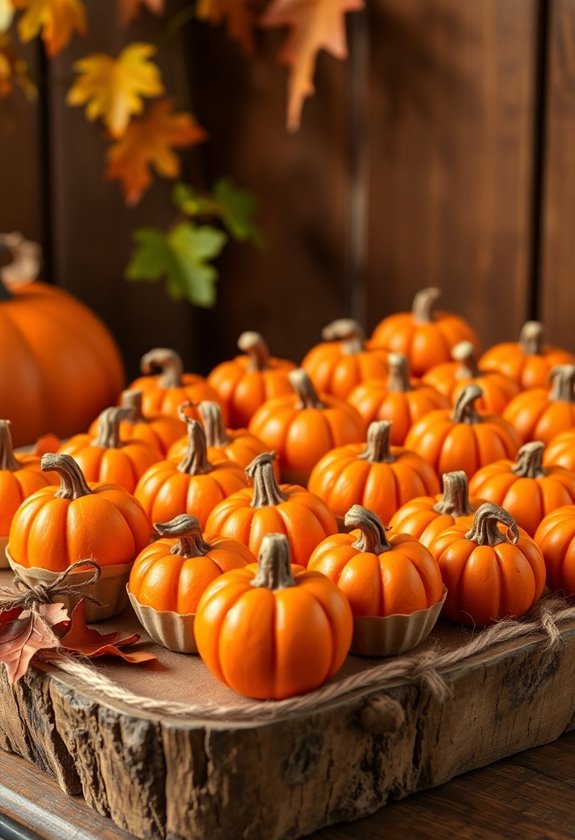
- Create pumpkin ornaments from egg carton cups painted in orange shades, arranged with natural elements like moss and pinecones.
- Repurpose wine corks into acorn place card holders by attaching real acorn caps and cutting grooves for cards.
- Make luminaries from empty soup cans by punching leaf patterns and using battery-operated tea lights for ambient lighting.
- Craft garlands from brown paper bags cut into pumpkin shapes and threaded with natural twine for eco-friendly hanging decorations.
Cardboard Turkey Centerpiece With Feathered Tail
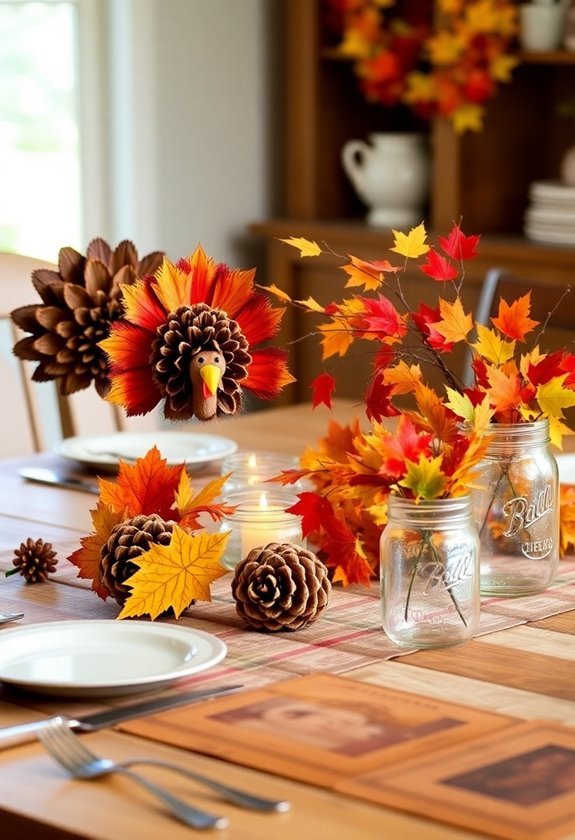
Thanksgiving crafting doesn’t have to break the bank or harm the environment, and this cardboard turkey centerpiece proves exactly that point. You’ll transform an ordinary cardboard box into something magical, just like I discovered when my daughter’s school project deadline crept up unexpectedly. Start by cutting your turkey’s body from sturdy cardboard—cereal boxes work perfectly. Here’s where the magic happens: gather fallen leaves from your yard for authentic feathers. I’ve learned that pressing them between books for a day creates the crispest results.
Cut tail slits into your turkey’s back, then slide those gorgeous leaves through like nature’s own decorative fan. Paint the body with warm browns and oranges, adding googly eyes for personality. My family’s turkey has starred at three Thanksgivings now, proving that eco-friendly doesn’t mean temporary. Elevate your Thanksgiving table with this unique centerpiece by positioning it among gourds and pinecones for a centerpiece that’ll have guests asking for your secret.
Tin Can Harvest Luminaries With Autumn Leaf Cutouts
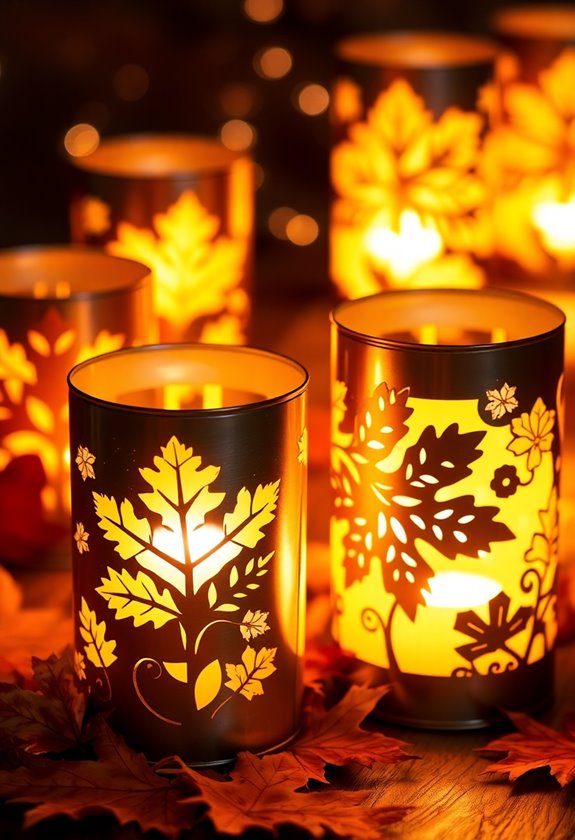
Transform empty soup cans into enchanting luminaries that’ll cast dancing leaf shadows across your dinner table, creating the kind of autumn magic that makes everyone pause mid-conversation. I discovered this technique while filming a documentary about sustainable living—sometimes the best discoveries happen when you’re focused on something else entirely.
Start by soaking off labels and cleaning your cans thoroughly. Here’s where it gets fun: sketch maple, oak, or birch leaves around the can’s surface. Using a hammer and nail, carefully punch holes along your leaf outlines. The secret I learned after accidentally puncturing my thumb? Place a towel inside the can for stability—trust me on this one.
Once you’ve created your leaf patterns, drop battery-operated tea lights inside. The warm glow filtering through those tiny holes transforms ordinary recycled cans into stunning harvest decorations that’ll have your guests wondering where you bought such beautiful luminaries. Additionally, these eco-friendly decorations align perfectly with sustainable living practices, enhancing your Thanksgiving celebration while being kind to the planet.
Paper Bag Pumpkin Garland With Natural Twine
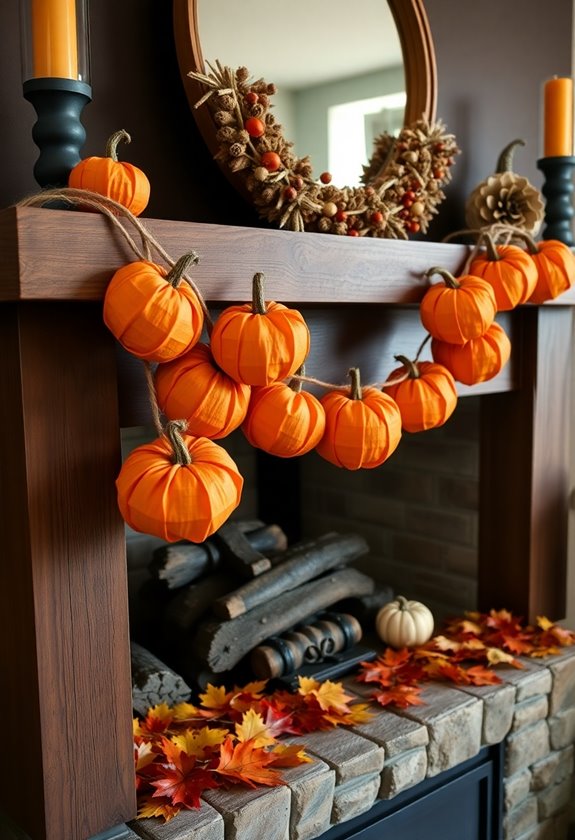
Creativity blooms when you’re working with the simplest materials, and nothing proves this better than turning ordinary brown paper bags into charming pumpkin garland that’ll stretch across your mantel or doorway. I discovered this technique during a particularly tight budget year when store-bought decorations weren’t an option, and honestly, the homemade version turned out more beautiful than anything I could’ve purchased.
Start by cutting paper bags into pumpkin shapes, then gently crumple each piece to create natural texture—think of it like aging paper for that vintage film look I’m always chasing in my projects. The key is varying your sizes; mix large and small pumpkins for visual interest. Thread natural twine through small holes punched at the top, spacing them about six inches apart. The rough texture of jute twine adds authentic charm that synthetic alternatives simply can’t match, creating rustic elegance that’ll make your guests wonder where you found such unique décor. Plus, using eco-friendly materials not only enhances your decor but also promotes sustainability during the holiday season.
Wine Cork Acorn Place Card Holders
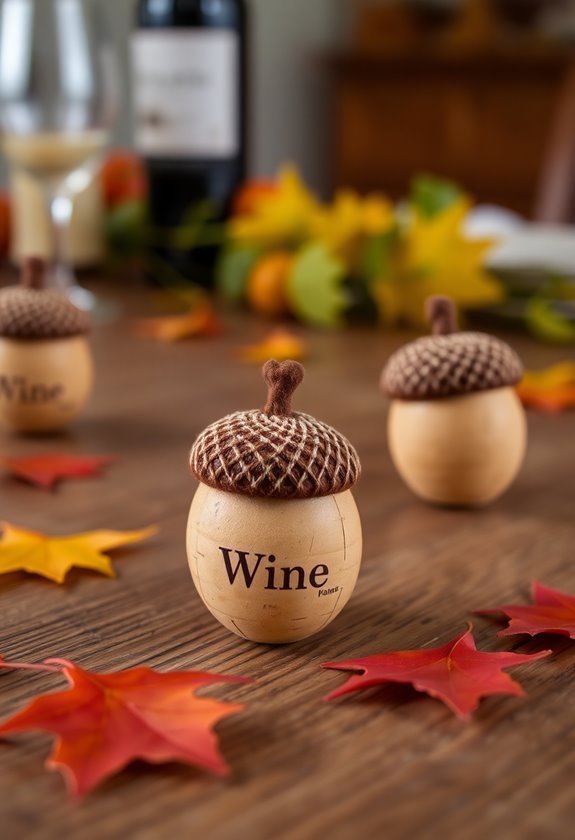
The memory of collecting fallen acorns with my daughter last autumn sparked an idea that’s become my favorite way to personalize dinner table seating—crafting miniature acorn place card holders from saved wine corks. These charming little holders bring nature’s warmth to your Thanksgiving table while giving those wine corks a second life.
You’ll love how simple this project is. Just hot-glue an acorn cap to the top of each cork, creating an adorable mini acorn. Then, slice a narrow groove along the cork’s side to hold place cards securely.
Here’s what makes these special:
- Each cork tells a story from celebrations past
- Natural acorn caps add authentic woodland charm
- Kids can help gather materials during nature walks
I’ve discovered that imperfect acorn caps work beautifully—they add character that store-bought decorations can’t match. Your guests will smile when they find their personalized acorn waiting at their seat. Enhance your festive table with festive kitchen decor ideas that complement these delightful place card holders.
Newspaper Cornucopia Filled With Dried Goods

Five years ago, I accidentally discovered the perfect solution to my overflowing recycling bin and empty centerpiece dilemma when I twisted old newspapers into my first cornucopia. You’ll love how simple this project is – just roll newspaper sheets into a cone shape, securing with tape or glue as you go.
Start by overlapping three newspaper sheets, then roll diagonally from one corner to create that classic horn shape. The beauty lies in the imperfections; crinkled edges add character! Once you’ve formed your cornucopia, fill it with dried corn kernels, acorns, mini pumpkins, or colorful leaves you’ve collected.
I’ve discovered that Sunday comics work wonderfully too – they add unexpected pops of color. You can even stuff tissue paper inside first to help smaller items stay put. This centerpiece costs practically nothing, yet guests always ask where I bought it. Sometimes the best decorations come from yesterday’s headlines! To enhance your festive decor, consider adding Thanksgiving pantry decor ideas that elevate your home atmosphere.
Glass Jar Gratitude Lanterns With Burlap Wrapping
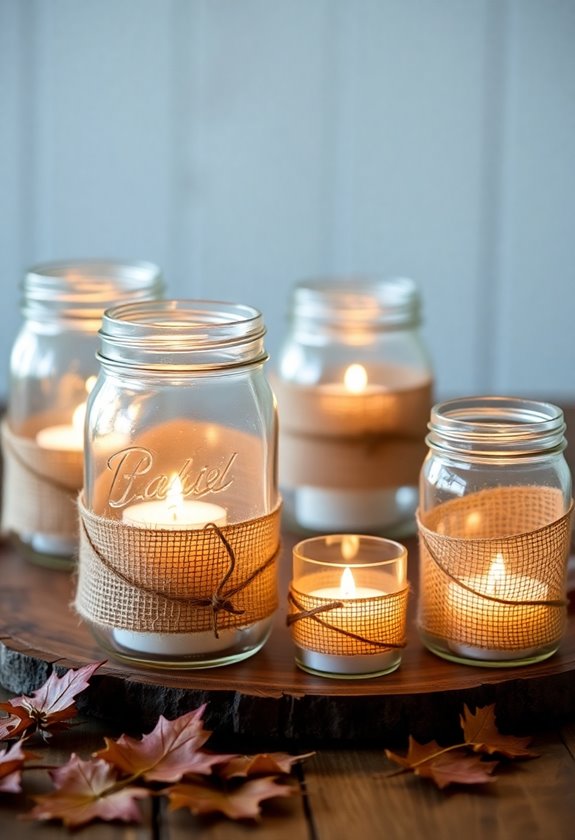
Warmth radiates from these simple glass jar lanterns in a way that perfectly captures Thanksgiving’s cozy spirit. You’ll transform ordinary mason jars into magical gratitude beacons that’ll make your dining room feel like a rustic farmhouse retreat.
Transform ordinary mason jars into magical gratitude beacons that radiate warmth and capture Thanksgiving’s perfectly cozy spirit.
I’ve discovered that wrapping these jars in burlap creates the perfect autumn texture – it’s like giving your lanterns a cozy sweater! Here’s what you’ll need:
- Clean glass jars of various sizes
- Natural burlap strips or ribbon
- Battery-operated tea lights or string lights
Simply wrap the burlap around each jar’s middle, securing it with a dab of hot glue or twine. Then, drop in your lights and watch the magic happen. The burlap diffuses the glow beautifully, creating soft shadows that dance across your table.
What makes these special? Write gratitude messages on small paper strips and tuck them inside. Your guests can read them during dinner, sparking meaningful conversations about thankfulness.
Egg Carton Mini Pumpkin Patch Display
Moving from glowing gratitude displays to charming miniature landscapes, you’ll love how egg cartons transform into the cutest pumpkin patch centerpieces I’ve ever created! I discovered this project during my first attempt at zero-waste crafting, and honestly, I was skeptical about turning trash into treasure.
Cut individual cups from cardboard egg cartons, then paint them in classic pumpkin shades—burnt orange, deep amber, and golden yellow. Once they’re dry, add realistic details with a fine brush: vertical ridges using darker orange, and tiny brown stems crafted from twigs or paper scraps.
The magic happens when you arrange these mini pumpkins on a wooden tray with moss, fallen leaves, and small pinecones. My kids helped create our first patch, and we couldn’t stop giggling at how professional it looked! This display works perfectly as a table centerpiece or mantel decoration, proving that sustainable crafting doesn’t mean sacrificing style.
Cereal Box Pilgrim Hat Treat Containers
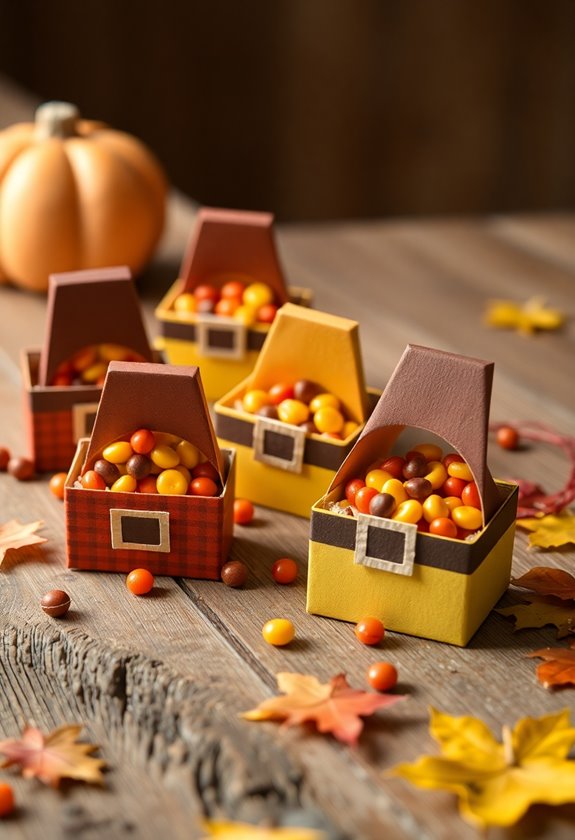
Creativity strikes again with these adorable pilgrim hat containers that’ll make your guests smile before they even peek inside for treats! I discovered this craft during my first Thanksgiving hosting disaster—when I realized I’d forgotten party favors entirely. Racing to my recycling bin at 6 AM, I spotted empty cereal boxes and had my eureka moment.
You’ll transform ordinary breakfast boxes into charming pilgrim hats by cutting cone shapes and adding paper brims. Here’s what makes this project especially rewarding:
- Each hat holds generous portions of candy, nuts, or homemade cookies
- Kids can personalize them with markers, stickers, or glitter
- They double as place cards when you write names on decorative buckles
The best part? You’re creating memories while reducing waste. I’ve watched families gather around my kitchen table, laughing as they decorated these containers together. That’s when I knew I’d struck gold with this simple, sustainable craft.
Plastic Bottle Fall Leaf Wind Catchers

While you’re basking in the success of those pilgrim hat containers, let’s channel that same upcycling energy into something that’ll catch both wind and compliments—plastic bottle fall leaf wind catchers!
I discovered this project during a particularly windy autumn when my neighbor’s store-bought decorations kept flying away. These homemade beauties stayed put and looked stunning! You’ll need clear plastic bottles, autumn-colored permanent markers, scissors, and string.
Cut the bottles into leaf shapes—don’t worry about perfection; real leaves aren’t symmetrical either. Color them with vibrant oranges, reds, and yellows, adding veins for authenticity. Punch small holes near the stems and thread fishing line through them.
Here’s my secret: vary the lengths dramatically. Some leaves should dangle close while others hang lower, creating enchanting movement patterns. Attach them to tree branches or porch railings where they’ll dance in the breeze, transforming discarded bottles into enchanting autumn magic.
Coffee Filter Turkey Napkin Rings
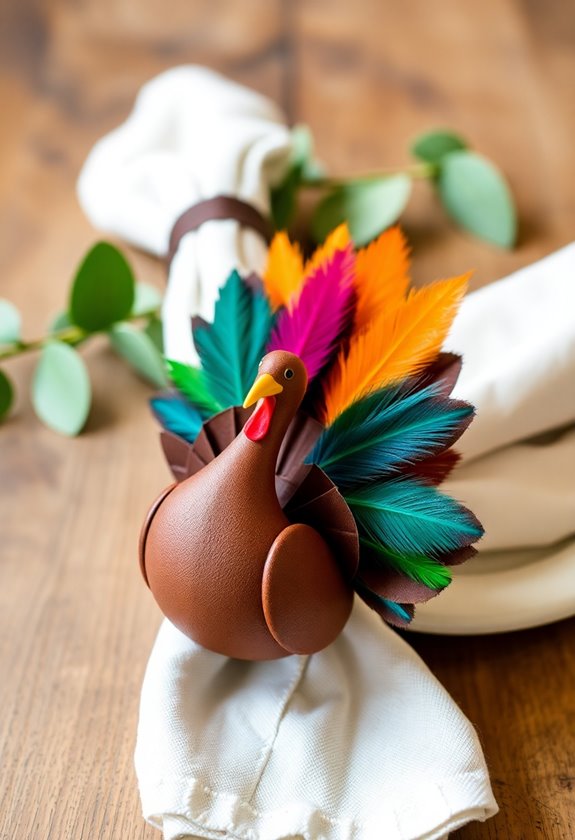
These coffee filter turkey napkin rings transformed my family’s Thanksgiving table from ordinary to absolutely magical—and they cost me less than five dollars to make for twelve place settings!
You’ll love how simple these adorable turkey rings are to create. I discovered this craft during a particularly hectic November when I’d forgotten to buy napkin rings entirely. My daughter spotted our coffee filters and suddenly we had the perfect solution!
Here’s what makes these turkeys special:
- Coffee filters fan out naturally to create beautiful, feathered turkey tails
- Brown construction paper bodies add stability and charm
- Googly eyes bring instant personality to each little bird
Simply fold the coffee filter accordion-style, attach it to a small brown paper turkey body, and add those wiggling eyes. The natural white of the filters mimics real turkey feathers perfectly. Your guests won’t believe you made something so charming from everyday household items!
Frequently Asked Questions
How Long Do Eco-Friendly Thanksgiving Ornaments Typically Last When Stored Properly?
Like Cinderella’s pumpkin carriage, your handmade treasures won’t last forever, but they’ll definitely outlive the midnight hour! I’ve discovered that properly stored eco-friendly ornaments can survive 3-5 years, sometimes longer. You’ll want to keep them in dry, cool spaces—think attic boxes, not damp basements. Paper-based ones are more fragile than fabric or wood pieces. I’ve learned that gentle handling during storage makes all the difference in preserving your autumn memories.
What’s the Best Way to Clean Recycled Material Ornaments After Use?
You’ll want to clean your ornaments gently, just like I learned after accidentally ruining my first batch with harsh soap! Use a soft, damp cloth with mild dish soap for most materials. For paper ornaments, lightly dust them instead of using water. I’ve found that a gentle brush works wonders for textured surfaces. Always let them dry completely before storing—trust me, moisture’s your biggest enemy here, and proper cleaning keeps them beautiful for years.
Are There Any Recycled Materials That Should Be Avoided for Safety Reasons?
Like hidden thorns on a beautiful rose, some recycled materials can bite back when you’re crafting. You’ll want to steer clear of anything with sharp edges, like broken glass or jagged metal pieces—trust me, I’ve learned this the hard way! Also avoid materials that might contain lead paint or toxic chemicals. Stick to clean cardboard, fabric scraps, and plastic containers. Your fingers (and your family’s health) will thank you for being choosy about your materials.
Can Children Safely Participate in Making All These Eco-Friendly Ornament Projects?
You’ll want to supervise younger children closely, especially when cutting materials or using glue guns. Most projects work great for kids over eight, but I’ve learned that sharp scissors and hot tools aren’t their friends. Stick to child-safe scissors, washable glue, and pre-cut materials for little ones. I always set up stations where older kids handle the tricky parts while younger ones focus on decorating and assembling.
How Much Money Can You Save Making Recycled Ornaments Versus Buying New?
You’ll save 75% compared to store-bought decorations! Last year, I spent just $8 on supplies and created thirty beautiful ornaments, while my neighbor dropped $120 on similar items. You’re transforming trash into treasure – those empty jars become stunning candle holders, cardboard scraps turn into festive garlands. It’s incredibly rewarding when guests compliment your handmade creations, not knowing they’re made from yesterday’s recycling bin. Your wallet and planet will thank you!