
Create a charming St. Patrick’s Day welcome sign in just 30 minutes using a wooden board, green and white paint, and festive stencils. You’ll start by painting the board white, then add stenciled green letters spelling “Welcome” and decorative shamrocks. Personalize your sign with ribbon, artificial greenery, or glitter accents for extra flair. A quick sanding of the edges creates that perfect rustic touch. There’s so much more you can do to make this Irish-inspired decoration uniquely yours.
Design Highlights
- Paint a wooden board white, then immediately use stencils and green paint to spell “Welcome” while base coat is drying.
- Achieve rustic charm quickly by lightly distressing edges with sandpaper and adding simple shamrock designs.
- Speed up drying time by using quick-dry acrylic paint and a hairdryer between coats.
- Create instant decoration by hot-gluing artificial greenery and pre-made wooden shamrocks to the board’s corners.
- Skip weatherproofing for indoor use, focusing only on essential paint and design elements to complete in 30 minutes.
Materials and Supplies Needed
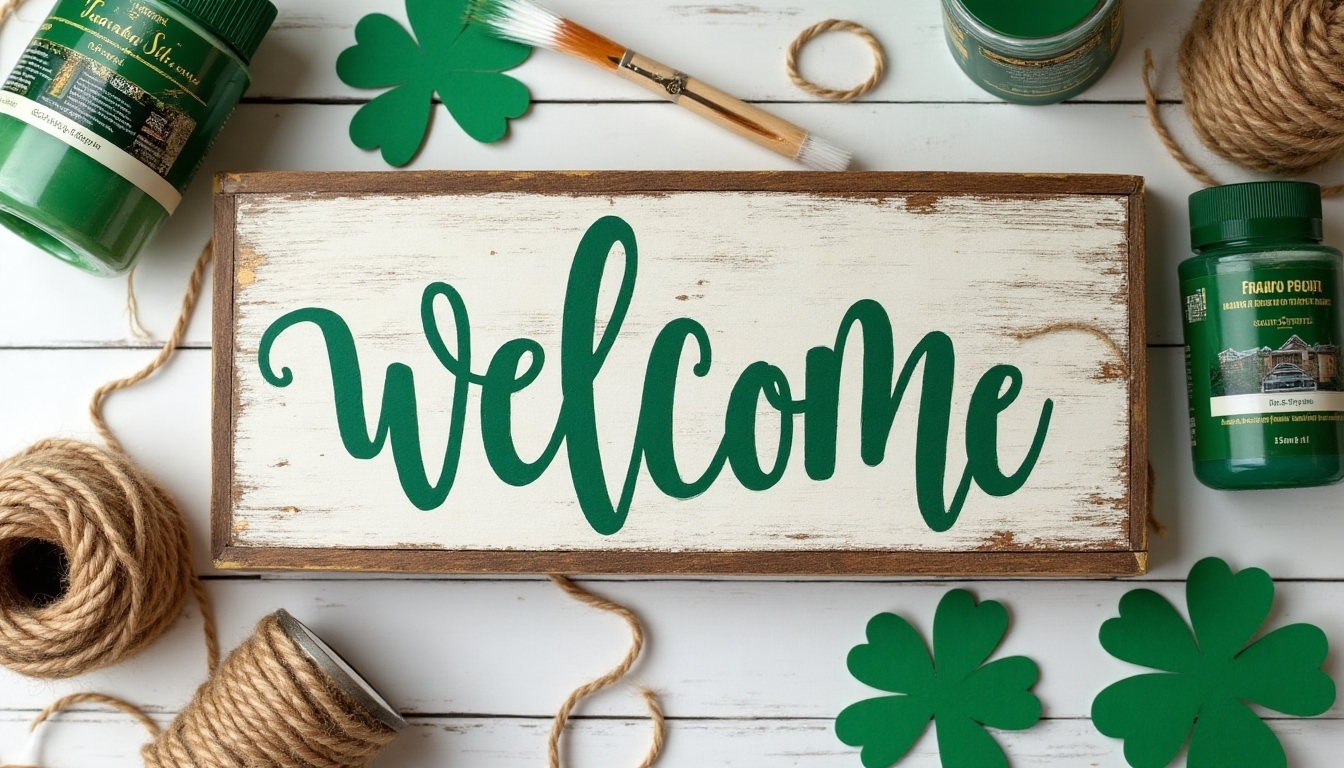
Creating a festive St. Patrick’s Day welcome sign is easier than you think! You’ll need a wooden plank or board about 24 inches long, green and white acrylic paint, paintbrushes in various sizes, letter stencils, shamrock stencils, sandpaper, and a pencil. Don’t forget some twine or ribbon for hanging your masterpiece. For decorative touches, gather artificial greenery, small wooden shamrocks, and a hot glue gun with glue sticks. You might also want some gold glitter paint to add that magical Irish sparkle. Everything’s readily available at your local craft store, and you’ll love using these supplies to create your own special piece of St. Patrick’s Day décor. Additionally, consider incorporating durable fabrics into your design to ensure your sign not only looks festive but also lasts for years to come.
Step-by-Step Instructions

These five simple steps will transform your plain wooden board into a charming St. Patrick’s Day welcome sign that’ll make everyone feel lucky!
First, paint your board white and let it dry completely. Next, position your letter stencils to spell “Welcome” and secure them with painter’s tape. Using green paint, carefully fill in each letter. Once dry, remove the stencils and add your shamrock design at the bottom.
Finally, distress the edges with sandpaper for that cozy, rustic look you’ll love. Don’t worry if it’s not perfect – that’s what gives your sign character and makes it uniquely yours! To enhance your decor, consider incorporating charming fireplace decor ideas which can create a festive atmosphere for the holiday.
Customization Options
While your welcome sign looks lovely with the basic design, you’ll find endless ways to make it uniquely yours with fun customization options. Let your creativity shine by adding personal touches that make your sign special.
Consider these charming additions to make your sign stand out:
- Add sparkly shamrock stickers or hand-painted clovers around the edges
- Incorporate family names or Irish blessings into the design
- Weave green ribbon or twine through pre-drilled holes for extra flair
- Attach small battery-operated LED lights for a magical evening glow
Incorporating St. Patrick’s Day garden decor can enhance the overall aesthetic of your outdoor space. Your personalized touches will create a welcoming piece that brings Irish charm to your home’s entrance.
Tips for Perfect Paint Application

For your St. Patrick’s Day welcome sign, you’ll want your paint to look flawless and professional. Start by stirring your paint thoroughly, ensuring there aren’t any clumps that could mar your beautiful design. Always work in thin, even layers, letting each coat dry completely before adding another. You’ll love how smooth the finish turns out!
When painting letters, use a small detail brush and work from the inside out to avoid smudging. Don’t worry if you make a mistake – keep some cotton swabs nearby to quickly clean up any errors while the paint’s still wet. Incorporating shades of green into your design will enhance the festive feel of your sign. Your sign will look absolutely amazing!
Adding Irish-Themed Embellishments

Now that your base paint has dried, it’s time to bring Irish magic to your welcome sign with charming embellishments! Let’s add those special touches that’ll make your creation truly festive and welcoming.
Choose from these delightful Irish-themed decorations to make your sign sparkle:
- Glittery shamrock stickers that catch the light
- Green and gold ribbon bows for the corners
- Small wooden Celtic knot cutouts
- Metallic gold letter stickers for “Welcome”
Arrange your chosen embellishments on the sign before permanently attaching them. Try different layouts until you find the perfect balance. When you’re happy with the arrangement, secure each piece with strong craft glue. Adding these embellishments will enhance your decor for St. Patrick’s Day living room decor and create a warm, inviting atmosphere.
Weather-Proofing Your Sign

Those beautiful embellishments you’ve added deserve to stay bright and beautiful, even when facing the elements! To protect your sign from rain and moisture, you’ll want to seal it with two coats of clear, waterproof polyurethane. Apply the first coat evenly with a foam brush, let it dry completely for 2-3 hours, then add your second coat.
For extra protection, especially if you’re displaying your sign outdoors, spray a UV-resistant clear coat over everything. This will prevent fading and keep your St. Patrick’s Day welcome sign looking fresh and festive. Don’t forget to seal the edges and back too!
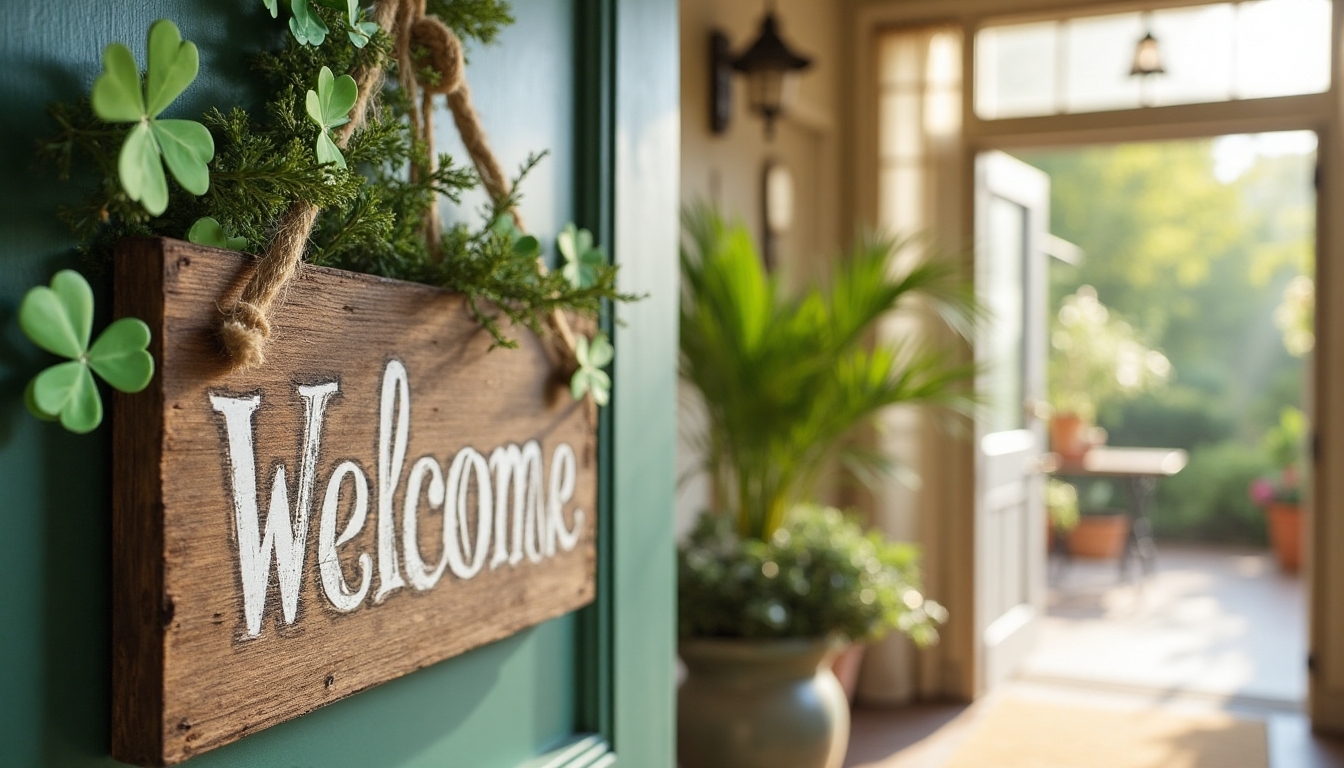
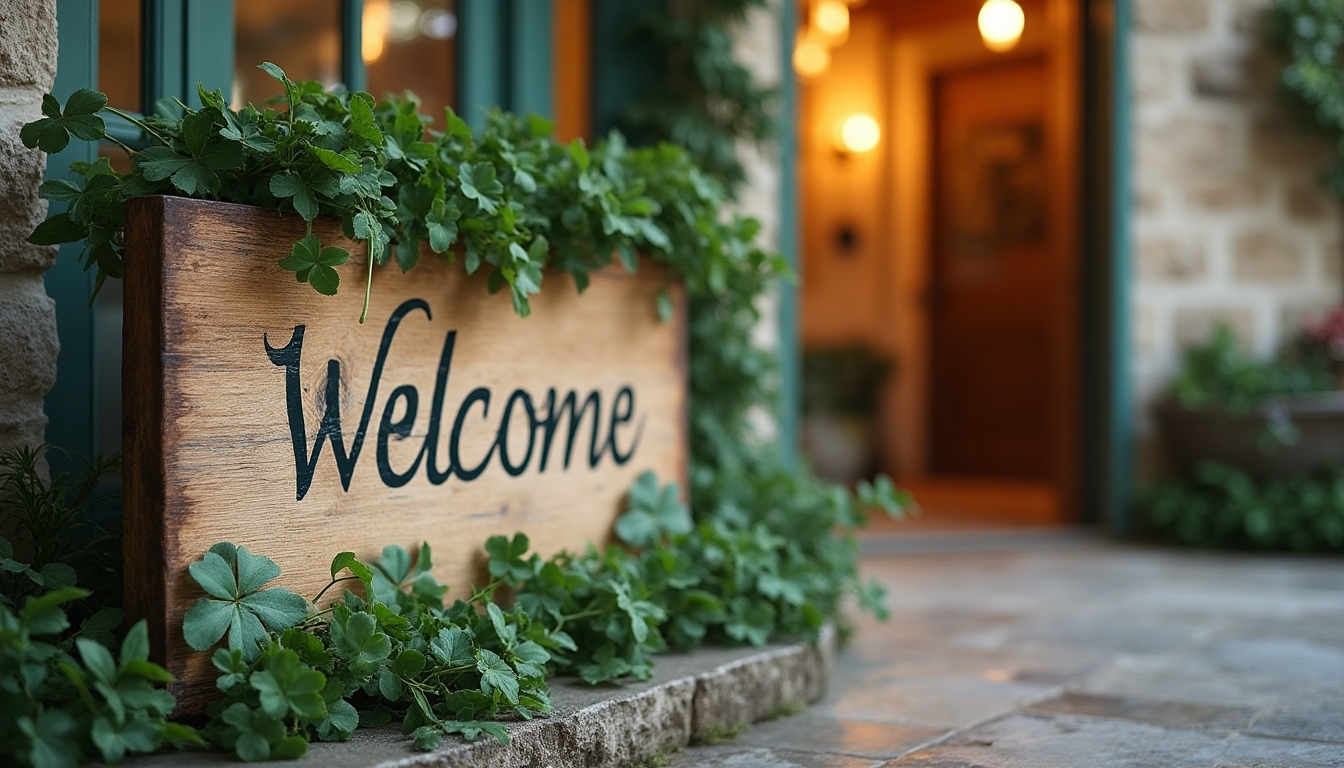
Hanging and Display Ideas
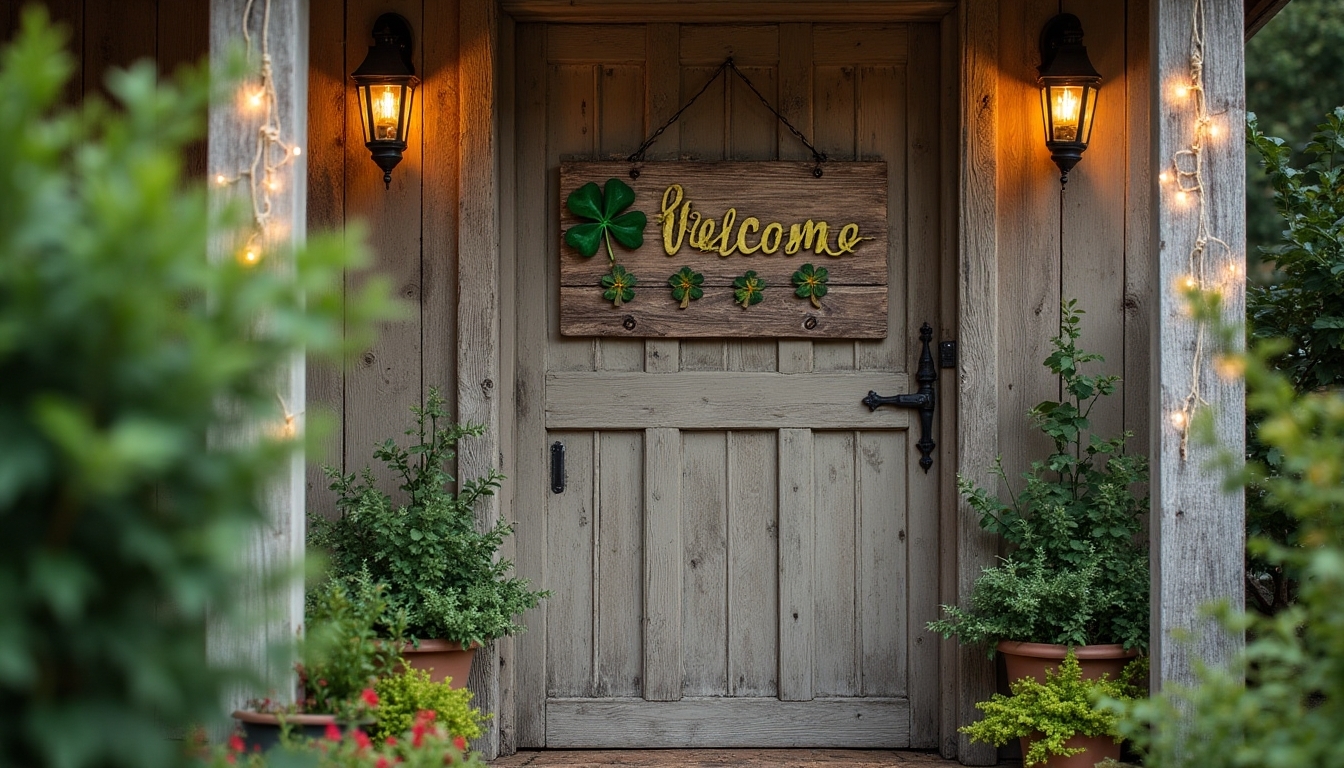
Your beautiful St. Patrick’s Day welcome sign deserves a special place to shine and spread Irish cheer. Let’s explore some charming ways to display your festive creation that’ll make your home feel extra welcoming.
Choose from these perfect spots to showcase your handmade treasure:
- Hang it proudly on your front door using a decorative wreath hanger
- Place it on your covered front porch, nestled between potted shamrocks
- Display it above your fireplace mantel alongside other Irish-inspired décor
- Prop it on your entryway console table with battery-operated twinkle lights
Time-Saving Shortcuts
While crafting a St. Patrick’s Day welcome sign, you’ll want to save precious time without sacrificing quality. You’ll love these clever shortcuts that make your project easier. Instead of hand-painting letters, use adhesive stencils that you can quickly press and fill. Pre-cut wooden signs from craft stores eliminate sawing and sanding time.
For quick drying, use a hairdryer on your paint layers, and opt for multi-surface acrylic paints that don’t need primer. Keep baby wipes handy for instant cleanup of mistakes. Finally, choose Command strips instead of traditional hanging hardware – they’ll stick instantly to most surfaces and won’t damage your walls.
Maintenance and Storage

Now that you’ve created your beautiful sign with these time-saving techniques, let’s make sure it stays looking fresh for many St. Patrick’s Days to come. Proper care will help preserve your cherished decoration and keep it ready for next year’s celebrations.
To maintain and store your welcome sign:
- Store in a cool, dry place away from direct sunlight to prevent fading
- Wrap gently in bubble wrap or acid-free tissue paper to protect delicate elements
- Keep in a sturdy box or container labeled “St. Patrick’s Decor”
- Dust regularly when displayed using a soft, dry microfiber cloth
Your handmade treasure will remain festive and welcoming year after year with these simple care steps.
Frequently Asked Questions
Can I Use This Sign Design for Other Holidays Besides St. Patrick’s Day?
You’re in luck! This versatile sign design is perfect for any holiday you can dream up. You’ll love how easily you can switch out colors and decorations to match different celebrations. For Christmas, try red and green with holly, or create a spooky Halloween version with orange and black. During summer, brighten it up with patriotic colors for Independence Day. Your creativity is the only limit to making this sign uniquely yours!
How Long Will the Paint and Decorations Typically Last Outdoors?
If you’re displaying your welcome sign outdoors, you’ll want to protect your creative work from the elements! With proper sealing, your paint and decorations can last 1-2 years, but you’ll get the best results by using outdoor-rated materials from the start. To extend your sign’s life, you can apply a clear UV-resistant sealant, keep it under a covered area, and bring it inside during harsh weather. A little care goes a long way!
Where Can I Find Authentic Irish Symbols to Incorporate Into My Design?
Proudly peruse popular Irish symbols through trusted traditional sources! You’ll find authentic Celtic designs in Irish heritage books, museums’ online collections, and cultural websites like Ireland’s National Library. Some meaningful symbols you can include are the Trinity knot, Celtic cross, shamrock, Claddagh, and Irish harp. Don’t forget to check local Irish cultural centers – they’re often happy to share their knowledge and help you create something that’s genuinely Irish-inspired.
Is This Project Suitable for Children to Help With?
You’ll love making this a family project, but you’ll need to guide your children through certain steps. While kids can help with painting, decorating, and placing stickers or stencils, you should handle any cutting, sanding, or hot glue work. Your little ones will feel so proud contributing to the design process, and you’ll create wonderful memories together. Remember to lay down newspaper, wear old clothes, and make it a fun, creative experience!
What’s the Approximate Total Cost to Make This Welcome Sign?
You’ll love how budget-friendly this welcome sign project is! The total cost typically runs between $15-25, depending on where you shop and what supplies you already have at home. Your main expenses will be the wooden board ($5-8), craft paint ($3-5), and decorative elements like ribbons or shamrocks ($7-12). If you’re a crafty person, you might already have some of these items in your stash, making it even more affordable!