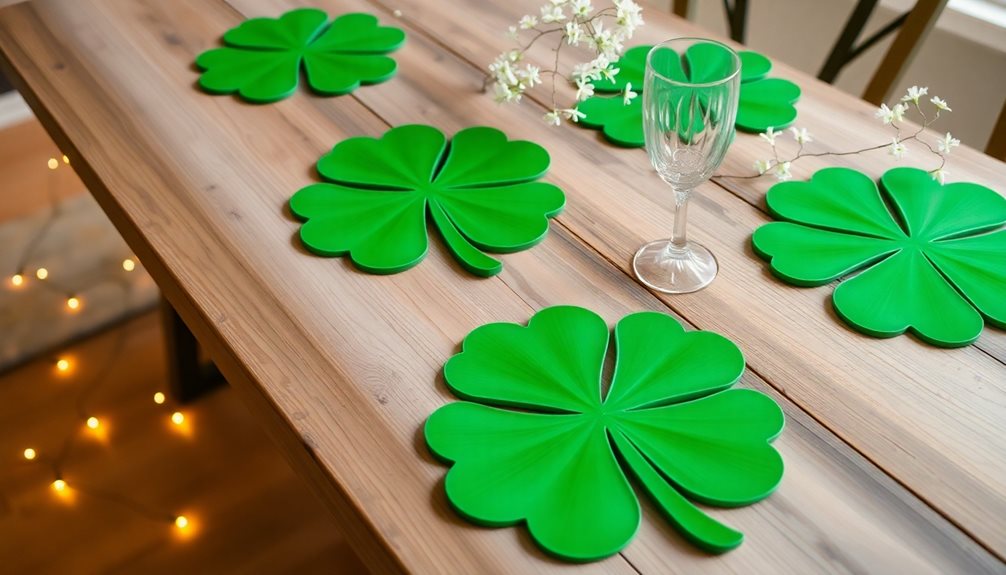
Create charming St. Patrick’s Day placemats in three simple steps using green felt, cardstock, and crafting supplies. First, trace three heart shapes in a clover pattern onto cardstock and cut out your shamrock template. Next, transfer the design to green felt, carefully cutting along the lines. Finally, embellish your placemat with metallic markers, sequins, and ribbons before sealing with clear contact paper. There’s so much more to discover about making these festive table decorations truly special.
Design Highlights
- Cut heart shapes from green felt fabric and arrange them in a clover pattern with a curved stem underneath.
- Glue the shamrock design onto white cardstock paper and trim the edges for a clean, polished look.
- Apply a protective layer of clear contact paper over the entire placemat to ensure durability and easy cleaning.
- Enhance the design with metallic paint markers, sequins, or ribbon for festive St. Patrick’s Day flair.
- Create multiple placemats using the same template to maintain consistency in size and shape across table settings.
What You’ll Need: Materials and Supplies
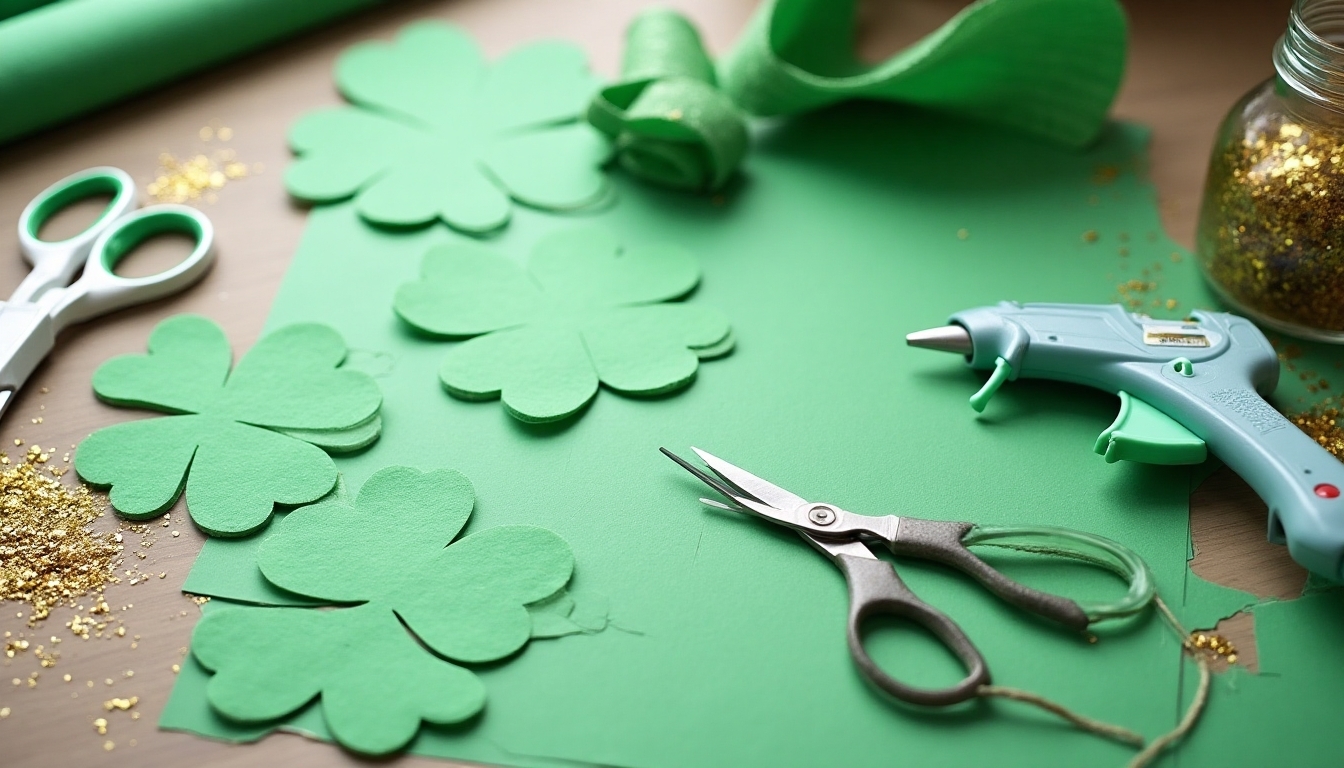
Before you begin crafting your festive St. Patrick’s Day shamrock placemats, you’ll want to gather all your supplies in one spot. You’ll need green felt fabric, scissors, craft glue, white cardstock paper, a pencil, a shamrock template, ruler, and clear contact paper for protection. Don’t forget your crafting mat or old newspaper to protect your work surface.
For extra flair, you might also want decorative elements like green ribbon, metallic paint markers, or sparkly sequins. They’re not essential, but they’ll help you add your personal touch. Remember, it’s okay if you don’t have everything – you can always adapt with what’s available. Additionally, consider incorporating durable fabrics to ensure your placemats can be used for future celebrations.
Crafting Your Shamrock Design
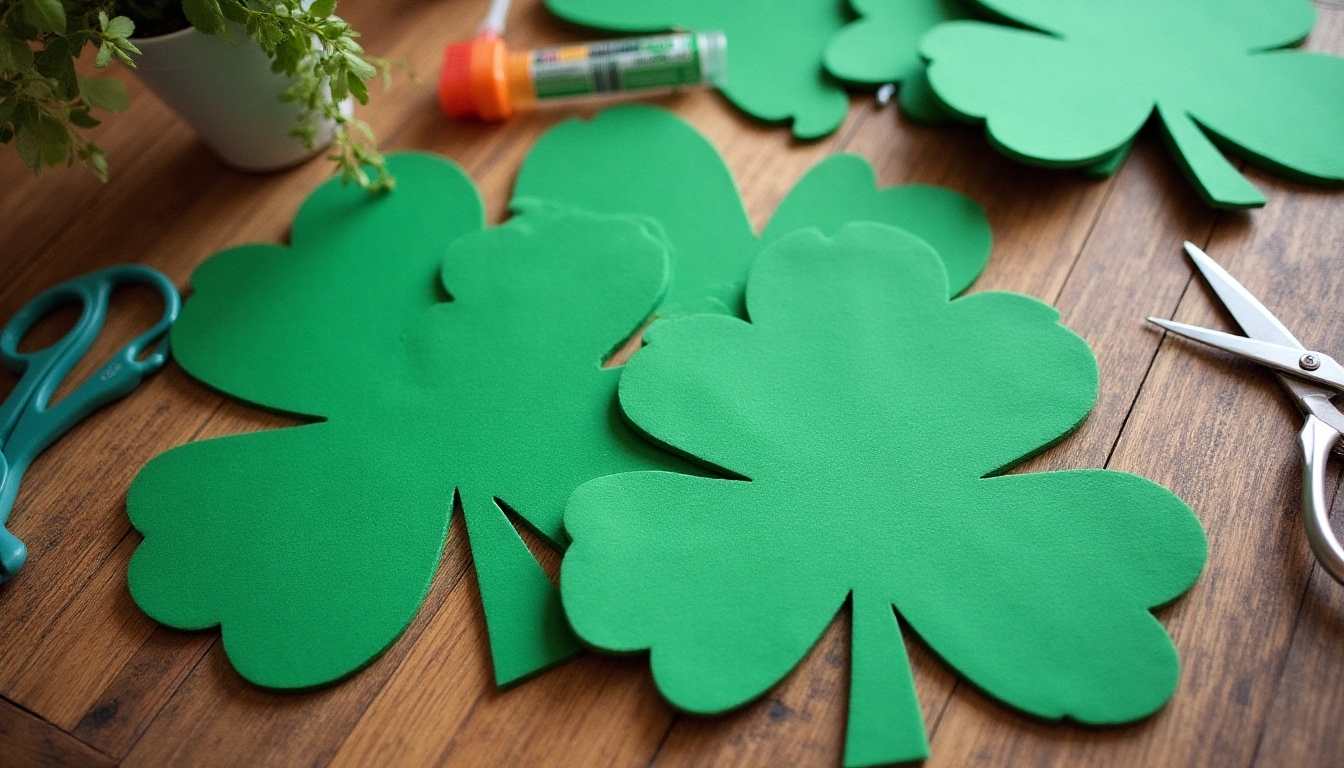
Creating your shamrock design starts with three simple heart shapes positioned just right. You’ll love how these hearts come together to form your lucky shamrock, making each placemat uniquely special for your St. Patrick’s Day celebration.
- Draw three identical heart shapes, arranging them in a clover pattern with their points meeting in the center
- Add a small, curved stem extending down from where the hearts meet
- Outline your design with a darker green shade to make it pop
- Fill in the hearts with your chosen shade of green, creating a beautiful, dimensional effect
To enhance the festive spirit, consider incorporating festive backyard decor that complements your table setting.
Now you’re ready to bring Irish charm to your table!
Tips for Creating Perfect Placemats
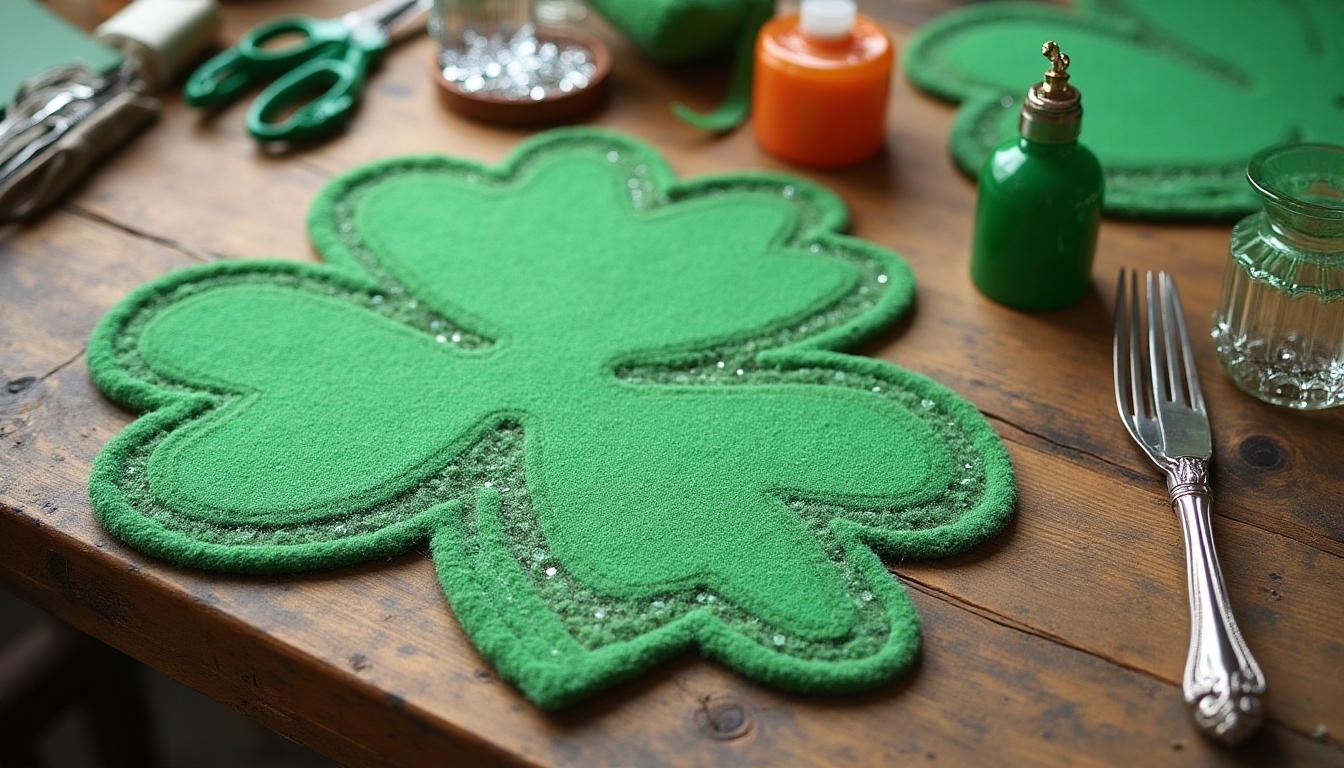
While your shamrock design sets the stage, the perfect placemat requires attention to a few key details that’ll make your creation both beautiful and practical. You’ll want to guarantee your edges are smooth and even, so take time to carefully trim any rough spots. Don’t forget to press your work with a warm iron, creating crisp lines that’ll impress your guests.
For extra durability, consider adding a protective clear coating that’ll help your placemats withstand spills. Remember to test your materials first, and make sure they’re food-safe. Additionally, incorporating Charming Kitchen Decor elements will enhance the festive theme of your table setting. Your fellow crafters will love how professional and polished your finished placemats look!
Frequently Asked Questions
How Long Do These DIY Shamrock Placemats Typically Last With Regular Use?
Your DIY shamrock placemats can last several seasons when you take good care of them! With regular use, you’ll typically get 2-3 years of enjoyment if you’re gentle with washing and storing them properly. To extend their life, you’ll want to spot clean when possible, avoid harsh detergents, and store them flat in a cool, dry place between seasons. You’ll love how they bring that special touch to your table year after year!
Can I Make These Placemats Waterproof for Outdoor St. Patrick’s Celebrations?
Like armor protecting a knight, you can definitely make your placemats waterproof for outdoor celebrations! Start by applying 2-3 coats of clear, waterproof fabric sealant or outdoor mod podge to both sides of your placemats. You’ll want to let each coat dry completely, just like waiting for your lucky charm to work its magic. Don’t forget to test the seal with a few water drops before using them at your festive outdoor gathering!
Are These Placemats Safe to Wash in the Washing Machine?
You’ll want to skip the washing machine for these festive placemats to keep them looking their best! Instead, you can gently spot clean them with a damp cloth and mild soap when needed. If they’re made with fabric, you can hand wash them carefully in cool water, but machine washing might damage the shamrock design and special touches you’ve added. Your placemats will stay beautiful longer with this gentle care approach!
What Age Group Is This Craft Project Most Suitable For?
Looking to create something special with your little ones? This delightful craft project is perfect for children aged 6-12, though you’ll want to supervise younger crafters. It’s especially well-suited for 8-10 year olds who’ve developed better scissor skills and attention to detail. You’ll love watching their creativity bloom as they make their own unique designs. Plus, it’s a wonderful opportunity for families to bond while creating festive decorations together.
Can I Use This Same Design Template for Other Holiday-Themed Placemats?
You’ll love how versatile this placemat template is for all your favorite holidays! Simply swap the shamrock shape for other seasonal icons – try hearts for Valentine’s Day, pumpkins for Halloween, or stars for the Fourth of July. You can keep the same basic design steps but change up your colors and patterns to match each celebration. It’s a wonderful way to build your collection of festive table decorations throughout the year!