Transform your New Year’s celebration with three stunning DIY decorations that won’t break the bank. Create a glittering countdown clock display using foam board and sparkly paper, craft elegant metallic paper chain garlands in gold and silver, and design dazzling number centerpieces with glitter-dusted cardboard. You’ll need basic craft supplies and about $30 to bring these festive pieces to life. Let’s explore how these eye-catching decorations will make your party space shine.
Design Highlights
- Create a glittering countdown clock display using foam board, stencils, and metallic glitter paper for an eye-catching centerpiece under $30.
- Make metallic paper chain garlands by linking gold, silver, and copper strips, adding twinkle lights for enhanced sparkle.
- Design sparkly number centerpieces with cardboard, metallic spray paint, and glitter, completed with battery-operated fairy lights.
- Mix affordable materials like cardstock, glitter paper, and LED lights to achieve an elegant New Year’s party atmosphere.
- Save money by purchasing supplies from local craft stores and repurposing materials while maintaining a cohesive decorative theme.
Glittering Countdown Clock Display
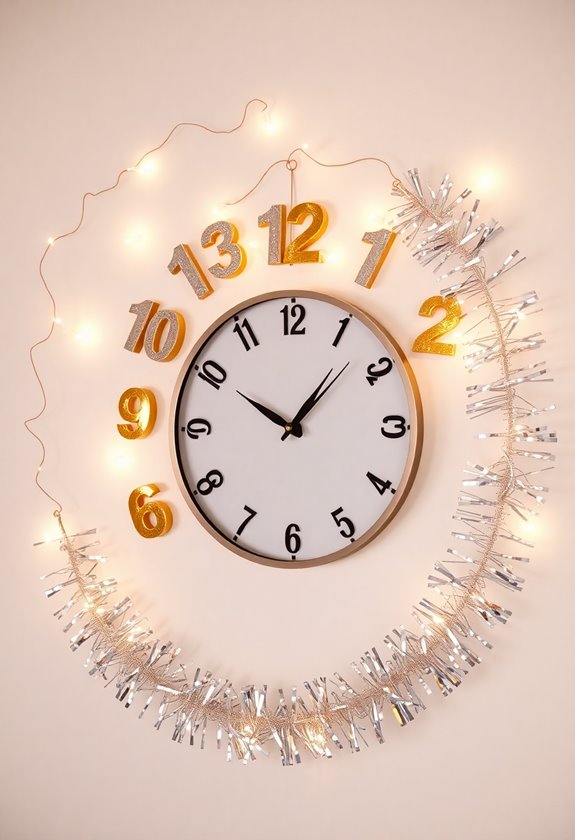
A dazzling countdown clock display will become the stunning centerpiece of your New Year’s party, drawing everyone’s eyes as midnight approaches. You’ll need a large foam board, glitter paper in gold and silver, and number stencils to create this eye-catching piece.
Start by cutting out your numbers from 1 to 12 using the stencils, then layer them with alternating glitter papers. Arrange them in a circle on your foam board, adding sparkly embellishments between each number. Don’t forget to create moveable clock hands from metallic cardstock, securing them with a brad fastener in the center. Additionally, consider incorporating festive fireplace decor to enhance the overall ambiance of your celebration.
Metallic Paper Chain Garlands

While your countdown clock sets the stage for midnight magic, shimmering paper chain garlands will transform your entire party space into a dazzling wonderland. You’ll love how easy and affordable these elegant decorations are to create, using simple metallic paper and basic crafting supplies from your local store.
- Cut strips of gold, silver, and copper paper into 1-inch-wide bands, then loop and link them together for a stunning cascade effect
- Layer different metallic shades to create depth and visual interest that catches every light in the room
- Weave ribbon or twinkle lights through your chains for extra sparkle and dimension. Incorporating strategic lighting can further enhance the festive atmosphere of your New Year celebration.
Sparkly Number Centerpieces
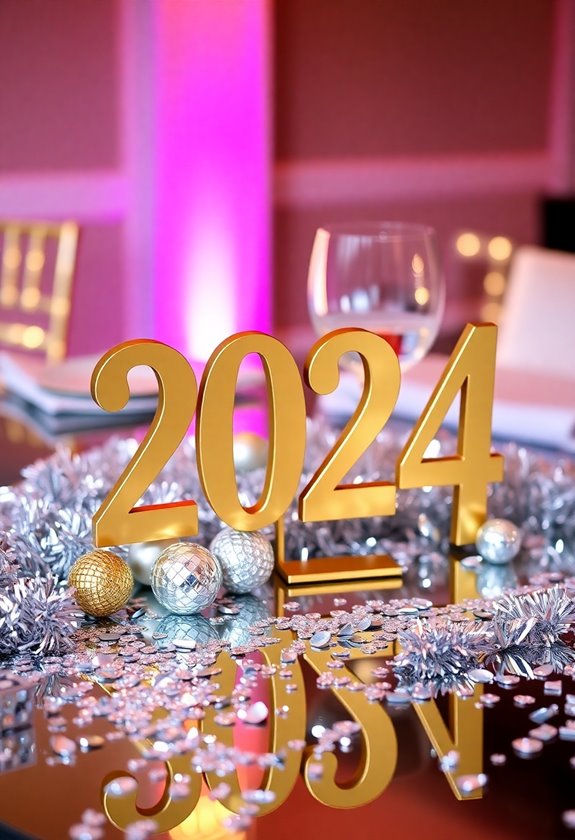
Since every New Year’s party needs a stunning focal point, these glittering numerical centerpieces will instantly draw your guests’ eyes to your celebration tables. You’ll love creating these eye-catching “2024” displays using cardboard numbers, metallic spray paint, and a generous sprinkle of glitter.
Start by cutting your numbers from sturdy cardboard, then apply two coats of metallic spray paint in gold or silver. While the paint’s still tacky, dust them with matching glitter. Once dry, stand them upright using small wooden blocks as bases. Add battery-operated fairy lights around the base, and you’ve got a dazzling centerpiece that’ll sparkle all night long! Additionally, consider incorporating metallic accents to enhance the overall elegance of your party decor.
Frequently Asked Questions
How Far in Advance Should I Start Making These DIY Decorations?
You’ll want to start your DIY decorations about 2-3 weeks before your celebration to avoid any last-minute stress. This gives you plenty of time to gather materials, test out designs, and make adjustments if needed. If you’re planning intricate pieces or working on multiple decorations, you might want to begin a month ahead. Don’t forget to set aside some extra time for unexpected challenges or creative inspiration that might strike!
Are These Decorations Reusable for Other Celebrations Throughout the Year?
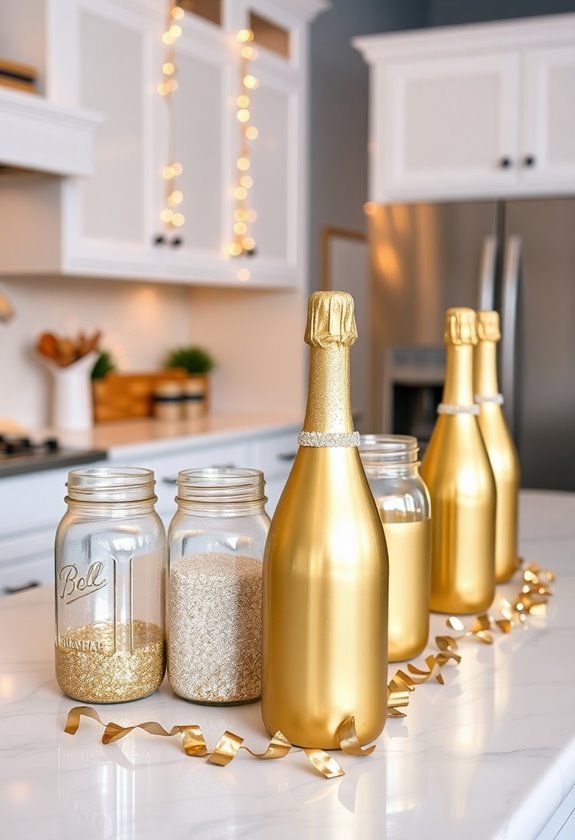
You’ll be thrilled to know that most DIY decorations can easily shift into other celebrations! Your metallic paper crafts, string lights, and sparkly banners can brighten up birthdays, while handmade garlands work beautifully for any festive occasion. Transform your glittery mason jars into summer party centerpieces, and those lovely tissue paper pom-poms can add charm to baby showers or weddings. With some creative thinking, you’ll get amazing value from your crafting efforts!
What Tools Do I Need to Have Before Starting These Projects?
You’ll need some basic crafting tools to get started: scissors, a hot glue gun with glue sticks, ruler, pencil, and string or fishing line. Don’t forget a good pair of craft scissors, they’re different from regular ones! You’ll also want to have clear tape, double-sided tape, and push pins handy. For safety and convenience, grab some paper towels and keep a trash bin nearby while you’re working.
Can Children Help With Making These New Year Party Decorations?
While adults handle scissors and hot glue, your kids can be amazing creative partners in crafting New Year’s magic! Children will love helping with safe tasks like sorting sparkly decorations, painting paper plates, or stringing beads. You’ll cherish these moments of working together, and they’ll beam with pride seeing their creations displayed. Just remember to supervise closely, choose age-appropriate tasks, and keep potentially harmful materials out of reach.
Where Can I Store Leftover Materials for Future DIY Projects?
You’ll love having a dedicated storage system for your crafting materials! Start by organizing items in clear, stackable containers so you can easily see what’s inside. Keep smaller items like glitter and sequins in labeled mason jars, while larger materials can go in plastic bins under your bed or in a closet. Don’t forget to use vacuum storage bags for fabric and paper, and add silica gel packets to protect against moisture.