Create a charming shamrock garland in five easy steps! First, trace and cut 12-15 shamrocks from green cardstock using a template. Then, add dimension by gently folding each leaf down the middle. Next, personalize your shamrocks with glitter, metallic markers, or Celtic patterns. Thread the decorated shamrocks onto string, spacing them 6 inches apart. Finally, hang your festive creation using clear hooks, creating gentle swoops between points. Let’s explore how to make your garland truly magical.
Design Highlights
- Trace and cut 12-15 shamrocks from green cardstock paper using a template for consistent shapes.
- Create dimension by gently folding each shamrock leaf down the middle and add decorative elements like glitter or metallic paint.
- Punch holes at the top of each shamrock and space them 6 inches apart in a line.
- Thread string or twine through the holes, leaving 12 inches at each end for hanging.
- Hang the garland using clear removable hooks, creating gentle swoops between attachment points for an elegant display.
Materials and Supplies Needed
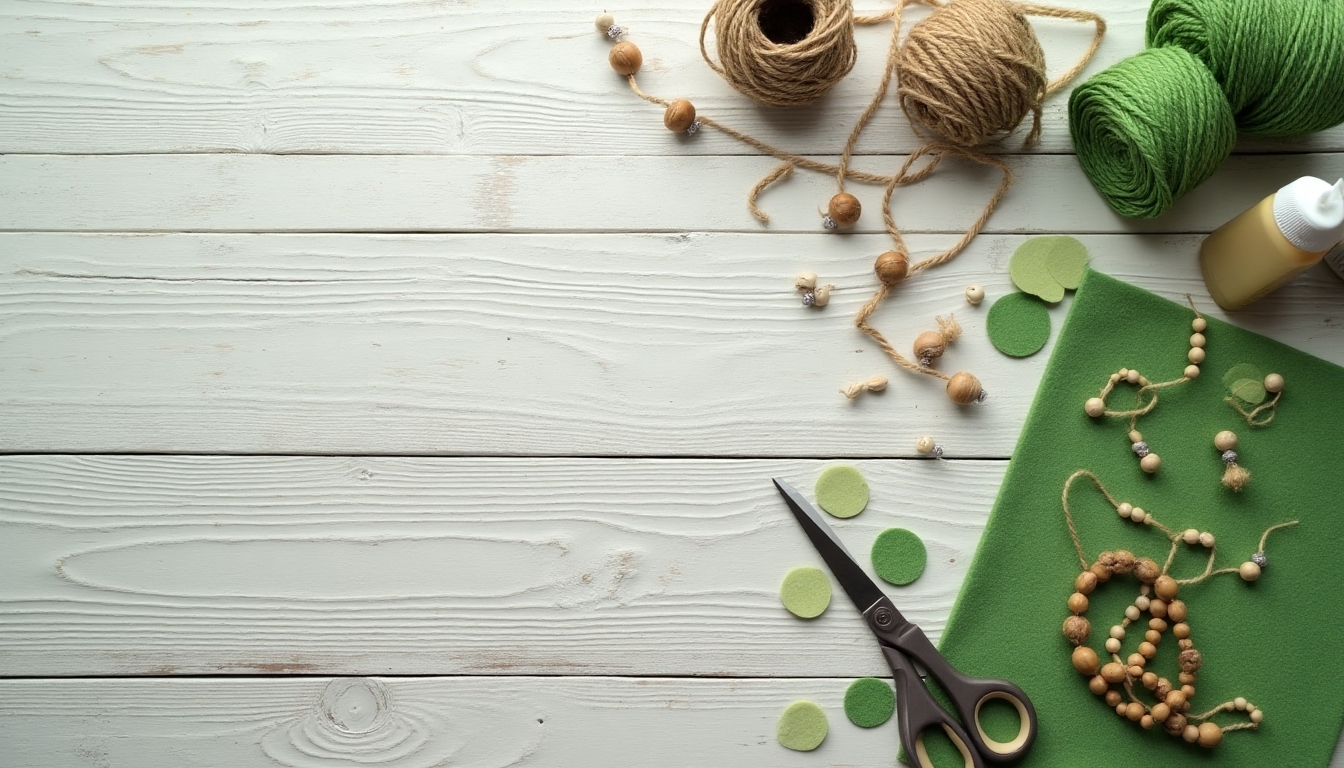
A crafting adventure awaits as you gather the essential supplies for your festive shamrock garland. You’ll need green cardstock paper or construction paper, scissors, a pencil, string or twine, and a shamrock template that you can easily trace. Don’t forget your trusty hole punch and some clear tape or glue to secure everything together.
For extra flair, grab some glitter, metallic markers, or decorative washi tape to make your shamrocks sparkle. You might also want a ruler to space your shamrocks evenly, and if you’re working with little ones, child-safe scissors are a must. Everything you need is simple and affordable! Additionally, consider using durable fabrics for your garland to ensure it lasts for future celebrations.
Cutting and Preparing the Shamrocks
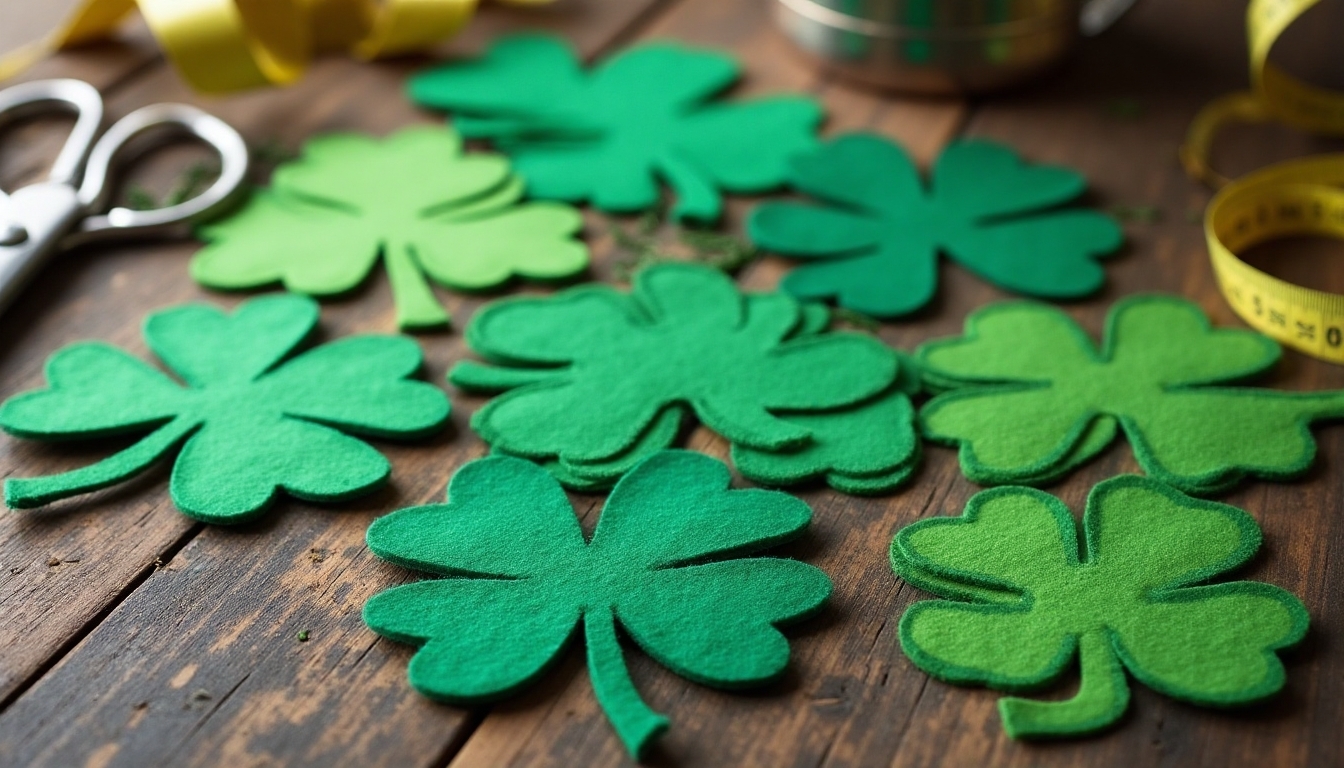
Now that you’ve gathered your supplies, let’s begin creating those charming shamrocks! Start by tracing your shamrock template onto your green cardstock, making sure to space them evenly. You’ll want to cut about 12-15 shamrocks for a standard-sized garland.
Using your scissors, carefully cut along the traced lines, keeping your movements steady and precise. Don’t worry if they’re not perfect – that’s what makes your garland unique! For added dimension, gently fold each shamrock slightly down the middle of each leaf. This simple technique will make your shamrocks pop beautifully when they’re strung together. Additionally, consider incorporating St. Patrick’s Day bedroom decor to enhance the festive atmosphere of your space.
Adding Details and Decorative Elements
Let’s bring your shamrocks to life with some magical finishing touches! Your garland will sparkle with personality once you add these delightful details. Start by outlining each shamrock with glitter glue, creating a shimmering border that catches the light. You can also add polka dots, swirls, or Celtic patterns to make each leaf unique.
For extra charm, attach tiny rhinestones at the center of each shamrock, or weave ribbon through the edges. Don’t forget to brush on some metallic paint for that extra pop of Irish magic. Additionally, consider incorporating charming decor ideas that complement your garland for an enchanting backyard atmosphere. Your personal touches will make this garland truly special and perfect for celebrating with friends and family.
Assembling Your Garland
Gathering your decorated shamrocks together, you’ll transform them into a beautiful flowing garland that’s ready to brighten any space. Lay your shamrocks in a line, making certain they’re facing the same direction and evenly spaced about 6 inches apart. Thread your string or ribbon through the holes you’ve created, being careful not to twist or tangle the line. As you connect each shamrock, give it a gentle tug to make sure it’s secure. You’ll want to leave about 12 inches of string at each end for hanging. Soon you’ll have a festive garland that’ll make your home feel wonderfully Irish! Additionally, consider incorporating elements from charming St. Patrick’s Day deck decor to enhance your festive atmosphere.
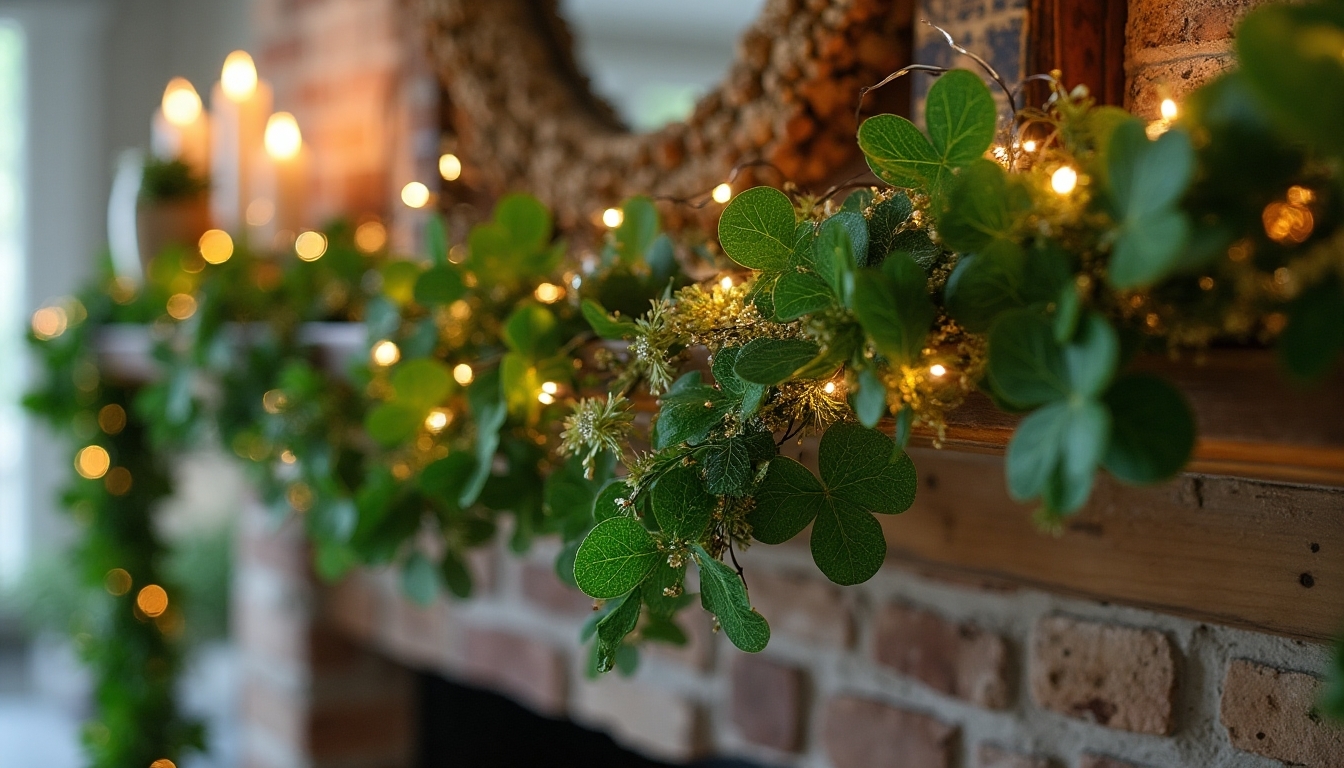
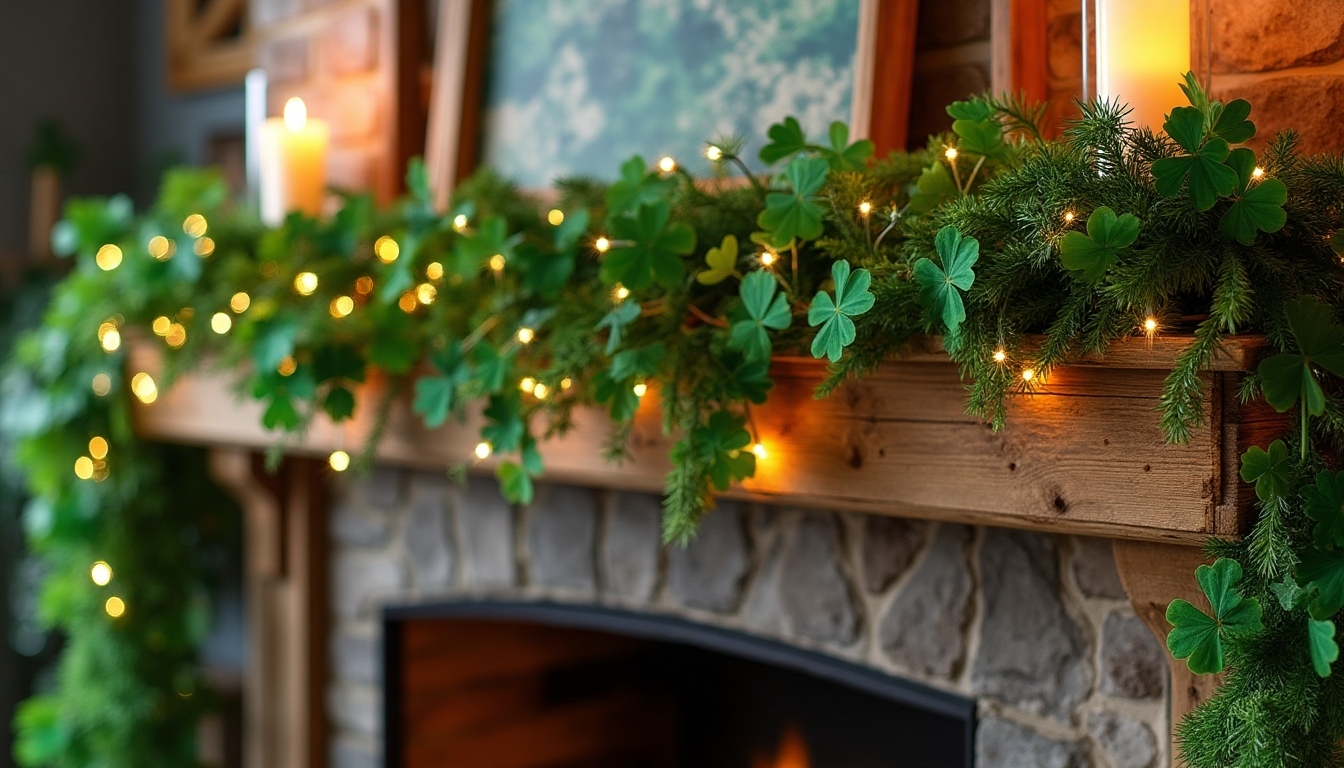
Hanging and Display Tips

Your beautifully crafted shamrock garland deserves the perfect spot to shine! For the best display, hang it where you’ll enjoy it most – across your mantel, over a doorway, or along a staircase railing.
Use clear removable hooks to protect your walls, spacing them about 12 inches apart. When hanging, create gentle swoops between hooks for that classic garland look. Don’t pull too tight – let it naturally drape.
If you’re displaying outdoors, choose a covered area away from direct wind and rain. You can also wrap your garland around porch pillars or weave it through deck railings for a festive touch that’ll make everyone feel lucky! Consider enhancing your decor with St. Patrick’s Day kitchen window decor ideas that complement your garland beautifully.
Frequently Asked Questions
How Long Will a Paper Shamrock Garland Last Before It Needs Replacing?
Your paper shamrock garland can last for several years if you take good care of it! Store it in a cool, dry place when you’re not using it, and you’ll be amazed at how well it holds up. Keep it away from direct sunlight and moisture, which can fade or damage the paper. If you’ve used quality paper and assembled it carefully, you’ll be able to enjoy your festive creation for many St. Patrick’s Day celebrations to come!
Can I Use Real Shamrock Leaves Instead of Crafting Artificial Ones?
You know, I was just thinking about using real shamrock leaves too! While it’s a lovely idea, real shamrocks won’t work well for a garland since they’ll wilt and turn brown quickly. You’ll find that fresh leaves only last a day or two, and they’re quite delicate to work with. Instead, you can create beautiful, lasting memories with paper or fabric shamrocks that’ll stay green and vibrant throughout your celebrations.
What’s the Best Way to Store the Garland Between Seasons?
You’ll love how easy it is to keep your garland looking fresh for next year! Store it in a clean, large plastic container with a secure lid to protect it from dust and moisture. Before packing it away, gently wrap it in tissue paper to prevent tangling, and place a silica gel packet inside to absorb any humidity. Keep the container in a cool, dry place, like under your bed or in a closet, and you’ll be all set for next season!
Will the Garland’s Colors Fade if Placed in Direct Sunlight?
Like a precious memory fading in an old photograph, your beautiful garland can lose its vibrant green charm when exposed to direct sunlight. You’ll want to protect your festive creation by hanging it away from sunny windows and harsh light. If you can’t avoid some sun exposure, don’t worry – you can help preserve the colors by spraying your garland with a UV-protective craft sealer that’ll keep those shamrocks looking lucky all season long.
How Do I Prevent the Shamrocks From Curling or Warping Over Time?
You’ll love how easy it is to keep your shamrocks looking fresh and flat! Store them in a climate-controlled space, away from humidity that can cause warping. If you’re working with paper shamrocks, try laminating them or coating them with a clear sealant for extra protection. For fabric ones, give them a light starch treatment before displaying. When you’re not using your garland, store it flat between pieces of cardboard to maintain its perfect shape.