
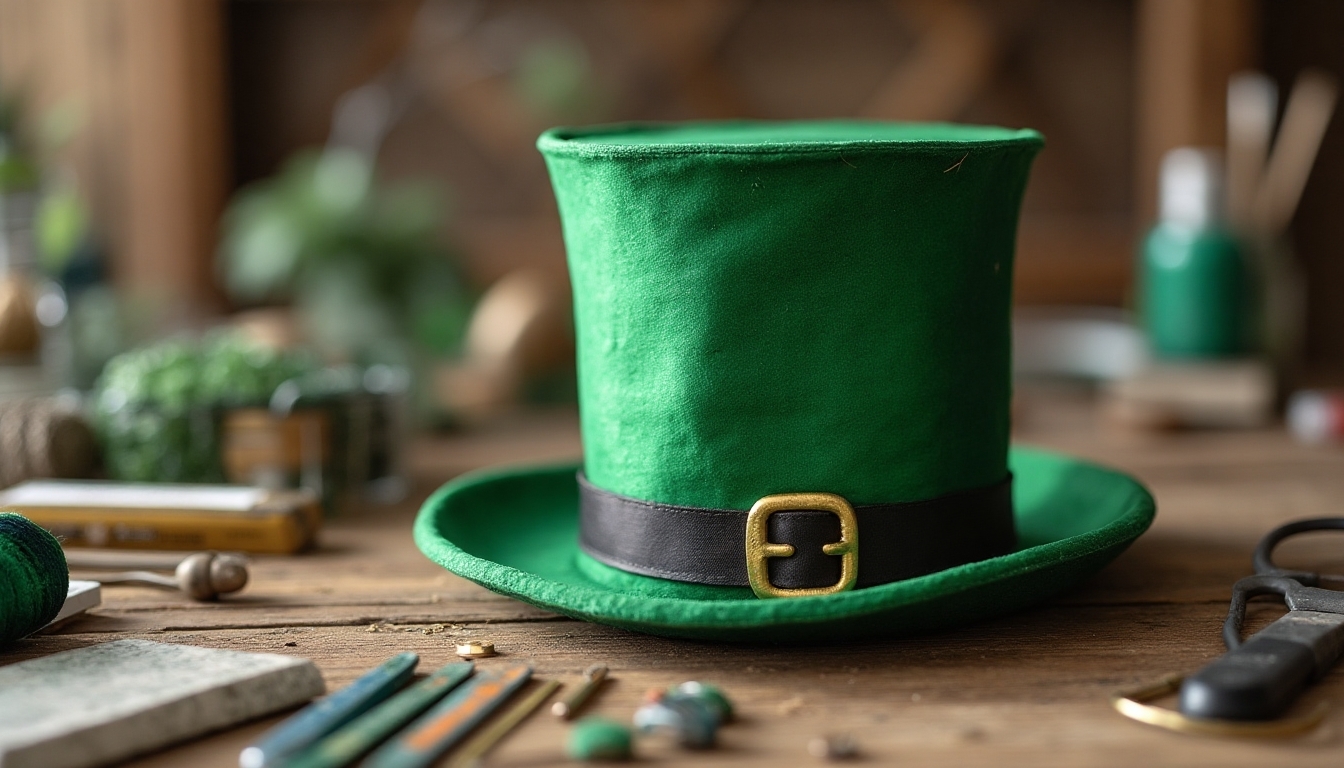
Transform a terra cotta pot into a festive leprechaun hat centerpiece in just 30 minutes! Start by painting the pot black, then wrap a green felt strip around the base and secure it with hot glue. Add a decorative gold buckle in the center, and embellish with artificial shamrocks, gold coins, and ribbon accents around the brim. You can personalize your creation with optional glitter or sequins for extra sparkle. There’s so much magic waiting in this simple St. Patrick’s Day craft.
Design Highlights
- Paint terra cotta pot green quickly using thin layers, and dry with a hairdryer between coats for faster results.
- Hot glue a simple black craft foam strip around the pot’s base and attach a premade gold buckle.
- Skip complex decorations and stick to basic elements: one shamrock cluster and a single gold ribbon bow.
- Use ready-made embellishments instead of crafting decorative elements from scratch to save valuable time.
- Focus on essential features only: green base, black band, gold buckle, and minimal decorations for a 30-minute completion.
Materials and Supplies Needed
Creating this festive leprechaun hat centerpiece starts with gathering all your essential supplies. You’ll need a medium-sized terra cotta pot, green acrylic paint, gold ribbon, craft foam in black and gold, hot glue gun with glue sticks, and scissors.
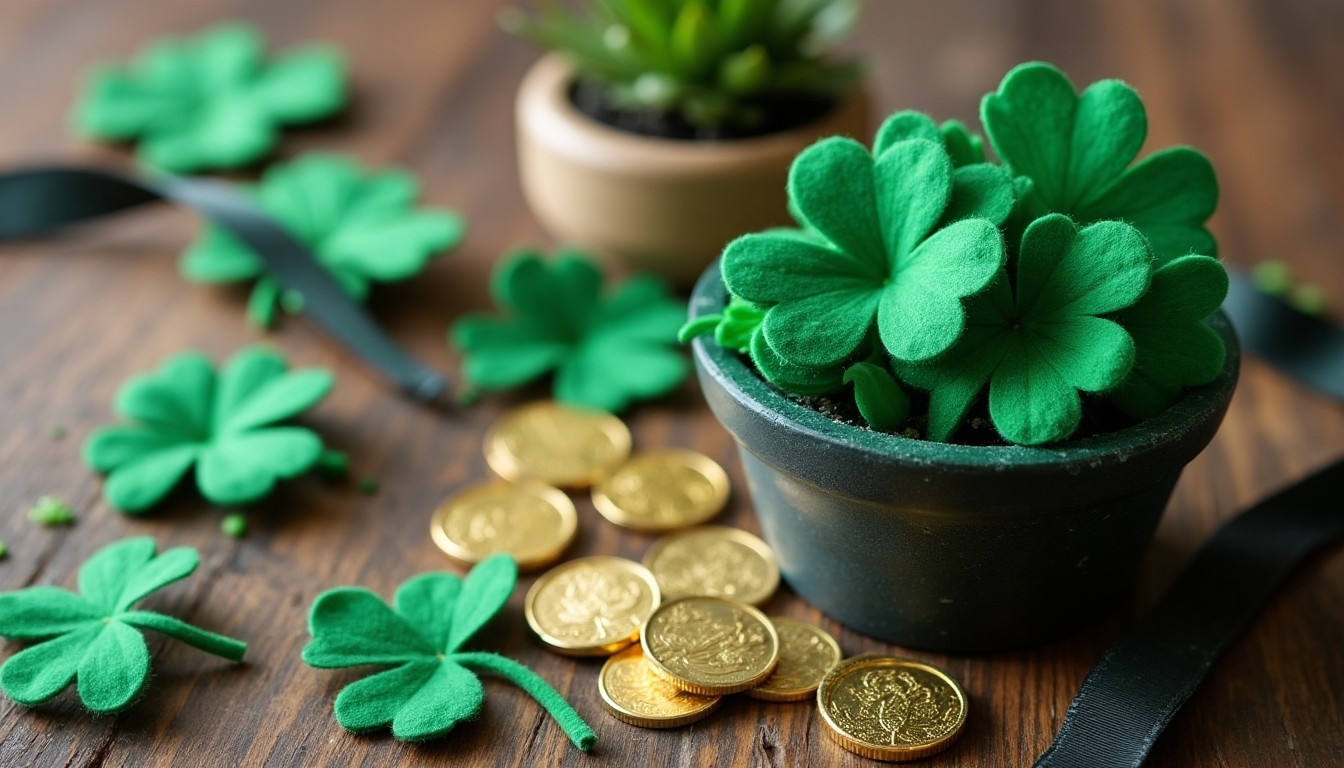
For decorative elements, grab some artificial shamrocks, gold coins, and a small buckle embellishment from your local craft store. Don’t forget paintbrushes and a pencil for marking your cuts. If you’d like to add a personal touch, pick up some glitter or sequins in green and gold shades. With these materials ready, you’re all set to create something magical! Additionally, consider incorporating St. Patrick’s Day office decor to enhance the festive atmosphere in your workspace.
Step-by-Step Assembly Guide
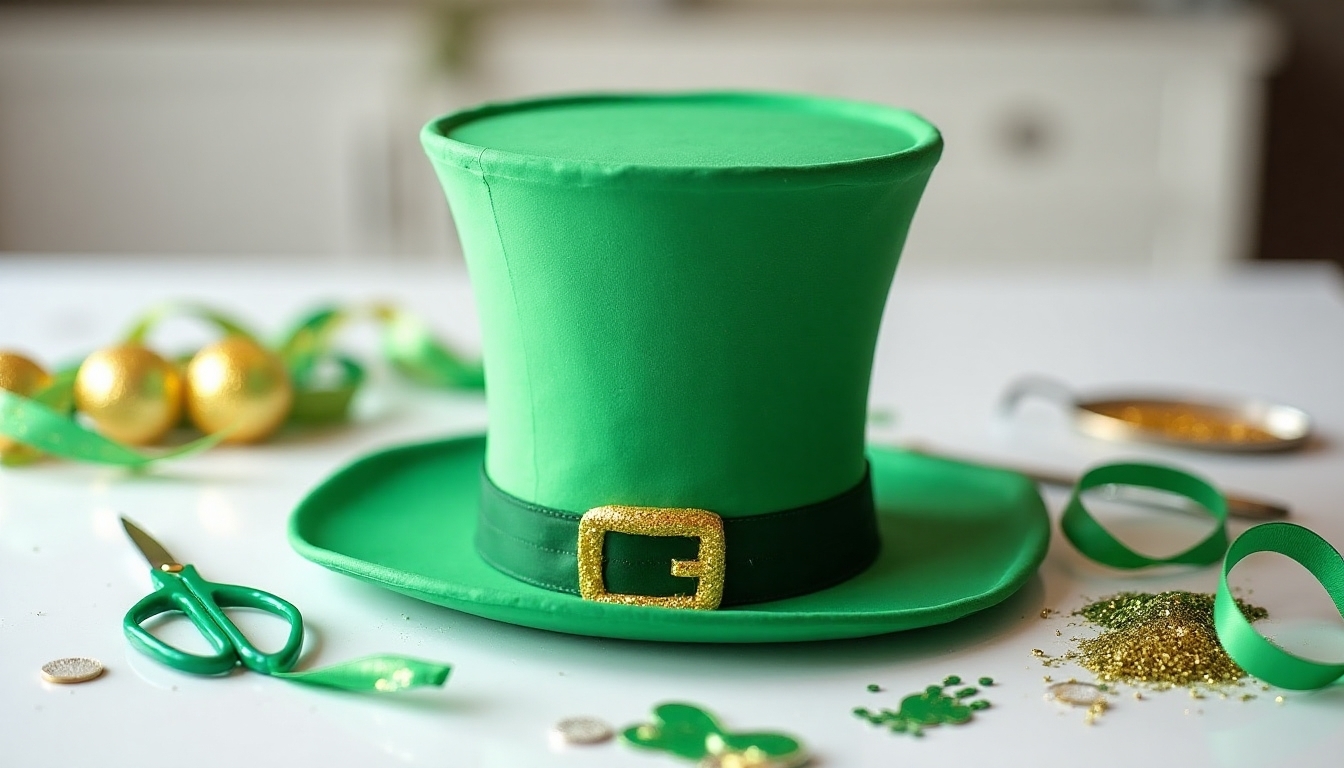
Let’s begin transforming your terra cotta pot into a charming leprechaun hat centerpiece! First, paint your pot black, making sure to cover both inside and out. While it’s drying, cut your green felt into a strip that’ll wrap around the pot’s base.
Next, hot glue the felt band around the pot, then add your gold buckle in the center. Create a small bow from your ribbon and attach it to the side. For the finishing touch, arrange artificial shamrocks around the brim. Adding charming St. Patrick’s Day patio decor can elevate your festive atmosphere even more!
You’re doing great! Stand your hat upright, and if you’d like, place battery-operated lights inside for an enchanting glow that’ll make everyone smile.
Tips for Perfect Color Selection
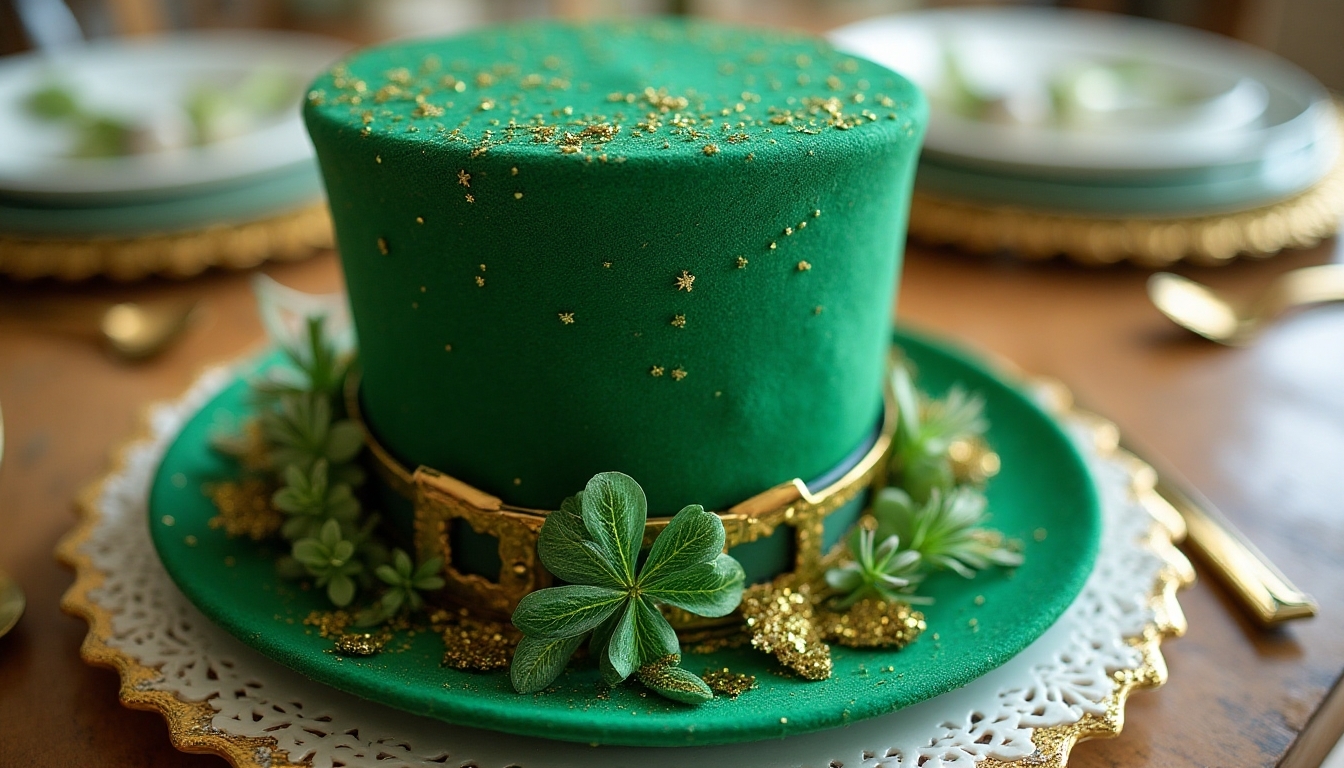
When selecting colors for your leprechaun hat centerpiece, the right shades will make all the difference in creating that magical Irish charm. Start with a rich emerald green as your base color – it’s the traditional choice that’ll make your piece instantly recognizable. You’ll want to complement it with a deep black for the hat’s band and a gleaming gold for the buckle and accents.
Don’t be afraid to play with different green tones! Forest green adds depth, while a hint of lime brings playfulness. Remember, metallic gold paint or ribbon will catch the light beautifully, making your centerpiece truly eye-catching and festive. Additionally, incorporating St. Patrick’s Day kitchen table decor can enhance the overall theme and create a cohesive look for your celebration.
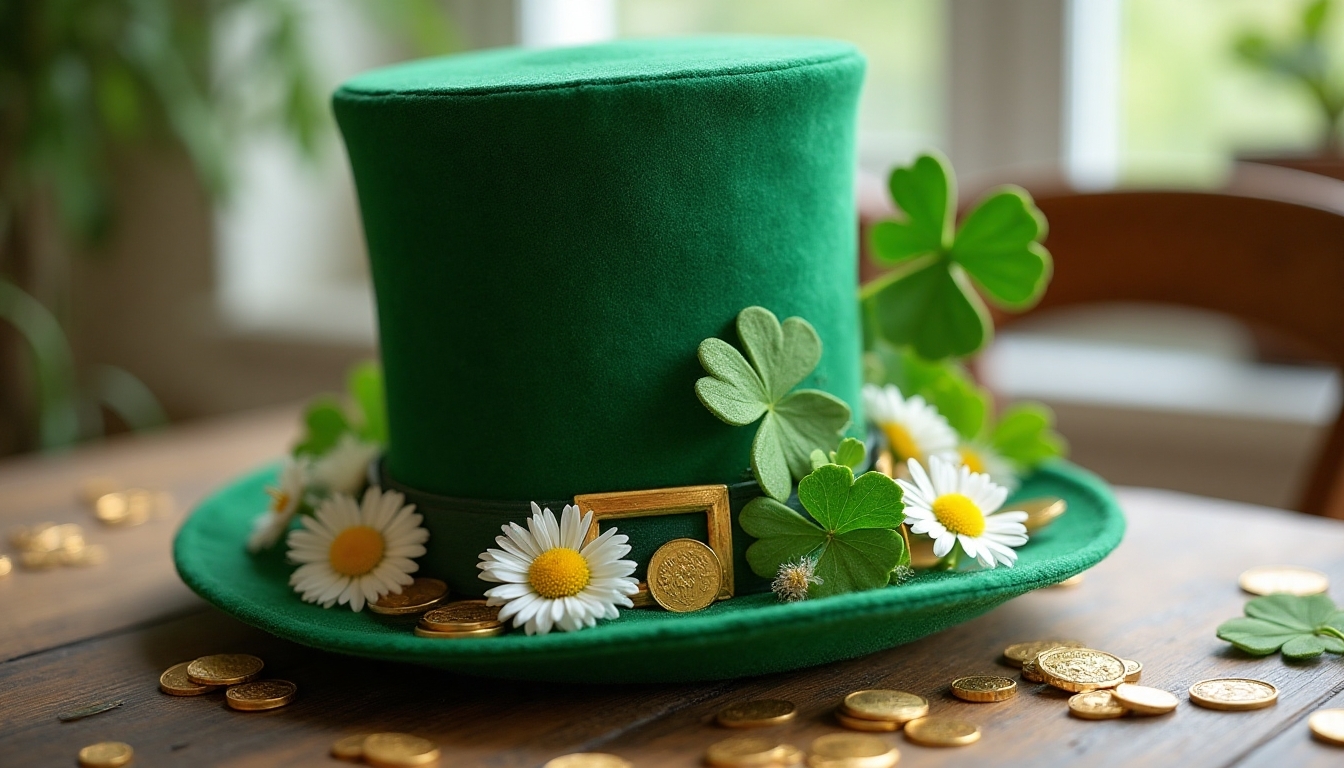
Adding Decorative Embellishments
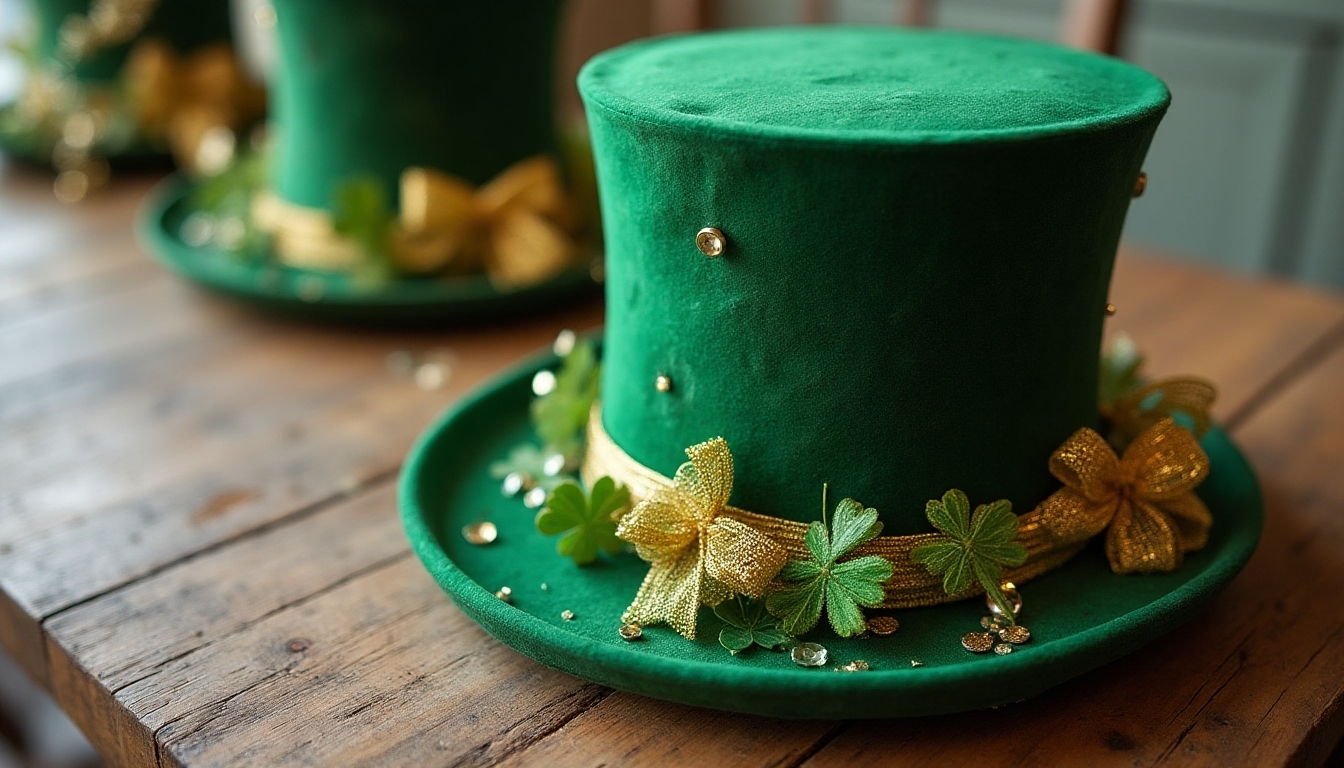
The right embellishments transform your leprechaun hat centerpiece from charming to absolutely magical! Let’s add those special touches that’ll make your creation truly shine. Remember, you’re creating something unique that’ll bring smiles to everyone’s faces.
Consider these delightful additions to make your centerpiece extra special:
- A shimmering gold buckle made from metallic ribbon or craft foam
- Tiny shamrocks crafted from green felt or paper
- Rainbow-colored rhinestones arranged in a playful pattern
- Delicate gold glitter accents along the hat’s brim
Don’t be afraid to mix and match these elements – your personal touch makes this project wonderfully yours! Additionally, incorporating St. Patrick’s Day kitchen decor ideas can enhance the festive atmosphere of your home.
Creative Variations and Themes

Now that you’ve mastered the basic leprechaun hat design, you’ll love exploring different creative themes and variations that can make your centerpiece truly one-of-a-kind! Try transforming your hat into a magical garden by adding artificial moss, tiny mushrooms, and delicate fairy lights. You can create a rainbow theme with colorful ribbons cascading down the sides, or embrace rustic charm with burlap and dried flowers.
For a modern twist, paint your hat with metallic colors like rose gold or silver. Consider making a collection of mini hats in varying sizes, creating a whimsical family of leprechaun accessories perfect for table settings. To enhance your decor further, incorporate St. Patrick’s Day themed decor that complements your centerpiece and brings festive cheer to your living room.
Budget-Friendly Alternatives

Making your leprechaun hat centerpiece doesn’t have to break the bank, especially with these smart and creative money-saving options! You’ll love how these budget-friendly alternatives help you create something special while keeping costs down.
- Use green construction paper instead of expensive craft felt for the hat’s base
- Replace gold-colored ribbon with yellow paper strips painted with metallic markers
- Substitute real flowers with handmade tissue paper shamrocks
- Create buckles from cardboard covered in aluminum foil instead of buying plastic ones
These simple swaps will help you craft a charming centerpiece that’s just as delightful as pricier versions, and you’ll feel proud knowing you made it yourself!
Storage and Maintenance Tips
Since your festive leprechaun hat centerpiece deserves to stay beautiful for future celebrations, proper storage and care will keep it looking magical year after year. When it’s time to pack away your creation, wrap it gently in acid-free tissue paper, and store it in a sturdy box away from direct sunlight and moisture. If you’ve used fabric elements, give them a light brushing to remove dust before storage.
Throughout the year, you’ll want to keep your centerpiece in a climate-controlled space. If any decorative elements become loose, just reattach them with appropriate glue. Your St. Patrick’s Day masterpiece will be ready to charm your guests again next March!
Seasonal Adaptation Ideas
Your charming leprechaun hat centerpiece can sparkle in every season with a few creative tweaks. Transform your festive decoration throughout the year by changing up the colors and accents to match each season’s spirit.
- Summer: Switch green ribbons for sunny yellow ones, add small sunflowers, and replace gold coins with seashells
- Fall: Use warm orange ribbon, add mini pumpkins, and incorporate autumn leaves around the base
- Winter: Wrap the hat in silver ribbon, add snowflake ornaments, and dust with artificial snow
- Spring: Choose pastel ribbons, decorate with silk flowers, and nestle small decorative eggs nearby
Sizing and Placement Guidelines

The perfect leprechaun hat centerpiece follows three essential sizing rules to create a balanced, eye-catching display. First, your hat’s height should be between 12-15 inches – tall enough to command attention but not so high that it blocks conversation. Next, guarantee the base width is roughly two-thirds of the height for ideal proportions. Finally, place your centerpiece at least 14 inches above the table surface.
You’ll want to position your creation in the middle of your gathering space, where everyone can admire your handiwork. If you’re using multiple hats, arrange them in descending sizes to create a charming visual flow.
Troubleshooting Common Issues

While crafting the perfect leprechaun hat takes practice, even experienced DIY-ers can run into a few bumps along the way. Don’t worry though – we’ve all been there! Here are the most common issues you might face and how to fix them:
- If your hat won’t stand upright, try reinforcing the base with an extra layer of cardboard or adding small weights inside
- When green paint looks patchy, apply thin layers and let each coat dry completely
- For buckles that keep falling off, use strong craft glue and hold in place for 60 seconds
- If decorative elements appear crooked, remove and reposition while adhesive is still wet
Frequently Asked Questions
Can This Centerpiece Be Used Outdoors for a St. Patrick’s Day Party?
You’ll want to be careful using this centerpiece outdoors, as it’s best suited for indoor celebrations. If you’re planning an outdoor party, you can still display it by placing it in a sheltered area, like under a tent or patio cover. Wind, rain, and moisture can damage the materials, but don’t worry – you can protect your creation by securing loose elements and maybe adding a clear protective spray. Consider making a backup just in case!
How Long Will the Hat Centerpiece Maintain Its Shape and Appearance?
Like a loyal friend at your party, your leprechaun hat centerpiece will stay picture-perfect for about 2-3 weeks when you keep it indoors. You’ll notice it’s at its best during the first week, shining with that magical charm you created. If you’ve used quality materials and stored it in a dry, cool spot away from direct sunlight, you’ll enjoy its festive appearance through your St. Patrick’s Day celebrations and beyond.
Is This Project Suitable for Children to Help Make?
Yes, this craft project is perfect for children to help create! You’ll want to supervise younger kids with scissors and hot glue, but there are plenty of kid-friendly tasks they can enjoy. They can help pick out colors, arrange decorations, and add embellishments like stickers or ribbons. It’s a wonderful way to bond while crafting together, and they’ll feel so proud showing off their creative contribution to your St. Patrick’s Day décor.
Can the Centerpiece Be Converted Into a Wearable Hat if Needed?
Quick as a wink, you can transform this centerpiece into a wearable hat with just a few adjustments! You’ll need to add an elastic band or ribbon to secure it, and you might want to reinforce the base to make it more sturdy. While it won’t be as durable as a store-bought hat, it’s perfect for a quick costume change or photo opportunity. Just remember to handle it gently, since it’s originally designed as a decorative piece.
What’s the Approximate Total Cost Including All Materials and Supplies?
You’ll love how budget-friendly this project is! The total cost typically runs between $15-20, depending on where you shop and what you already have at home. Most craft stores offer the main supplies – green felt ($3-4), foam base ($2-3), ribbon ($2-3), decorative elements ($5-6), and basic crafting materials like glue and pins ($3-4). If you’re a savvy shopper, you can even catch sales to bring the cost down even more!