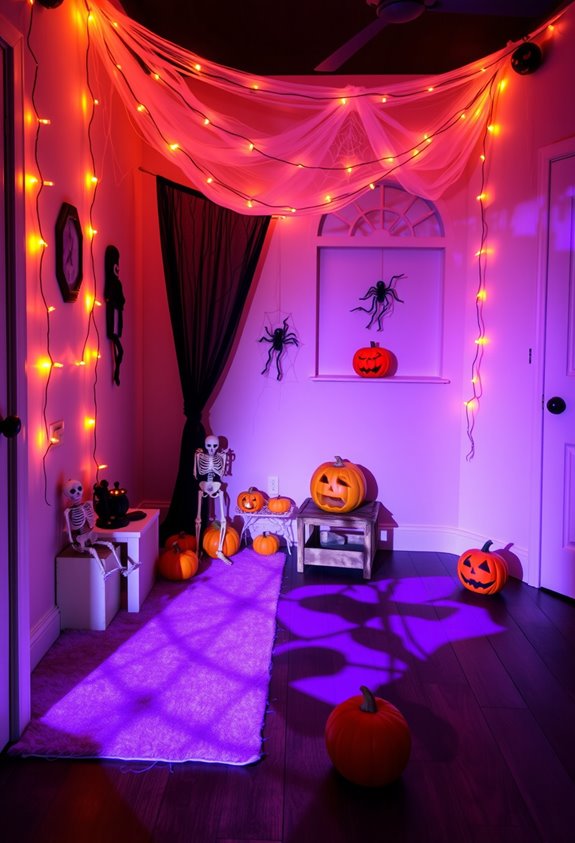
Your playroom doesn’t have to stay boring in October. With the right moves, it becomes the most haunted room in the house. Start with a classic orange-and-black color palette, then layer in bat-covered walls, floating witch hats, and googly-eyed monster doors. A cardboard haunted playhouse? Kids absolutely lose it. Mummy-wrapped furniture costs almost nothing. Even your shelves can pull spooky weight. Every idea below builds something kids will actually interact with.
Design Highlights
- Transform doors into monster faces using wiggle eyes and paper mouths, secured with Scotch Restickable Dots for easy removal after Halloween.
- Build a mini haunted playhouse from stacked cardboard boxes with jagged windows, tea lights, and orange cellophane for glowing effects.
- Hang paper bats using foam dots to lift them off walls, creating realistic shadows and a sense of movement.
- Wrap toy chests and small tables in toilet paper or crepe streamers, adding googly eyes for a fun mummy effect.
- Create a witch’s cauldron centerpiece with staggered florals, a central broom, and ultrasonic fog lights for dramatic, glowing atmosphere.
Pick the Right Color Palette for Your Halloween Playroom
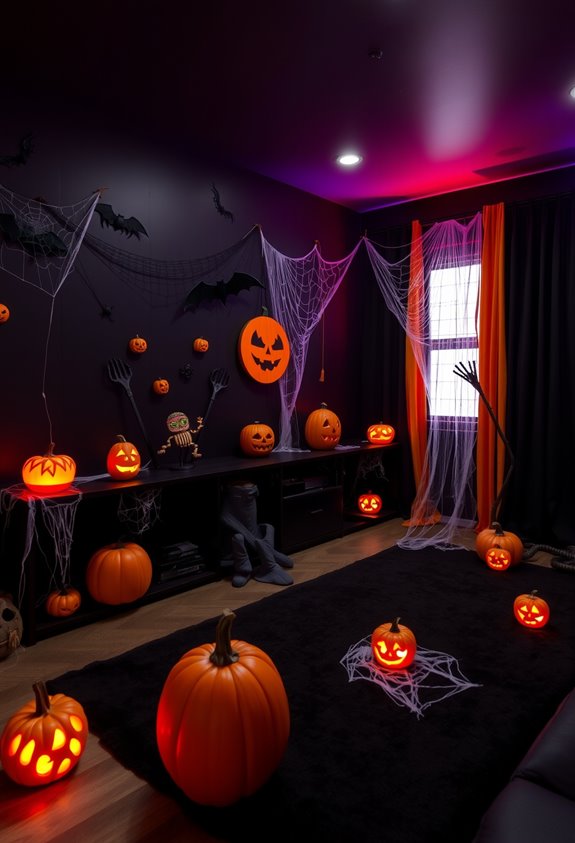
Before anything else, nail down your color palette — it sets the entire mood of your haunted playroom.
Classic orange (#FFA500) and black (#000000) are the obvious starting point. They’re iconic for a reason.
Black brings drama and mystery. Orange keeps things from feeling like a cave.
Together, they create high contrast that actually helps kids distinguish play zones, storage areas, and decorative accents. Pretty functional, honestly.
But you’ve got options.
White (#FFFFFF) softens the intensity. Gold (#FFD700) adds festive warmth.
Want something less spooky? Pastels like pink (#FFB6C1) or mint green (#98FF98) dial back the fright factor without losing the Halloween spirit.
Neutral grays work too — subtle, balanced, easy to build on. For kid-focused spaces, leaning into bright yellows and mandarins against creamy backgrounds naturally creates a playful, energetic atmosphere without tipping into overwhelming. Pick your vibe. Commit to it.
Turn Your Playroom Walls Into a Bat-Covered Haunted Zone
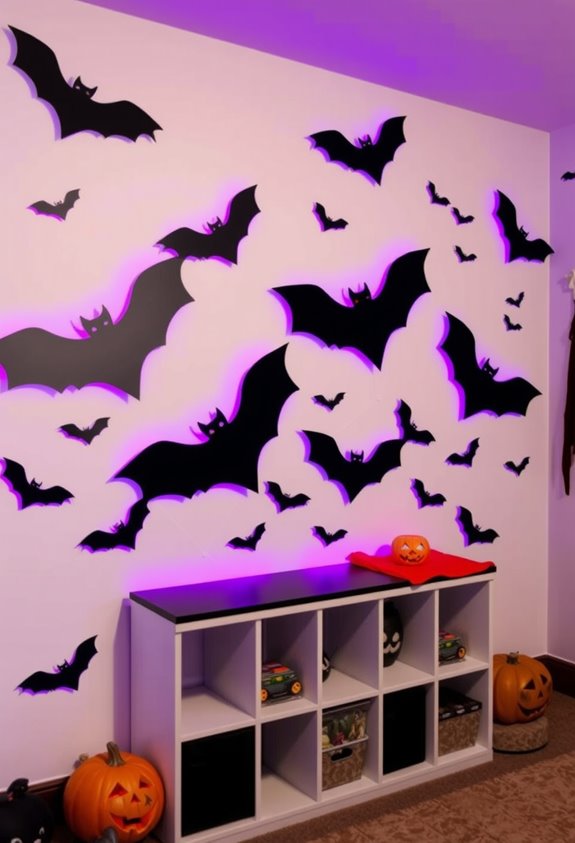
Once you’ve locked in your color palette, the walls are where the haunted playroom really comes alive — and bats are your fastest, cheapest way to get there. Paper or foam bats arranged in a scattered flight pattern instantly create movement. No artistic talent required. Cluster them dense in one corner, then let them spread outward — that contrast builds real visual depth. Flat, even spacing? Boring. Don’t do it.
Go 3D with folded cardstock wings and foam dots to lift them slightly off the wall. Shadows do the rest. Matte black hits harder against light walls, but glitter finishes keep things kid-friendly. Use removable adhesive strips — your walls will thank you. Add warm nearby lighting, and that bat zone genuinely transforms.
Hang Witch Hats From the Playroom Ceiling for a Floating Effect
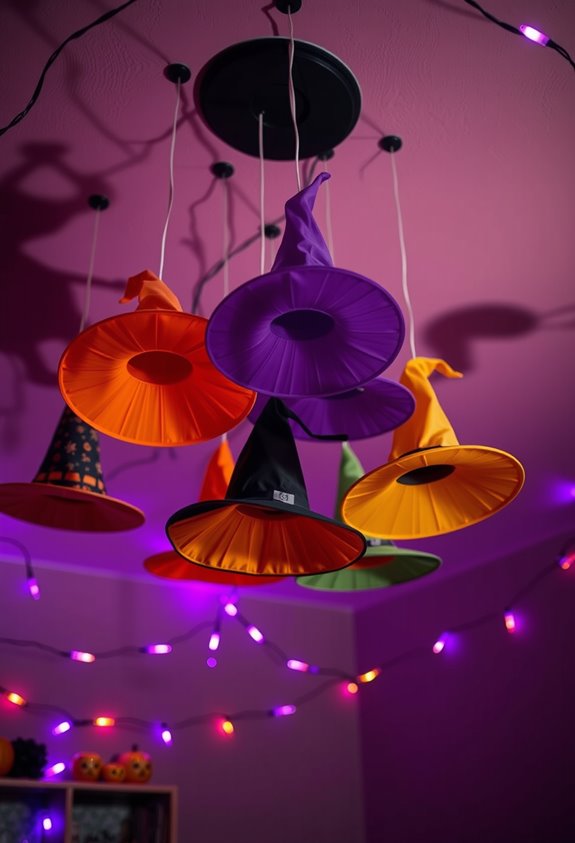
Bats on the walls are just the beginning — now look up. Floating witch hats overhead? Absolutely magical. And yes, kids lose their minds over this one. The trick is fishing line. It disappears against the ceiling, making each hat look genuinely airborne. Use command hooks for attachment — no damage, no drama. Keep the hats lightweight. Heavy hats fall. Simple physics.
Here’s what makes this work:
- Staggered heights — different line lengths give each hat its own floating level
- LED light sticks — battery-powered, lightweight, and they glow beautifully inside the hat
- Multiple hats grouped together — one hat is cute; several hats are a whole moment
Add purple or green lighting nearby. Now your ceiling belongs to the witches. Before hanging, lay all your hats out on the floor first to plan your spacing — shorter fishing lines also help prevent the hats from tangling together in any moving air.
Transform Any Door Into a Googly-Eyed Halloween Character
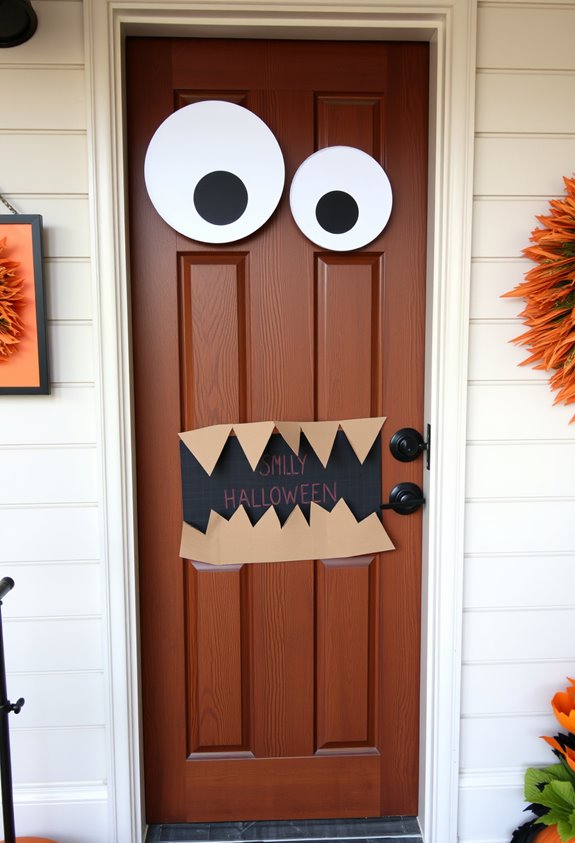
Your door is just standing there, doing nothing. Fix that. Grab some wiggle eyes, Scotch Restickable Dots, and maybe some creepy cloth or paper for framing.
Your door is just standing there being boring. Wiggle eyes and restickable dots fix that fast.
Wipe the door down with a damp paper towel first, then dry it completely. Adhesion matters.
Place the eyes about one-third down from the top so the face reads clearly from across the room. Two eyes, slightly apart, instantly reads as a monster.
Add a paper mouth or foam teeth if you’re feeling ambitious. The restickable dots peel off cleanly, so renters, you’re covered.
Store everything rolled up after Halloween and reuse it next year. It’s genuinely that simple. Your door doesn’t have to be boring for three months straight. Make it weird. This same setup works on your car for Trunk or Treat, and a mini battery-powered strobe light in the trunk makes the eyes flash for an extra spooky effect.
String Up Pom-Pom and Ghost Garlands Throughout the Room
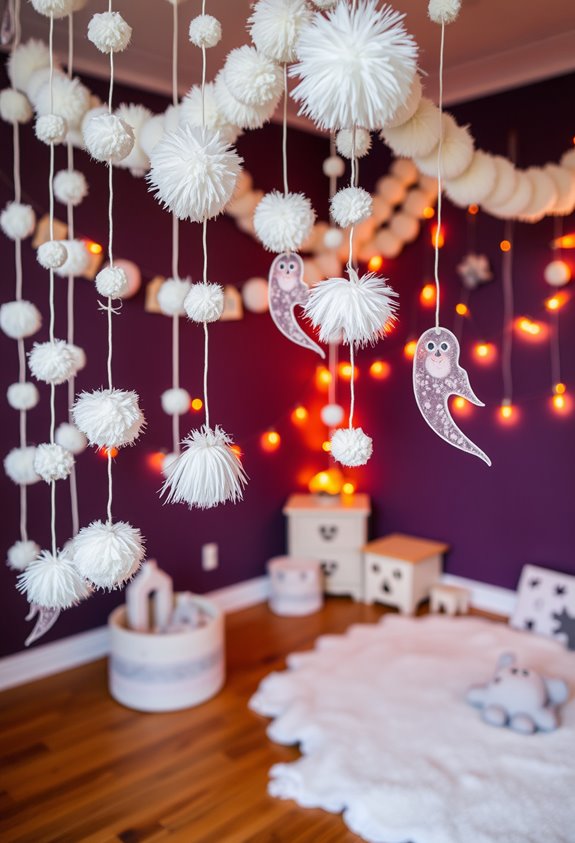
Garlands do something walls and shelves can’t: they add movement. String pom-pom spiders and white felt ghosts across doorways, shelves, and room openings, and suddenly the whole space feels alive.
You’re not just decorating—you’re transforming the room.
Here’s what makes these garlands actually work:
- Two pipe cleaners per spider give you exactly eight legs without guesswork.
- Cotton balls or foam balls keep ghost heads rounded instead of flat and sad.
- Hot glue plus double knots at anchor points prevent everything from sliding into a sad pile on the floor.
Mix yarn, felt, and googly eyes for texture. Black, white, and orange keeps it festive.
Repeat small ornaments across a long line for that dense, playful look kids genuinely love. For a classic spooky aesthetic, stick to black and white yarn when making your pom-pom spiders and ghost figures.
Use Mini Pumpkins and Gourds for a Non-Scary Fall Look
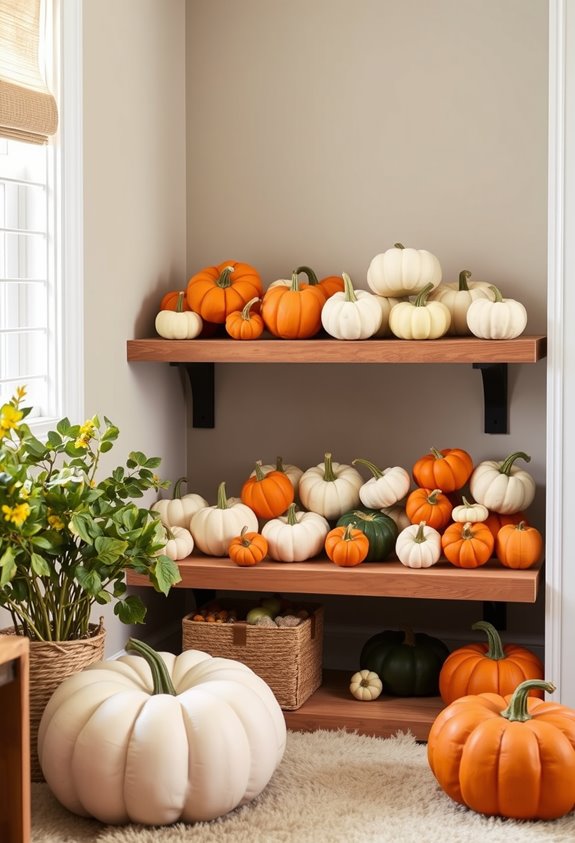
Not everything in a Halloween playroom needs to scream. Mini pumpkins and gourds do the heavy lifting without traumatizing anyone. They’re small, cheerful, and surprisingly versatile. Windowsills, coffee tables, shelves — they fit everywhere without blocking light or creating chaos.
Here’s the smart move: pair a few statement pumpkins with minis to fill gaps. Instantly fuller. Way cheaper. Grouping three mini gourds together is a classic styling trick that actually works. Tuck them into a lantern or birdcage and suddenly you’ve got a centerpiece, not a prop.
Add faux leaves, moss, or small blooms and the whole vibe shifts from Halloween haunted to fall festive. That’s the goal. Cute, bright, seasonal — and totally kid-friendly without sacrificing style. For a creative twist, stack gourds from largest to smallest and glue them together to create a mini gourd topiary that works as both a decoration and a fun kids’ activity.
Style Your Shelves With Spooky Books and Halloween Figurines
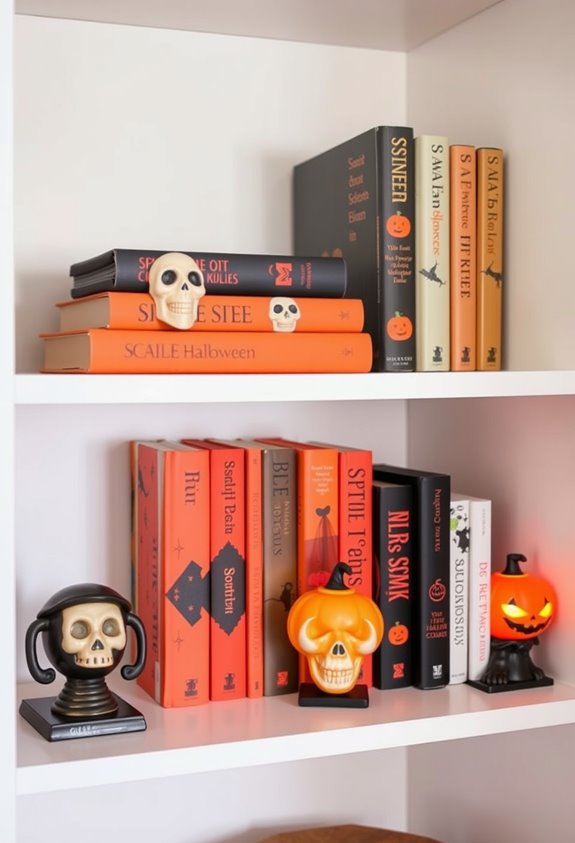
Shelves almost always tell you everything about how much effort someone actually put into decorating. Yours can say a lot. Pull horror and mystery titles forward so their dark covers do the heavy lifting. Mix classic gothic reads with modern spooky picks for that layered, “I actually thought about this” vibe. Then add figurines. Small ones. Grouped in threes or fives because odd numbers just work better visually.
Here’s your quick shelf formula:
- Anchor each shelf with one bold spooky book cover as the focal point.
- Cluster witch, ghost, or skull figurines in odd-numbered groups at varying heights.
- Leave intentional gaps so the display feels curated, not chaotic.
Keep it playful. This is a playroom, not a haunted house. For gothic atmosphere that looks great on a shelf, consider Agatha Christie’s And Then There Were None, where ten strangers are picked off one by one at a deserted mansion.
Add a Witch’s Cauldron as a Halloween Playroom Centerpiece
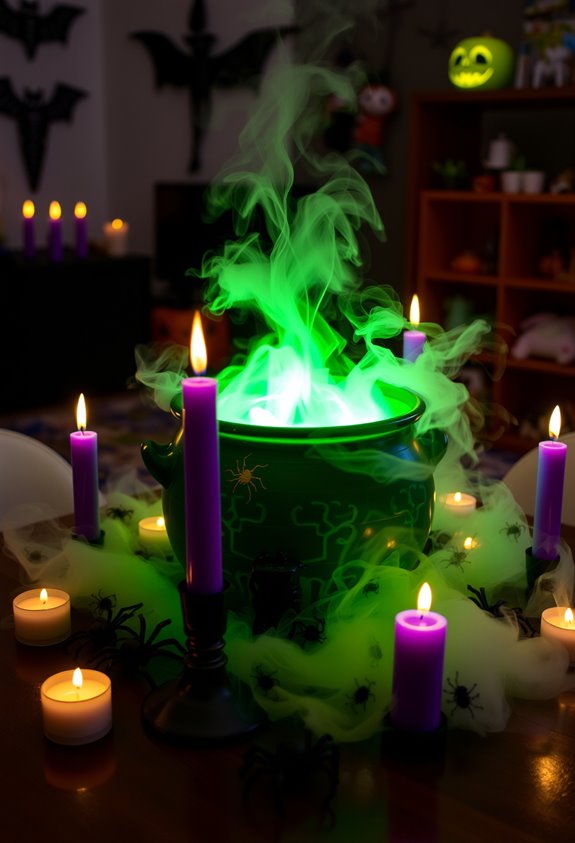
A witch’s cauldron doesn’t just sit in a playroom — it commands it. Start with a Styrofoam block trimmed to fit snugly inside your cauldron. Secure it to the bottom with adhesive. That’s your foundation.
Now, the fun part. Witch legs are your strongest visual move here. Add wire reinforcement so they stand straight in the foam. Stagger them slightly for a more natural look. Drop a broom in the center — it anchors everything vertically and sells the whole witch vibe instantly.
Layer in single florals at varying heights for depth. Add wire-edged ribbon loops using floral picks. Fill the gaps. Want next-level drama? Ultrasonic water lights create a glowing effect inside the cauldron. Fog effects take it even further. Your kids won’t walk past it — they’ll stop every time. For ornament picks, cut 16-gauge floral wire in half, insert it into the ornament hole, and secure it with a small dab of hot glue before placing it in the arrangement.
Build a Mini Haunted Playhouse From Cardboard Boxes
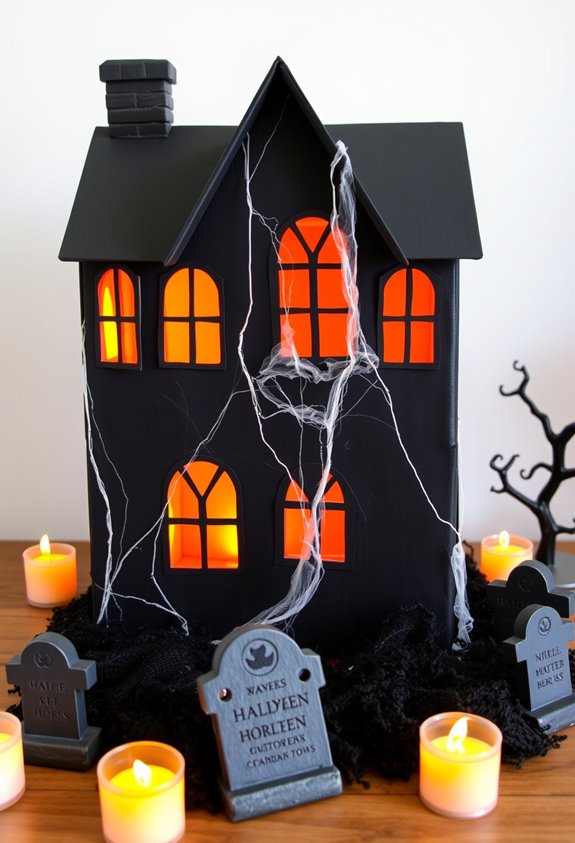
Cardboard boxes are basically free real estate for Halloween. Stack them unevenly, tape the seams, and you’ve already got haunted vibes going. Cut doors on three sides so they actually open. Add jagged window edges. Crooked and off-center? Perfect. That’s the whole point.
Cardboard boxes are free real estate. Stack them crooked, cut jagged edges, and the haunted vibes build themselves.
Here’s what makes it genuinely creepy and fun:
- Glowing windows – Tuck battery-powered tea lights inside upper sections and add orange cellophane behind the cutouts.
- Layered details – Scrap cardboard becomes shutters, towers, and trim. Nothing goes to waste.
- Dark paint – Gray or black transforms plain brown boxes into something your kids won’t stop talking about.
Position it as your playroom centerpiece. It’s interactive, spooky, and honestly? Way cooler than anything store-bought. When sourcing materials, larger furniture boxes from neighbors work far better than piecing together smaller ones for a more impressive structure.
Wrap Play Furniture Like Mummies on a Budget
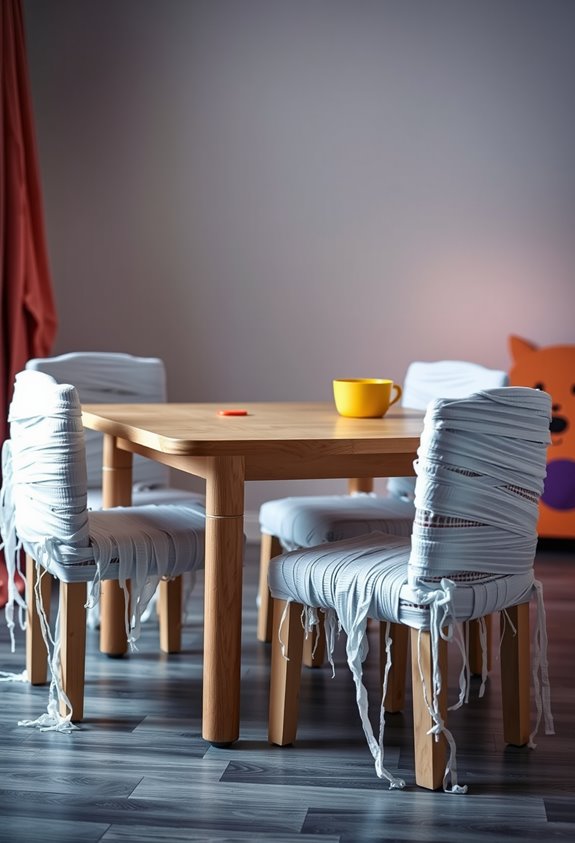
Once you’ve got a haunted playhouse dominating the room, it’s time to dress the rest of the furniture to match. Toilet paper, crepe streamers, and cheap cloth strips cut about four inches wide are your best friends here. Seriously, that’s it.
Wrap toy chests, small tables, and porch columns by starting at the bottom and spiraling upward. Overlap the strips so seams disappear. Leave small gaps and uneven edges — perfect bandages ruin the whole vibe. Tuck tape underneath so fasteners stay hidden.
Finish it off with googly eyes and a felt mouth on your wrapped columns. Tea-dyed fabric gives everything that weathered, ancient look without spending much. Keep the wrapping loose around furniture edges. Safety first, mummies second.
For even more Halloween fun, kids can take the mummy theme further by wrapping each other in toilet paper as part of a Mummy Wrap game — pairs compete to see who gets the most wrapped before the music stops.
Frequently Asked Questions
At What Age Can Kids Start Helping Decorate Their Own Playroom?
Your little ones can start helping decorate their playroom as early as age 1! Even toddlers can pick between two options, like pillow colors or baskets, making them feel included in creating their special space.
How Do You Store Halloween Playroom Decorations Safely After the Season?
Want your decorations ready for next year? Clean and dry everything first, then wrap fragile pieces, label your bins clearly, and store them in a climate-controlled space off the floor to keep them safe.
Can Halloween Playroom Decor Work in Small or Shared Bedroom Spaces?
Yes, you can absolutely make Halloween decor work in small or shared bedrooms! Swap in themed bedding, hang bat decorations vertically, and add glow-in-the-dark stickers. You’ll create a festive space everyone loves without crowding the room.
Are Any Common Halloween Decoration Materials Unsafe or Toxic for Children?
Yes, some Halloween materials aren’t exactly “child-friendly”—shocking, right? You’ll want to avoid flammable fabrics, toxic face paints, and small loose pieces. Always check for “non-toxic” labels and CE markings to keep your little ones safe together!
How Early in October Should You Start Decorating a Kids’ Playroom?
Start decorating your kids’ playroom in the first week of October! You’ll build excitement gradually, just like most families do. Kick things off with simple accents, then add more festive touches as Halloween gets closer.
Conclusion
You’ve got everything you need to turn your playroom into the spookiest spot on the block. Don’t overthink it — cardboard, paint, and a few googly eyes go a long way. According to the National Retail Federation, Americans spend over $3 billion on Halloween decorations annually. Your kids don’t care about Pinterest-perfect. They care about fun. Make it weird. Make it theirs. That’s the whole point.